Neither one nor Many
Software engineering blog about my projects, geometry, visualization and music.
I'm a heavy user of scratch pads with i3, I often don't like the dimensions of a window after you make them floating. As do other people, see here and here2.
I've used a customized version of the solution proposed in one of the comments by the creator of i3-gaps (Airblader) here3. This has served me well, but one thing bugged me when using multiple monitors it wouldn't center the window correctly, so I made a Python script that first uses Qt to get all screen dimensions and determine the correct offset based on the Mouse position. It's a bit overkill probably, but it works, so I'm happy with it.
Step 1: download, make, and make install wmutils.
Note that if you update your system in the meantime, it may have to be recompiled at some point, I've experienced this with the lsw command which is using some X calls that changed after I updated from Ubuntu 17.04 -> 17.10.
Step 2: put this python script somewhere
#!/usr/bin/env python3
import os
import os.path
import psutil
import subprocess
import sys
from PyQt5.QtCore import *
from PyQt5.QtGui import *
from PyQt5.QtWidgets import *
from pymouse import PyMouse
from sys import platform


def clamp(n, smallest, largest):
    return max(smallest, min(n, largest))


def current_screen_size(mouse_position):
    for screen in app.screens():
        (x, y) = mouse_position
        screen_geom = screen.availableGeometry();
        if (x >= screen_geom.left() and y >= screen_geom.top() and
            x <= screen_geom.left() + screen_geom.width() and
            y <= screen_geom.top() + screen_geom.height()):
            return screen_geom
    return app.desktop().availableGeometry(-1)


# read ratio from config file
ratio_file = "/tmp/resize_ratio.txt"
ratio = 70

if os.path.isfile(ratio_file):
    file = open(ratio_file, "r")
    ratio = int(file.read())
    file.close()

if len(sys.argv) > 1:
    if sys.argv[1] == 'inc':
        ratio += 10
    elif sys.argv[1] == 'dec':
        ratio -= 10

ratio = clamp(ratio, 10, 100)

# get mouse and screen specs
app = QApplication(sys.argv)
mouse = PyMouse()
screen = current_screen_size(mouse.position())

# call wmutils::core utilities
currentWindow = subprocess.check_output(["pfw"])

# resize the window
new_width = (screen.width() / 100) * ratio
new_height = (screen.height() / 100) * ratio
# subprocess.call([
#     "wrs",
#     "-a",
#     str(new_width),
#     str(new_height),
#     currentWindow
# ])

# position the window centered (+ resize)
new_x = screen.left() + ((screen.width() - new_width) / 2)
new_y = screen.top() + ((screen.height() - new_height) / 2)
subprocess.call([
    "wtp",
    str(new_x),
    str(new_y),
    str(new_width),
    str(new_height),
    currentWindow
])

# persist current ratio
file = open("/tmp/resize_ratio.txt", "w")
file.write(str(ratio))
file.close()
Don't forget chmod +x /path/to/resize.py
You may need to install some python3 -m pip install ... when you try to run it you'll probably discover what exactly, I forgot to keep a requirements.txt.
From what I remember you need at least: python -m pip install pyuserinput pyqt5 python-xlib
Step 3: modify resize mode in i3
Probably you already have a "resize" mode, just add something like SHIFT+J and SHIFT+K to that mode to call the python script:
mode "resize" {
    bindsym Shift+k exec $HOME/.bin/resize.py inc
    bindsym Shift+j exec $HOME/.bin/resize.py dec
    ...
}
bindsym $mod+r mode "resize"
This is not going to be a really great blog post, but it consists of some notes that may be helpful to other people trying similar stuff, also for me; should I upgrade to a future version I can read here what I did the last time regarding customization/tuning of my laptop.
Most of my stuff is checked into git (.-files in my home directory). That stuff really works out of the box and results in immediately having the right terminal fonts, settings, i3 configurations, vimrc, helper programs, and so on.
I'm not going to talk about that kind of configuration.
Slightly irrelevant, but I run Ubuntu Server so it is kind of minimal and run i3 on top of it. This Intel Skylake Notebook comes with two GPU's which is quite cool:
- Intel Corporation HD Graphics 530 (rev 06)
- NVIDIA Corporation GM107M [GeForce GTX 960M] (rev a2)
Small notes
Intel GPU issues
Ubuntu versions <= 17.04 I used to have issues with my Intel driver. I don't know why exactly, but I had to boot with nomodeset during boot with grub to disable graphics altogether, and then install the NVidia propiatory drivers, and explicitly disable the Intel GPU.
The commandline tools I use for that are software-properties-gtk and for disabling the Intel driver nvidia-settings.
So the NVidia card was always used, this has the downside that the laptop on battery drains faster. Luckily with Ubuntu 17.10 it seems to work with the Intel driver. Maybe installing a newer kernel on an older Ubuntu version might help.
Switch to init level before/after X is started
systemctl isolate multi-user.target- switch to non graphical modesystemctl isolate graphical.target- switch to graphical again I don't think you'll need those commands much, you can alsoCTRL+ALT+F1etc. to go to a console and run stuff there. For example upgrading to a newer distribution can result in i3 restarting, if you startedaptin a terminal withini3it can be annoying .
.
Global tips
Update your Kernel
I would switch to a newer kernel, better yet maybe choose the newest kernel. At the time of writing for me that was Linux zenbook 4.16.11-041611-generic #201805221331 SMP Tue May 22 17:34:25 UTC 2018 x86_64 x86_64 x86_64 GNU/Linux
Got my commands from here, and this seems to be the official repo for that tool.
TL;DR
$ ukuu --list
$ xhost +
$ sudo ukuu --install v4.16.11
Fix video tearing/flickering
Stupidly enough I haven't tried it before until today, so I haven't tested the NVidia solution yet. But for Intel it seems to work. Oh man I've always hated the flickering / weird horizontal (sometimes diagonal) lines while playing any stupid youtube video, apparently super easy to fix:
sudo mkdir /etc/X11/xorg.conf.d
sudo vim /etc/X11/xorg.conf.d/20-intel.conf
Put this there:
Section "Device"
    Identifier  "Intel Graphics"
    Driver      "intel"
    Option      "TearFree"    "true"
EndSection
Reboot. Awesome!
For NVidia the instructions are in the YouTube video, but I'll copy & paste them here, just in case the video gets deleted and I need to use it some day:
nvidia-settings
xrandr

# Template:
# nvidia-settings --assign CurrentMetaMode="CONNECTION:RESOLUTION_RATE +0+0 { ForceFullCompositionPipeline = On }"

# Example of the command:
nvidia-settings --assign CurrentMetaMode="DVI-D-0:1280x1024_60 +0+0 { ForceFullCompositionPipeline = On }"

Lines to add in the "xorg.conf":
Section "Device"
    Option         "NoLogo" "1"
    Option         "RenderAccel" "1"
    Option         "TripleBuffer" "true"
    Option         "MigrationHeuristic" "greedy"
    Option         "AccelMethod" "sna"
    Option         "TearFree"    "true"
EndSection

Section "Screen"
    Option         "metamodes" "CONNECTION:RESOLUTION_RATE +0+0 { ForceFullCompositionPipeline = On }"
EndSection

(backup the old xorg.conf if you already have it):
sudo mv /etc/X11/xorg.conf /etc/X11/xorg.conf.old
(then run):
sudo cp /home/linuxtrend/Desktop/xorg.conf /etc/X11/xorg.conf
Source: youtube for Intel, youtube for NVidia.
Fix hibernation
Ubuntu 17.04 I got it working, then upgrading to 17.10 it broke, everything worked, but after it resumed I got a blank screen and nothing worked, apparently that was a regression. Easily solved by updating the kernel to the newest version (for me), see discussion in comments in the bug report. The rest of these notes are from memory from a long time ago, so might be incomplete...
First of all, I couldn't manage to get it working with btrfs, but that as quite a few kernel versions ago, so nowadays it might as well work (haven't tried it recently).
Either way I switched to ext4 since.
I also recall that I needed to switch to a non-encrypted swap partition, also maybe nowadays it works with encrypted swap.
root@zenbook:~# fdisk -l
Disk /dev/nvme0n1: 477 GiB, 512110190592 bytes, 1000215216 sectors
Units: sectors of 1 * 512 = 512 bytes
Sector size (logical/physical): 512 bytes / 512 bytes
I/O size (minimum/optimal): 512 bytes / 512 bytes
Disklabel type: gpt
Disk identifier: FF45D748-1985-494A-84BA-F920256E4BDD

Device             Start        End   Sectors   Size Type
/dev/nvme0n1p1      2048     534527    532480   260M EFI System
/dev/nvme0n1p2    534528     567295     32768    16M Microsoft reserved
/dev/nvme0n1p3    567296  163441490 162874195  77.7G Microsoft basic data
/dev/nvme0n1p4 163442688  165429247   1986560   970M Windows recovery environment
/dev/nvme0n1p5 165429248  949882879 784453632 374.1G Microsoft basic data
/dev/nvme0n1p6 949882880 1000214527  50331648    24G Linux swap
Make sure that the swap partition is enabled:
trigen@zenbook:~> swapon -s
Filename                Type        Size    Used    Priority
/dev/nvme0n1p6                          partition   25165820    0   -2
I placed this in /etc/fstab:
/dev/nvme0n1p6 none swap sw 0 0My laptop has less than 24GiB ram (16GiB), obviously it needs to be able to store a dump of your entire flash memory. One small caveat in my case, I had to instruct grub that /dev/nvme0n1p6 is the partitionto
Finally, edit /etc/default/grub, edit something like this:
GRUB_CMDLINE_LINUX_DEFAULT="resume=/dev/nvme0n1p6"You might as well change that annoying 10s timeout to something like 2s while you're at it ![]() .
. sudo grub-update.
Hardware Accelerated video
Will type this out tomorrow, right now I'm tired!
Tap to click touchpad
From: https://www.reddit.com/r/i3wm/comments/516e8c/tap_to_click_touchpad/
Check out the xinput command. xinput list will give you a list of input devices; find the ID of the one which looks like a touchpad. Then do xinput list-props
To make the change permanent, find a way to run that command on startup. One way would be to add exec xinput set-prop
Configure Mouse speed
Install lxinput
UPDATE:
It still works, and the android.sh script is still needed for my Huawei P10 it seems, but I found a faster way to sync files. Better use adb-sync! Compared to the awefully slow performance of mtp it's very fast. Also in my case mtp chokes up when syncing lots of files, or very large files. Seems like the connection is very unstable. With adb-sync I haven't experienced any of this.
Example usage: mkdir test; adb-sync -R /storage/emulated/0 ./test/ to sync everything...
Sometimes--actually quite often ![]() --I have some weird issues with my Linux laptop.
I could dedicate many blog posts to this kind of stuff like handling three screens, hacks for my touchpad and trackball mouse, weird boot issues with btrfs, etc.
However this is also one is especially weird and I don't want to forget how I fixed it.
--I have some weird issues with my Linux laptop.
I could dedicate many blog posts to this kind of stuff like handling three screens, hacks for my touchpad and trackball mouse, weird boot issues with btrfs, etc.
However this is also one is especially weird and I don't want to forget how I fixed it.
Mounting Samsung Galaxy Note 4 on Ubuntu...
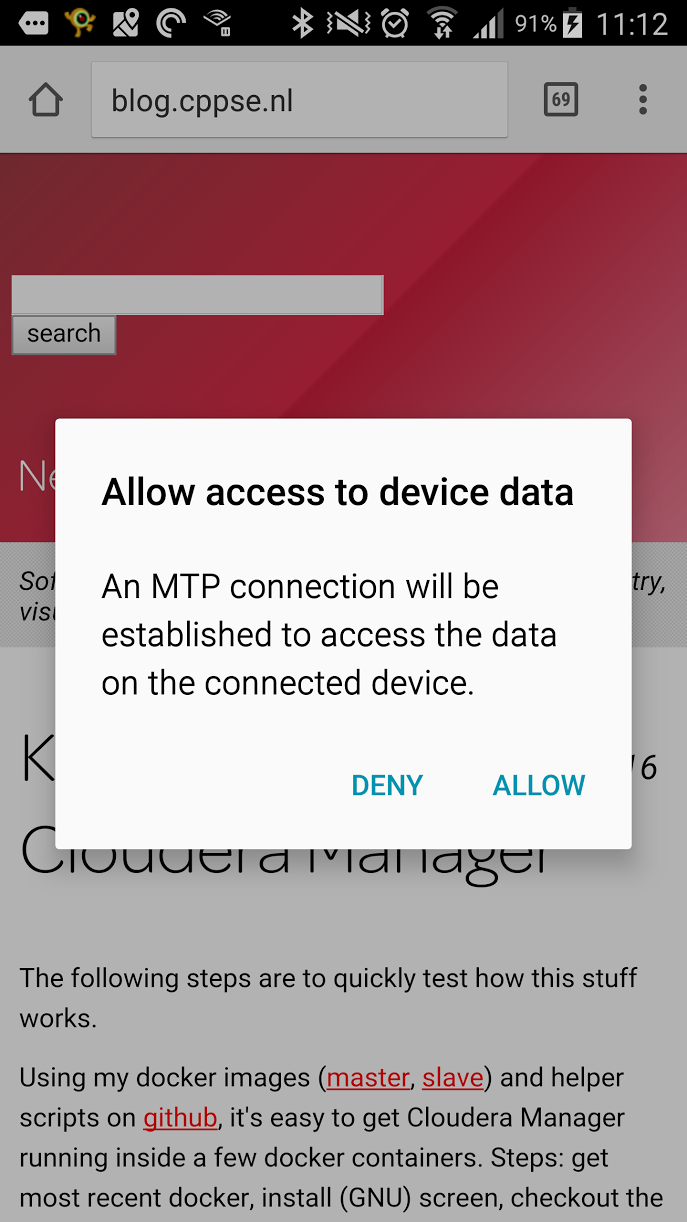
Bluetooth would have been very nice, my device is recognized (hcitool scan), but I never got it working using obexfs -b etc.... However after some struggling I got MTP working.
The mtp-connect tool might give you the following error repeatedly:
trigen@zenbook:~> mtp-connect
Device 0 (VID=04e8 and PID=6860) is a Samsung Galaxy models (MTP).
LIBMTP ERROR: couldnt parse extension samsung.com/devicestatus:1
I can try that a 100 times, and it will continiously fail. So I decided to debug it with strace. With this I found out that it sometimes worked! Only when stracing it..
So I made the following script:
trigen@zenbook:~> cat android.sh
while true; do
    sudo umount -f -l /android
    # somehow strace makes it slower, and it suddenly works...
    sudo strace -f -F -ttt -s 10000 -o /dev/null jmtpfs /android
    sleep 1
done
Execute it with bash android.sh and probably only after one or two failures, it will not throw the error.. and you are able to browse your phone via the /android path (in this case). Don't forget to accept the dialog on the Phone, and it will not work if the screen is turned off (consider something like RedEye Stay Awake).
A few caveats! (DO NOT rm stuff from it..)
I recommend you only use this to copy files from the device, and not manipulate it too much, as sometimes the connection does timeout for some weird reason.
When that happens simply abort the android.sh script, try umount -f -l /android and unplug, then plug the device back in again.
This happened when the connection stopped after I did a rm -rf * in the /android/Phone/DCIM/Camera/ path, and the connection got lost, it got screwed up:
root@zenbook:/android/Phone/DCIM# ll
ls: cannot access Camera: Input/output error
total 0
drwxr-xr-x  4 root root 0 sep 24 20:27 ./
drwxr-xr-x 50 root root 0 feb 14  4450805 ../
??????????  ? ?    ?    ?            ? Camera
drwxr-xr-x  2 root root 0 jun 19 22:36 Facebook/
So delete stuff using the device itself, install some app like Solid Explorer. Above problem was also fixed by using Solid Explorer to remove the files in Camera (so even though the directory seems to be erroneous, it was caused by something weird with the files, I verified that by also trying to move all the files into another directory, and in that case it was the new directory that was causing the I/O error).
I use CLion in this blog post, but it should be the same for any of the other editors. (PyCharm, PhpStorm, Intellij, etc.).
It took me a while to get a setup that works reasonably well for me at work, for what I expect not a very uncommon setup. That's why I'm sharing this in a blog post.
The project I'm working on is quite big, 10yr under development; large codebase and a complex build process. The debug build results in a 1.2 GiB executable, all intermediate files generated by the compiler/linker are many, and big. During build a lot of files are removed/(re)created/generated, so in general a lot of I/O happens.
Our build machines are extremely powerful, so it doesn't make sense to work on a local machine because of the build times. That's why compiling happens on remote machines. I have worked remotely at a lot of companies, and usually I would simply use vim + a lot of plugins. However, nowadays I'm accustomed to the power IDE's can provide, primarily navigation-wise (jumping to classes, files, finding usages, etc.) and simply don't want to work without a proper IDE.
This is my setup

I use an NFS mount (sshfs would suffice as well) where I mount from the remote to local, not the other way around, or compiling will be extremely slow.
In my opinion using file synchronization in these kinds of setups is too error prone and difficult to get right.
As a side-note; I've seen synchronization work moderately okay within a PHP project. But so far not in a C++ project where intermediate/build-files/libraries are first of all large and scattered throughout the project folder.
In my previous blog post we fixed fsnotifier such as in the previous image, but this also causes a new problem. ![]()
Lot's of I/O is slow over network mount
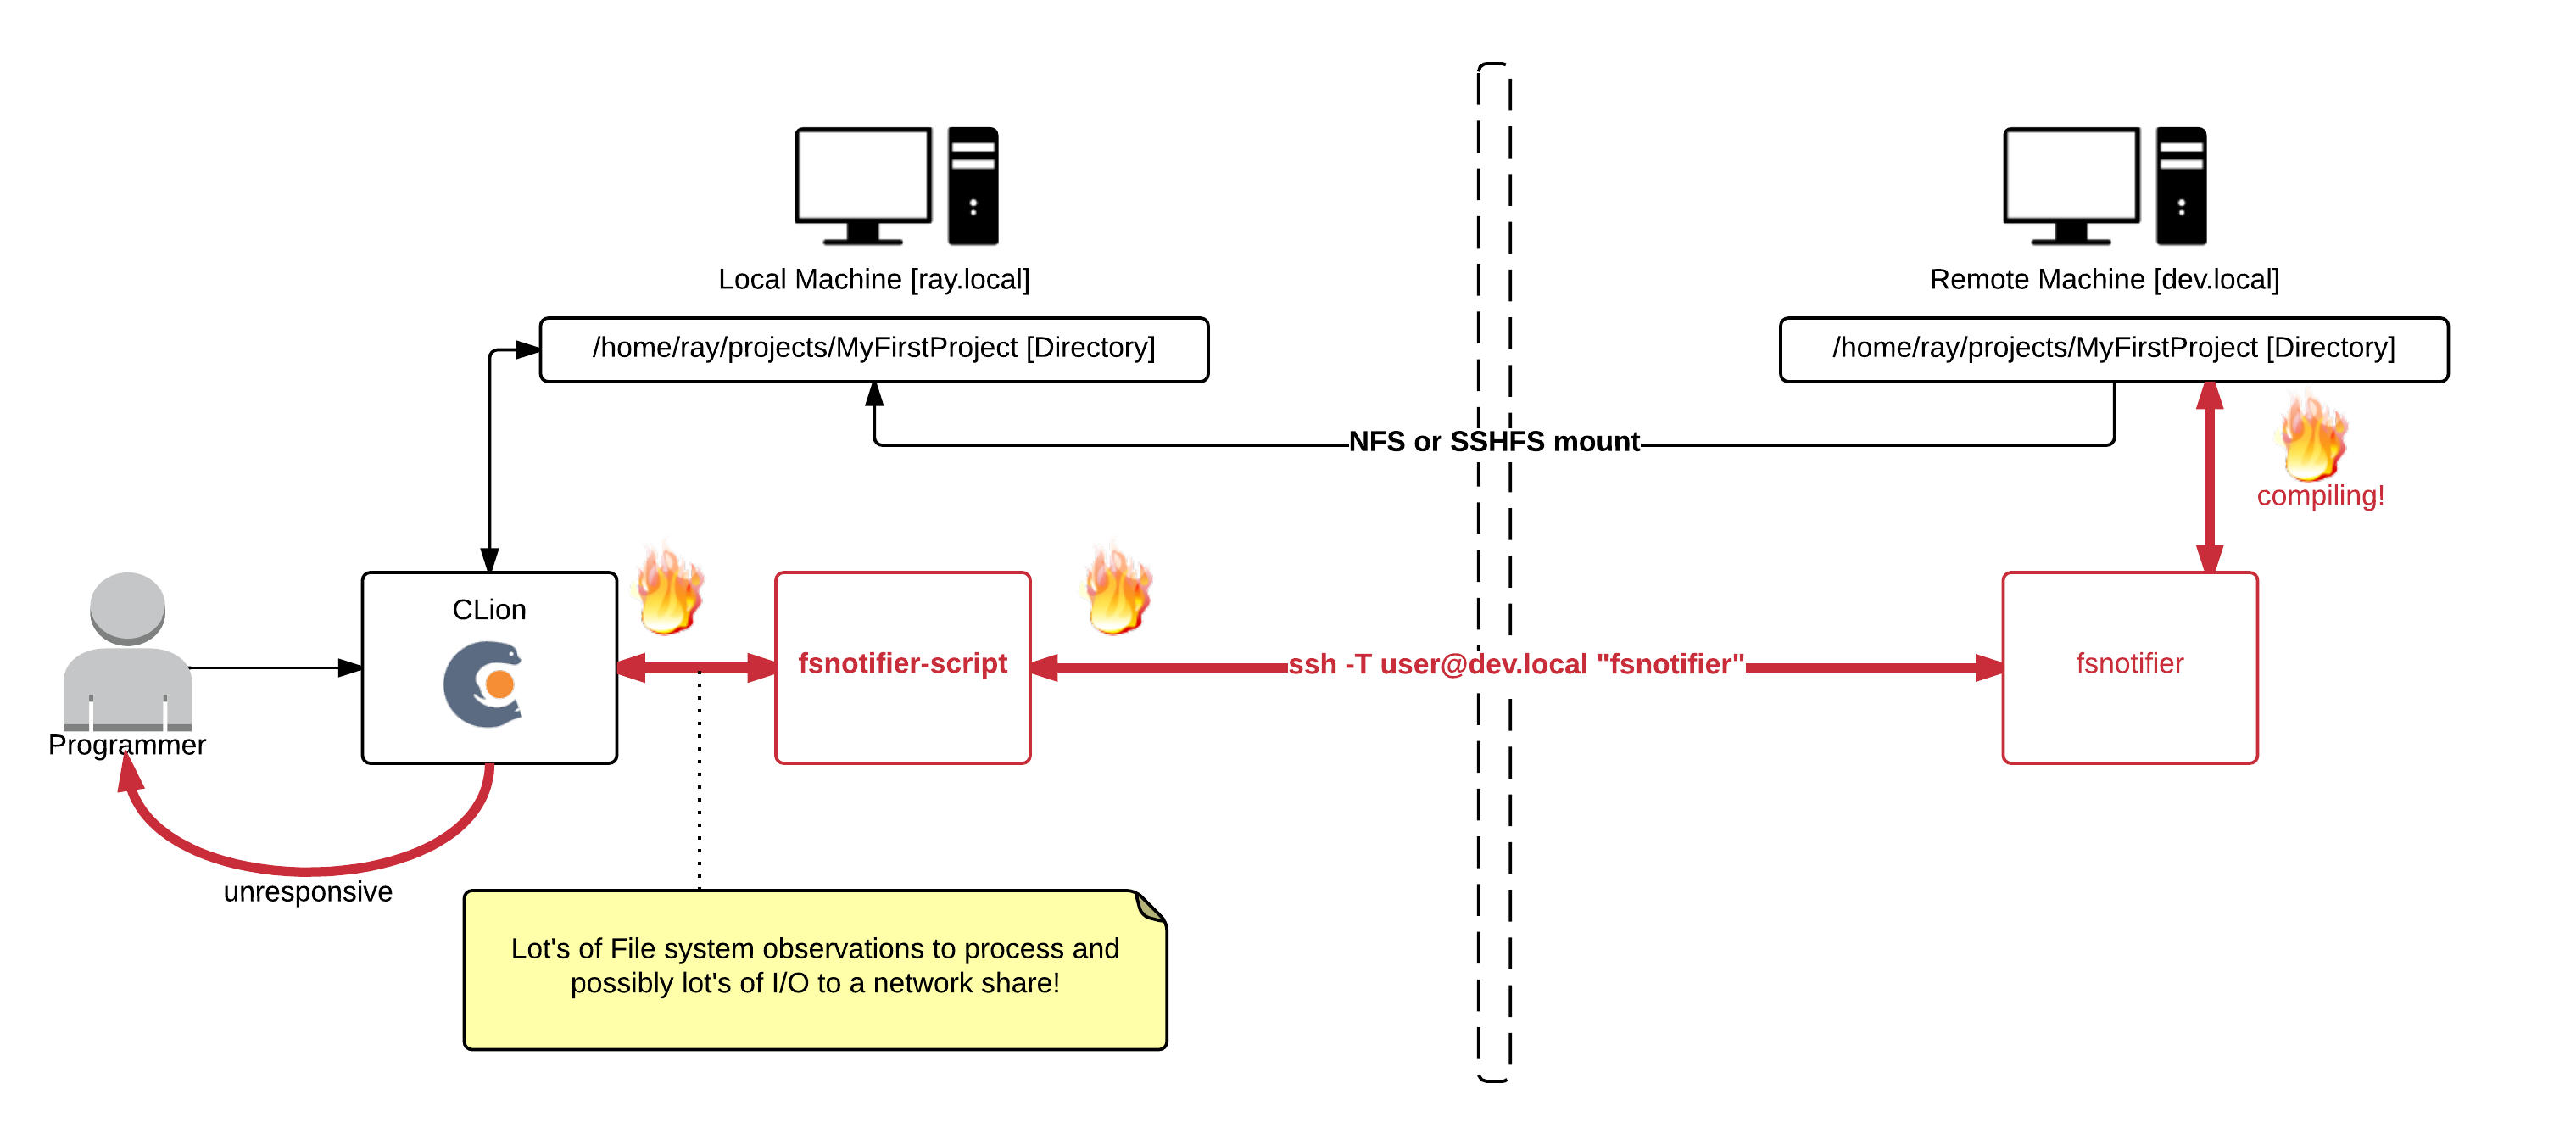
During compiling I noticed my IDE would hang, the only cause could be that it's somehow flooded by the enourmous lines of input it now receives from fsnotifier. Perhaps when we're working with the project files on a local disk the IDE wouldn't hang, because simple I/O (even just checking file stats) doesn't have network overhead.
Solution, ignore as much (irrelevant) I/O as possible

Here I made the fsnotifier script--that was at first just a simple proxy (calling the real fsnotifier via ssh)--more intelligent. It now filters out intermediate files generated by the compiler (.o, .d, and some other patterns). ![]()
function custom_filter
{
    typeset -n return_val=$1
    typeset cmd=$2  # i.e., DELETE/CREATE/CHANGE/...
    typeset file=$3 # i.e., /full/path/to/file

    # Ignore some files that are not interesting to my IDE
    if [[ $file =~ (cmd|mm)\.log$ ]] || \
       [[ $file =~ deps.*\.d$ ]]         || \
       [[ $file =~ \.o$ ]]            || \
       [[ $file =~ \.o\. ]]            || \
       [[ $file =~ \.html$ ]]         || \
       [[ $file =~ core\.*([0-9])$ ]];
    then
        return_val=false
        return
    fi

    return_val=true
    return
}
Download all source code from GitHub: https://github.com/rayburgemeestre/fsnotifier-remote/.
Alternative solutions
The fsnotifier script outputs it's process id to /tmp/fsnotifier.pid and hooks two signals, so you can enable/disable it with a signal. Disabling will simply pause outputting all updates from the real fsnotifier (that is invoked via ssh).
kill -SIGINT $(cat /tmp/fsnotifier.pid) - pause all activity
kill -SIGHUP $(cat /tmp/fsnotifier.pid) - continue all activity
Another extension you may find useful would be to make the buildscript touch a file like, i.e. /path/to/project/DISABLE_FSNOTIFIER and make the fsnotifier script pause itself (or behave differently) during the build until it sees for example the ENABLE_FSNOTIFIER file.
Simply disabling fsnotifier again doesn't fix the problem, CLion would keep nagging occasionally about conflicts with files that have changed both on disk and in memory. And when auto-generated files are being re-generated by the build, I want my IDE to reflect them immediately.
Fine-tuning your filter
The filter is just a bash/ksh function, so you can easily extend it with patterns appropriate to your project. The fun thing is you can "killall -9 fsnotifier", and Jetbrains will simply restart it. So no need to restart Jetbrains (and with that having it re-index your project). Debug the filters by tailing: /tmp/fsnotifier-included.log and /tmp/fsnotifier-filtered.log.
Update: 13th October 2016
No longer do I need to filter out *.o files etc. to get a better responsive IDE nowadays. The network improved (and perhaps it's something that improved in newer CLion versions).
Another change I did make to the script is based on the ROOTS that get registered (for monitoring the project path) use fsnotifier over ssh or not. (for local projects it would try to login via ssh otherwise, finding nothing and the IDE would hang at that point).
https://github.com/rayburgemeestre/fsnotifier-remote/commit/414e2e1f937a59a9ab11eede6b999c8170e30af0
This should work for all their editors, PyCharm, Intellij, CLion, PhpStorm, Webstorm, etc.
The editor(s) use this tool to "subscribe" to changes on the filesystem. So if you change a file that's also in a buffer in for example CLion, it will know it needs to reload that file from disk in order to show the latest changes.
Without this tool it will fallback to periodically checking for changes or when a specific file is activated, I don't know exactly, but it's slower anyway.
You probably started searching for a solution because you saw this error in the console or in a popup in the IDE:
trigen@baymax:/home/trigen/Downloads/clion-1.0.4> FSNOTIFIER_LOG_LEVEL=info ./bin/clion.sh
Java HotSpot(TM) 64-Bit Server VM warning: ignoring option MaxPermSize=350m; support was removed in 8.0
[   3243]   WARN - om.intellij.util.ProfilingUtil - Profiling agent is not enabled. Add -agentlib:yjpagent to idea.vmoptions if necessary to profile IDEA.
[  14166]   WARN - api.vfs.impl.local.FileWatcher - Project files cannot be watched (are they under network mount?)  <<<<<<<<<<<
Let's fix it by having the IDE run fsnotifier over SSH on the actually server.
I will use as an example a project named MyFirstProject mounted via NFS from a server named DevelopmentMachine:
sudo mount -t nfs DevelopmentMachine:/home/ray/projects/MyFirstProject /projects/MyFirstProject -o rw,user,hard,intr,tcp,vers=3,timeo=600,_netdev,nolock,execFirst you need fsnotifier on DevelopmentMachine, because that machine should be able to subscribe to the filesystem events.
I downloaded and build the one from ThiefMaster/fsnotifier-remote.
Test it by starting it and adding the project like this (>>> is your input, <<< the output you get):
[ray@DevelopmentMachine linux]$ ./fsnotifier
>>> ROOTS
>>> /home/ray/projects/MyFirstProject
>>> #
<<< UNWATCHEABLE
<<< #
Now it's watching, trigger some changes on something in that root (i.e. open a vim hi.txt):
<<< CREATE
<<< /home/ray/projects/MyFirstProject/.hi.txt.swp
<<< CHANGE
<<< /home/ray/projects/MyFirstProject/.hi.txt.swp
<<< STATS
<<< /home/ray/projects/MyFirstProject/.hi.txt.swp
...
In this example I work locally on /projects/MyFirstProject, where it's /home/ray/projects/MyFirstProject on the server.
The super easy solution is to make sure your local path is exactly the same. In my case I made a symlink so I have /home/ray/projects/MyFirstProject both on my local- and remote machine.
On the local machine I can run the above ./fsnotifier example through ssh, lets test that (make sure you have ssh keys configured correctly for this, otherwise you will get an authentication prompt):
trigen@baymax:/projects/fsnotifier-remote[master]> ssh -l ray DevelopmentMachine /home/ray/projects/fsnotifier-remote/linux/fsnotifier64
>>> ROOTS
>>> /home/ray/projects/MyFirstProject
...
The fun thing is that the displayed files are actually already correct, so you don't need to do some any mapping. Just make sure you launch your IDE on the /home/ray/projects/MyFirstProject folder.
(Which the beforementioned fsnotifier-remote script should be able to do, but I encountered multiple issues executing it under Linux and I didn't like to dive into it's Python code).
I created a local fsnotifier script with the following contents:
#!/bin/ksh93
ssh -l ray DevelopmentMachine /home/ray/projects/fsnotifier-remote/linux/fsnotifier64
Then told my IDE to use this wrapper (make sure it's executable with chmod +x)
trigen@baymax:/home/trigen/Downloads/clion-1.0.4/bin> vim idea.properties
idea.filewatcher.executable.path=/projects/fsnotifier-remote/fsnotifier <<< add this line!
You can log the communication between the IDE and fsnotifier over ssh by inserting this in the fsnotifier wrapper script: strace -f -F -ttt -s 512 -o /tmp/fsnotifier-debug.log (put it before the ssh command).
Then you can find stuff like this in the /tmp/fsnotifier-debug.log:
823 3722  1439468464.159229 read(4, "ROOTS\n", 16384) = 6
833 3722  1439468464.159644 read(4, "/home/ray/projects/MyFirstProject\n", 16384) = 28
843 3722  1439468464.160011 read(4, "/home/trigen/.clion10/system/extResources\n", 16384) = 42
853 3722  1439468464.160489 read(4, "#\n", 16384) = 2
Hope this approach will help others!
Update: 13th October 2016
Having this script in place allows for some fun "performance optimizations" in case you have a slow network connection.
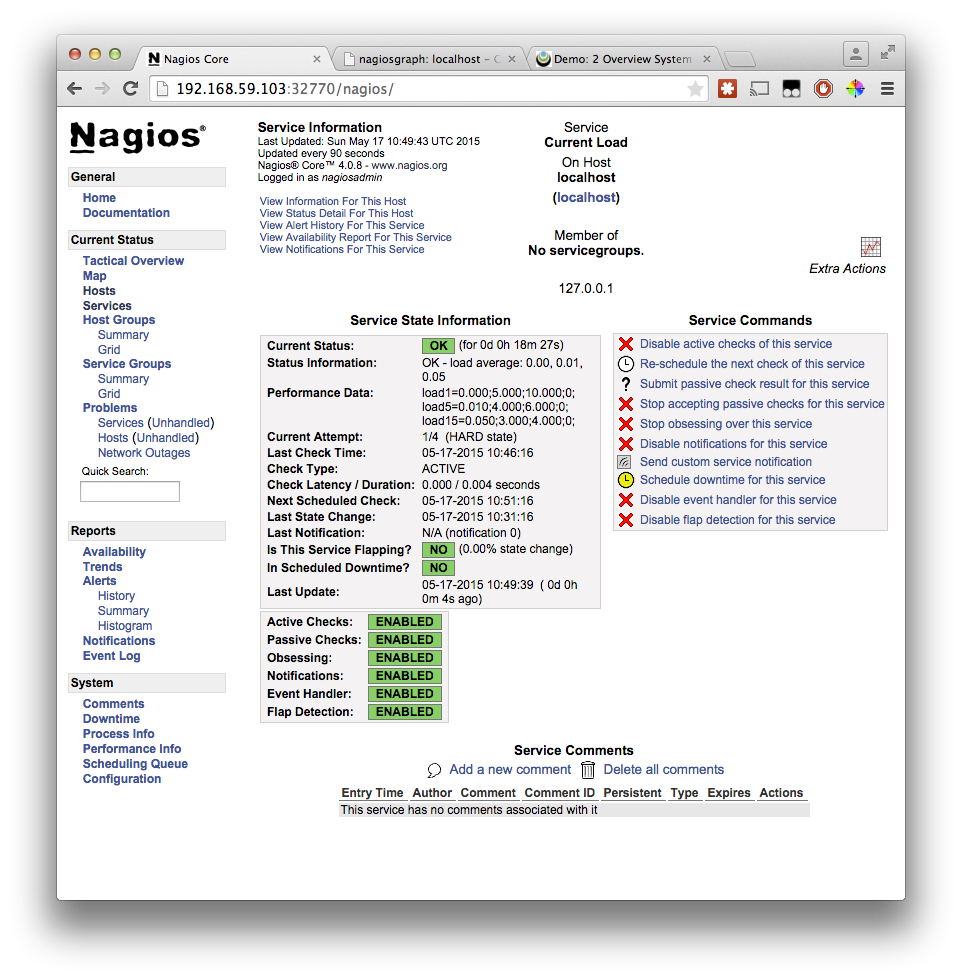
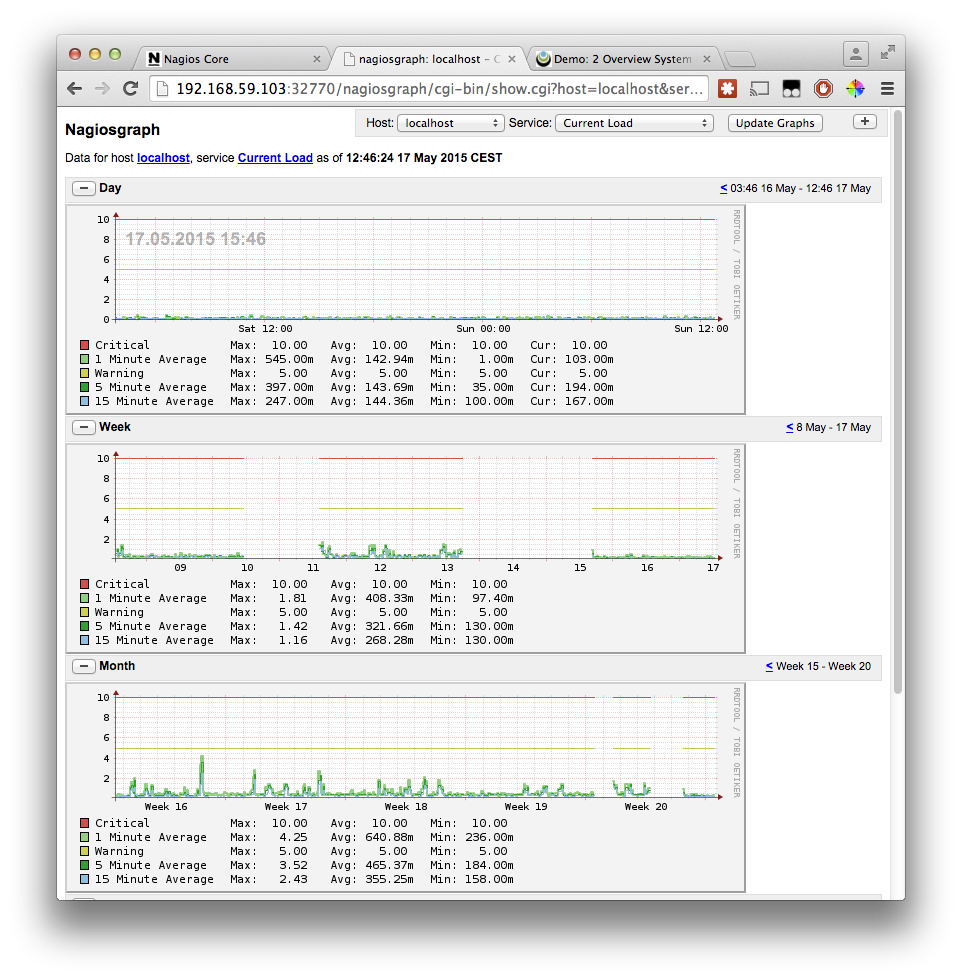
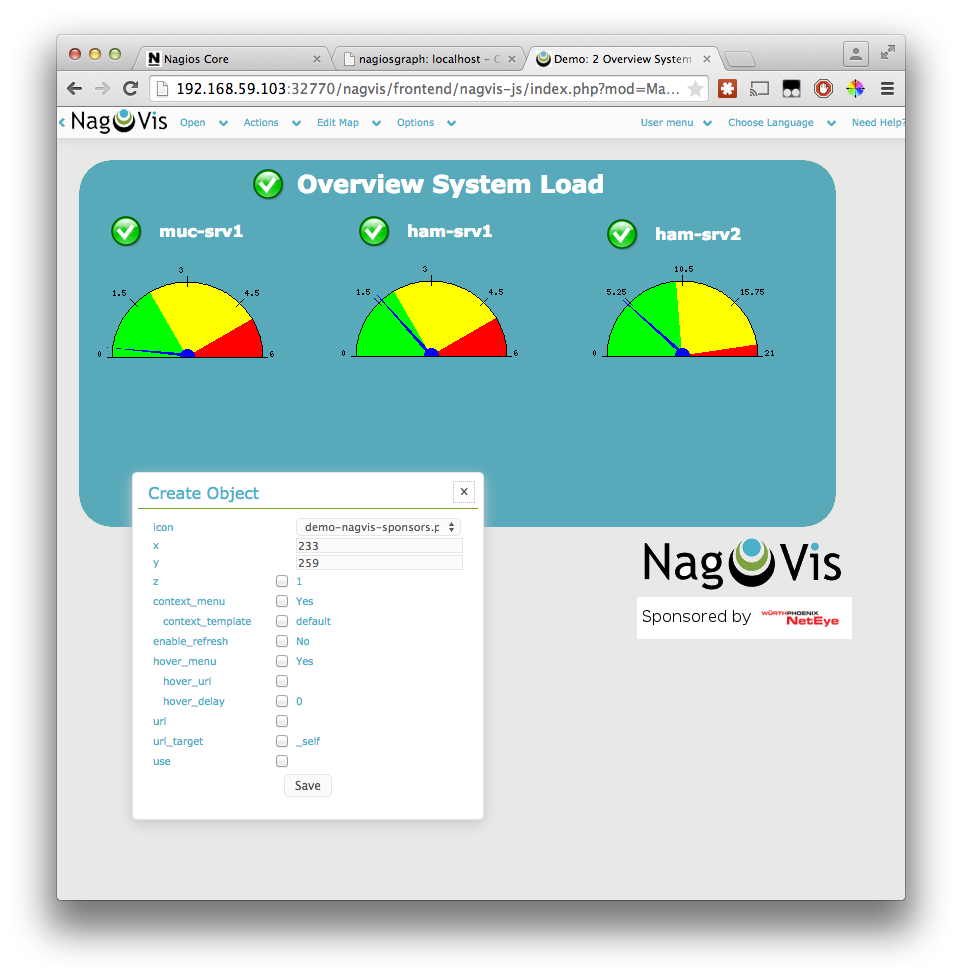
Setting up Nagios + Nagvis + Nagiosgraph on Ubuntu (14.04) can be a pain in the neck.
Default Ubuntu (14.04) ships with Nagios3, which is plain ugly and old, also the Nagvis is pretty old and less user friendly. So I created a Docker image with that install the—at the time of writing—newest versions of Nagios, Nagvis, Nagios plugins and Nagios graph. (Along with Apache2.4 + PHP 5.5 for the Web interfaces.)
I'm new to Docker, so leaving comments/rants/improvements is appreciated ![]()
TL;DR
docker run -P -t -i -v /your/path/to/rrd-data:/usr/local/nagiosgraph/var/rrd rayburgemeestre/nagiosnagvis
docker ps              # to discover port
boot2docker ip         # to discover host other than localhost (if you are using boot2docker on OSX)
open http://host:port  # you will get a webinterface pointing to nagios/nagvis or nagiosgraph
Caveats with the install
For Nagvis you need a different broker called livestatus, where both Nagios and Nagvis need to change their configs for, and you must specifically configure it to support Nagios Version 4, otherwise you will get an error starting Nagios. Specifically this one:
Error: Could not load module '/usr/local/lib/mk-livestatus/livestatus.o' -> /usr/local/lib/mk-livestatus/livestatus.o: cannot open shared object file: No such file or directory
Error: Failed to load module '/usr/local/lib/mk-livestatus/livestatus.o'.
Which is fixed by this instruction from the Dockerfile:
WORKDIR /usr/local/src/check-mk-raw-${livestatusversion}.cre.demo
RUN ./configure --with-nagios4 && \
    make && \
    ### specifically make mk-livestatus package /again/ with the --with-nagios4 flag, by default it's build for nagios3 which doesn't work.. \
    cd ./packages/mk-livestatus/mk-livestatus-${livestatusversion} && \
    make clean && \
    ./configure --with-nagios4 && \
    make && \
    make install
In the source root the --with-nagios4 flag is not propagated to it's
sub-packages. So I just make everything and then specifically clean the
mk-livestatus-xx package and re-configure with --with-nagios4, make, make install.
If I had to guess the livestatus configure script probably by default tries to detect the Linux distrubition, and as Ubuntu 14.04 ships with Nagios 3 by default it probably assumes to use version 3.
After the (re)configure, this is the normal output:
Event broker module '/usr/local/lib/mk-livestatus/livestatus.o' initialized successfully.Build docker image yourself
You can use the Dockerfile on Github to build the image yourself. It contains in one file all the commands you would need to execute to do everything manually.
Build with: docker build -t rayburgemeestre/nagiosnagvis ..
Get docker image from Docker Hub
You can also use the image rayburgemeestre/nagiosnagvis as a base for your
own projects using Docker Hub.
You can also run the base image with: docker run -P -t -i rayburgemeestre/nagiosnagvis.
The -P auto-portforwards the port for Apache that runs inside (use docker ps to detect the port).
[Snoop around on the container with: docker run -P -t -i --entrypoint /bin/bash rayburgemeestre/nagiosnagvis.]
Directories in the container
Nagios, Nagvis and Nagiosgraph are all installed in subdirectories of /usr/local.
You are likely to want /your/own/rrd-data directory mounted as /usr/local/nagiosgraph/var/rrd inside the container,
so the RRD databases are not stored inside the container and retained after rebuilding/upgrading the container.
This is possible with the -v flag: docker run -P -t -i -v /your/own/rrd-data:/usr/local/nagiosgraph/var/rrd rayburgemeestre/nagiosnagvis
Don't forget that the docker user (uid 1000) has the appropriate read-write permissions on that rrd directory.
The problem
The title being a reference to this article from 2011, a blog post from someone who encountered a similar issue once ![]() . Hopefully my blog post will prevent someone else from spending a day on this issue. We are in the middle of a migration from Oracle 11.2 to 12.1, and from PHP, Zend server more specifically, we had some connectivity problems to Oracle, the PHP function oci_connect() returned:
. Hopefully my blog post will prevent someone else from spending a day on this issue. We are in the middle of a migration from Oracle 11.2 to 12.1, and from PHP, Zend server more specifically, we had some connectivity problems to Oracle, the PHP function oci_connect() returned:
PHP Warning: oci_connect(): ORA-28547: connection to server failed, probable Oracle Net admin error in /home/webro/test.php on line 2Good luck googleing that Oracle error code, nothing hints in the right direction, only that it's an error that occurs after the connection is established. Quote from http://ora-28547.ora-code.com/:
A failure occurred during initialization of a network connection from a client process to the Oracle server: The connection was completed but a disconnect occurred while trying to perform protocol-specific initialization, usually due to use of different network protocols by opposite sides of the connection.
The problem in our case was with the characterset
The "tl;dr" is: you may be using an Oracle "Light" client instead of the "Basic" client. In Zend Server this means that in the Zend Server lib path some libraries are missing. The Light client only supports a few charactersets. If you have some other Characterset that isn't default, that may be the problem. You need to make sure the Oracle Instant client Zend Server is using is the Basic client.
Unfortunately you cannot tell this from the phpinfo() output. Both Light and Basic return exactly the same version information.
Oracle Run-time Client Library Version => 11.2.0.2.0
Oracle Instant Client Version => 11.2
How we found out..
Luckily I was able to succesfully connect from another virtual machine to the new database server. This was an older Zend server instance, where the Oracle instant client was patched from 11.1 to 11.2. The Zend server that failed had 11.2, so we assumed patching wasn't necessary. I compared the strace outputs.
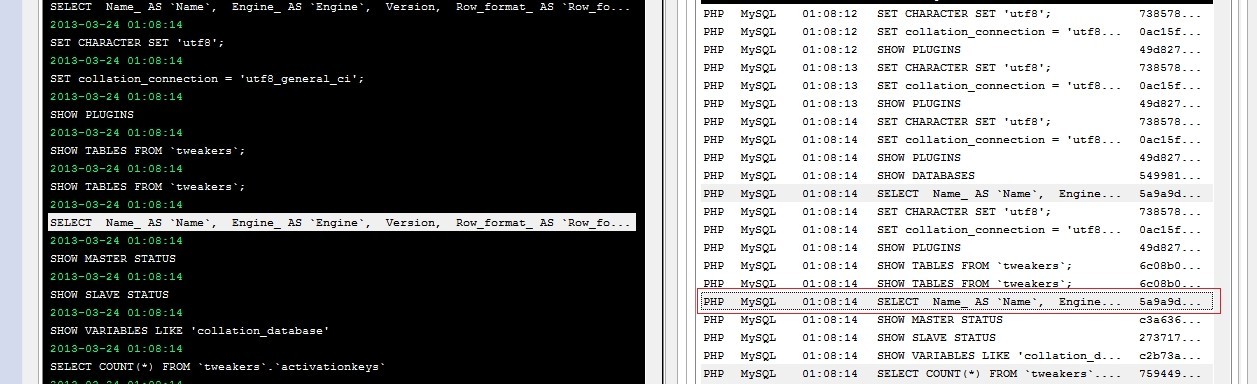
The first observation was that during the communication the server--on the right in the following image--stopped and concludes there is a communication error.
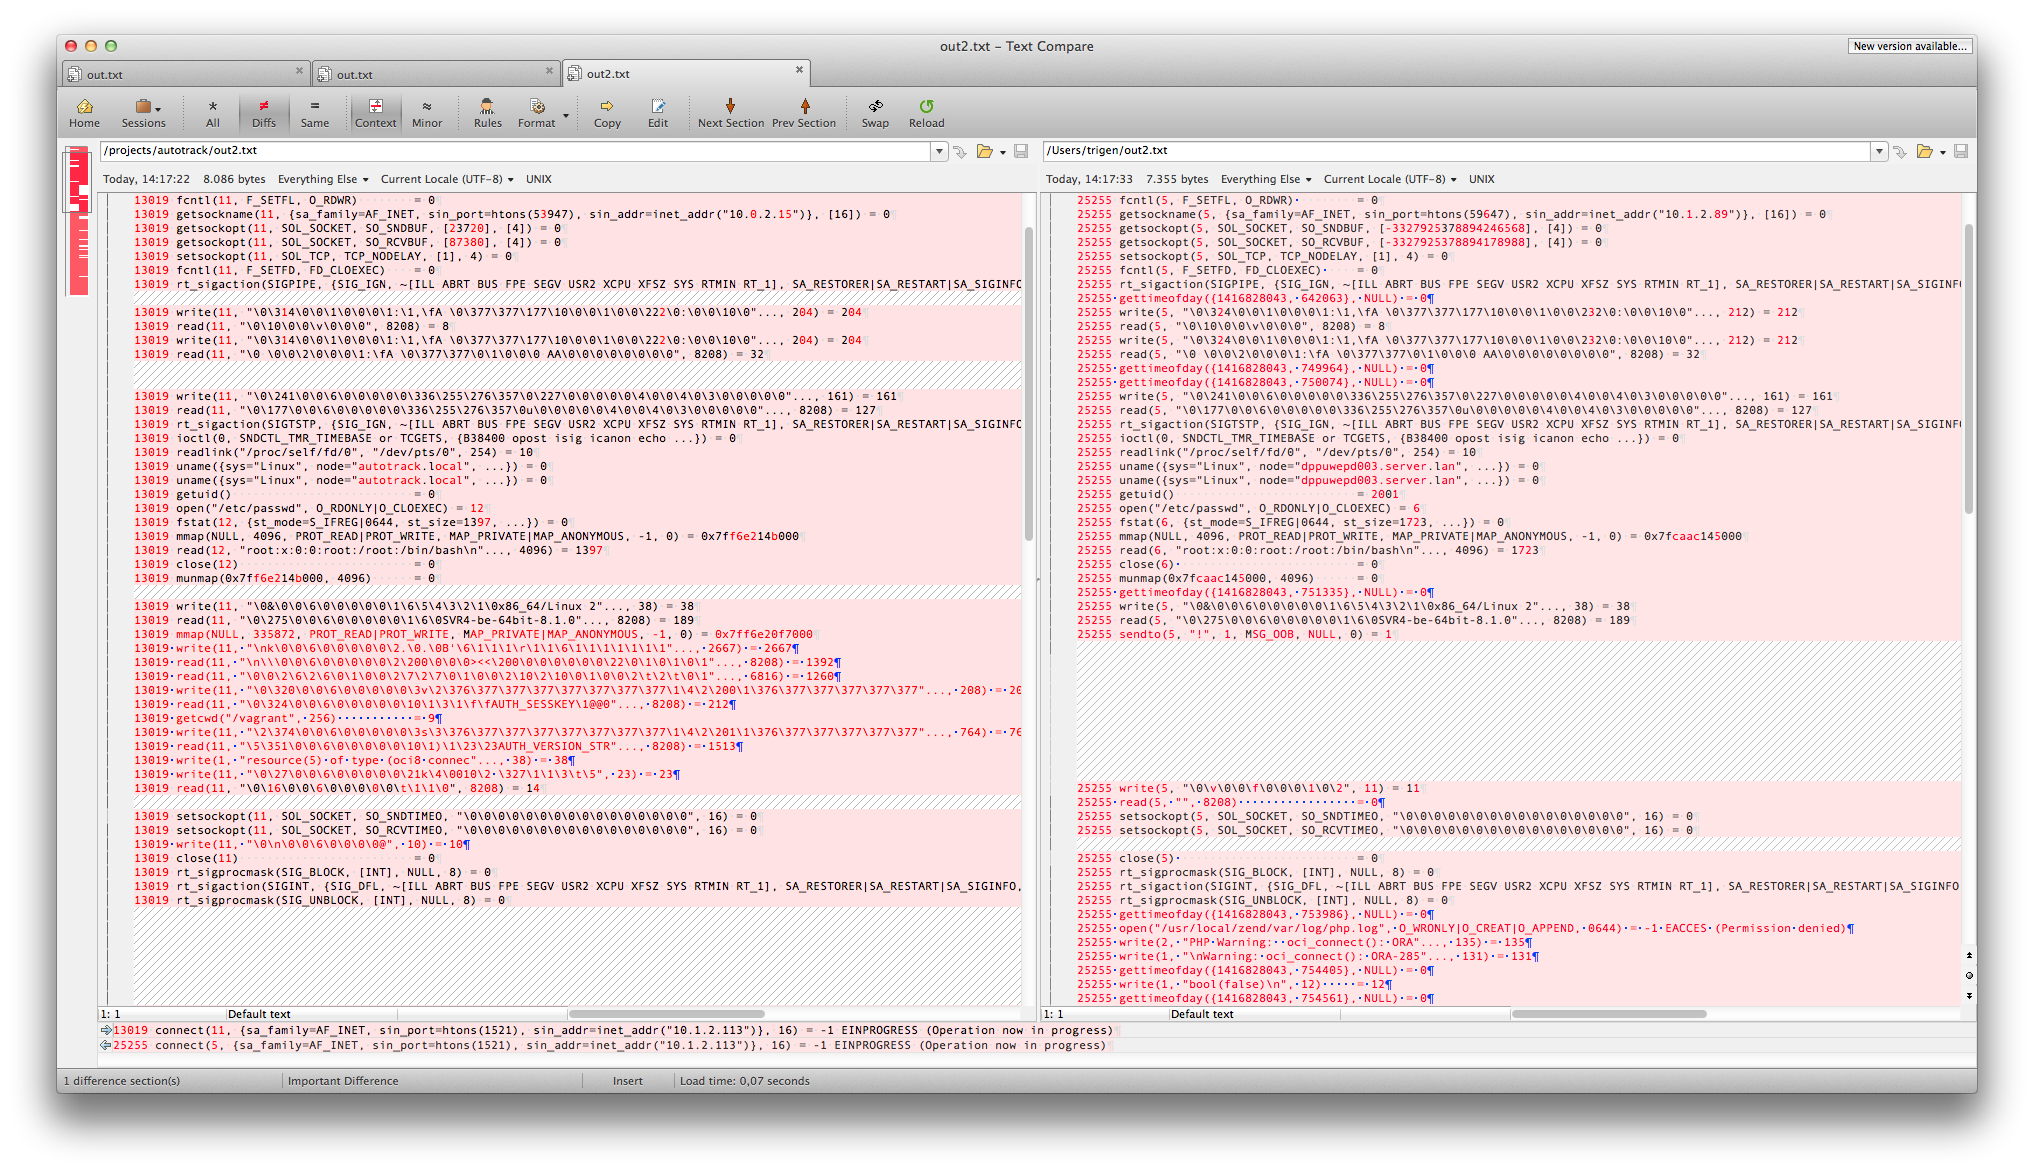
Working VM on the left, failing server on the right.
The second observation in the diff was that there was also a difference between libraries loaded.
- 9166  open("/usr/local/zend/lib/libociei.so", O_RDONLY) = -1 ENOENT (No such file or directory)
- 9166  open("/usr/local/zend/lib/libociicus.so", O_RDONLY) = 4
+ 17606 open("/usr/local/zend/lib/libociei.so", O_RDONLY) = 4
More insight into the problem..
We didn't specify explicitly what characterset to use for the connection, so it will try to find out after the connection is established. We use WE8ISO8859P15 in our database, and that charset is (amongst others) provided by libociei.
$ strings /usr/lib/oracle/11.2/client64/lib/libociei.so|grep WE8ISO8859P15
WE8ISO8859P15
...
Had we specified the charset in the oci_connect parameter (fourth param) we would have seen:
PHP Warning:  oci_connect(): OCIEnvNlsCreate() failed. There is something wrong with your system - please check that LD_LIBRARY_PATH includes the directory with Oracle Instant Client libraries in /home/webro/test.php on line 4
PHP Warning:  oci_connect(): ORA-12715: invalid character set specified in /home/webro/test.php on line 4
That would have hinted us to the solution earlier. Also in strace there would have been no connection setup at all, as the client can now bail sooner with "Invalid character set specified". Apparently with the Light oracle client version 11.1 the error used to be more helpful (see beforementioned blog post here):
ORA-12737: Instant Client Light: unsupported server character set WE8ISO8859P15The fix for Zend server
Replace the Light client with the Basic client, in our case this meant adding a library to Zend Server's libs:
# After installing the oracle instant client BASIC
ln -s /usr/lib/oracle/11.2/client64/lib/libociei.so /usr/local/zend/lib/libociei.so
Apparently the difference between Light & Basic is just this one library. The package that provides the Basic client may differ per Linux distribution, you can also download it from oracle.com.
Problem
The symptom is that while editing the IDE freezes, somehow the keyboard no
longer responds. Two years ago at Tweakers there was luckily someone using
Ubuntu who could tell me right away how to fix it ("Just killall -9
ibus-x11", and it would magically continue to work). Now more recently at
AutoTrack--where I now work--a collegue encountered the same issue. Luckily I
knew the fix this time. ![]()
The fact that I personally know at least five different individuals who spent time fixing this makes me guess there are a lot more people still. Hence this blogpost with some keywords that will hopefully lure others into this fix...
Fix
According to this bug report:
killall -HUP ibus-daemonOr use this one:
killall -9
ibus-x11
I have no idea what ibus exactly is, and I don't really care ![]() Also it may be possible to just uninstall ibus, I didn't try this,
but I can imagine the following to work..
Also it may be possible to just uninstall ibus, I didn't try this,
but I can imagine the following to work..
sudo apt-get remove ibus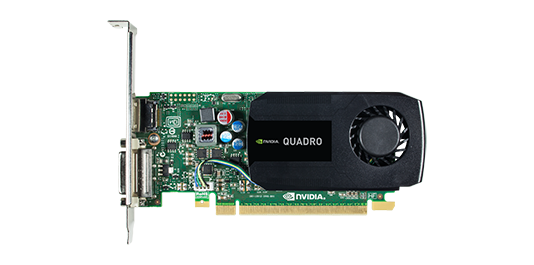
My super awesome NVIDIA Quadro K600 doesn't work properly with the default video drivers in Linux mint 15, 16 or Ubuntu 13.10.
Especially in mint it was especially unstable. In Ubuntu everything seems fine for a few days, until the GPU finally crashed as well.
Linux mint 15 / 16
You disable the default driver called nouveau, to be loaded by the kernel with nouveau.blacklist=1.
In mint I've tried editing GRUB_CMDLINE_LINUX etc. in /usr/share/grub/default/grub and all of /etc/grub.d/*. Somehow update-grub didn't parse it, I was not so patient, so I ended up simply editting /boot/grub/grub.cfg.
trigen@Firefly21 ~ $ vim /boot/grub/grub.cfg
...
:g/^\s*linux
        linux   /boot/vmlinuz-3.8.0-19-generic root=UUID=60f8754f-f688-461e-b120-bf8402c1e2a9 ro nouveau.blacklist=1
        linux   /boot/vmlinuz-3.8.0-19-generic root=UUID=60f8754f-f688-461e-b120-bf8402c1e2a9 ro recovery nomodeset nouveau.blacklist=1
        linux16 /boot/memtest86+.bin
        linux16 /boot/memtest86+.bin console=ttyS0,115200n8
Press ENTER or type command to continue
Reboot the system. CTRL+ALT+F1, login, sudo service mdm stop, ./NVIDIA-Linux-x86_64-331.20.run and follow instructions. Reboot.
Ubuntu 13.10
In ubuntu I attempted to directly edit /boot/grub/grub.cfg again. Adding the blacklist parameter, somehow this failed, the NVIDIA installer still complaining about nouveau being loaded.
So I attempted the 'normal approach' again: vim /etc/default/grub, modified this line: GRUB_CMDLINE_LINUX_DEFAULT="quiet splash nomodeset nouveau.blacklist=1".
I also googled and found this answer on stackoverflow, suggesting the nomodeset is necessary as well. (So I added both). sudo update-grub and EAT REBOOT INSTALL REPEAT.
Reboot the system. CTRL+ALT+F1, login, sudo service lightdm stop, ./NVIDIA-Linux-x86_64-331.20.run and follow instructions. Reboot.
Some notes: Install grub into specific partition
This is a "Note to self", how to install grub for specific partition (source). I needed this command fixing my dual boot (linux and windows on one ssd).
sudo mount /dev/sda5 /mnt
sudo grub-install --root-directory=/mnt/ /dev/sda
sudo update-grub
Somehow linux mint f*cked up my boot to windows 8 partition. It had some problems recognizing my partition table or something. (At work I have the exact same setup, and there were no problems.) I ended up fixing it with the above command, and from windows (had to restore an image) using this tutorial that uses EasyBCD.
In shell scripting I prefer the Kornshell. A while ago I experimented with "oh my zsh", but I switched back to ksh. Their auto completion for program commands is really unsurpassed (tab completion on program parameters for grep for example). The auto-incorrect however, is quite annoying ") . There is also a git plugin that visualized the active git branch in the
. There is also a git plugin that visualized the active git branch in the $PS1 prompt. I liked these features and I want to add them to ksh.
Apparently I like old things
I fixed a few things for ksh in my .kshrc at bitbucket.
Separated history amongst the different ksh shells.
My problem with the default behaviour: by default history is globally shared amongst all shells. I tend to work in a screen and do different stuff in each buffer. So it's annoying if stuff from one buffer magically appears in the other buffer.
So what I do is I make sure there is one history file ~/.ksh_history which contains all history from all shells. When starting a new shell I copy this file into a history file specific for that ("sub")shell, i.e. ~/.ksh_history_files/<shellpid>. Each new shell does this.
When a shell is started all history files from ~/.ksh_history_files/* are merged back into ~/.ksh_history. And the ones that are no longer in use (shells have exited) are removed. This is done with a simple lsof call.
Commands are processed through a simply ksh function that makes sure all history lines are unique, without changing the order.
Some funny caveats were:
- A history file should start with the character sequence
\x81\01. - Each command in history file should end with a
\x00character.
A prompt that embeds current git branch
If you are inside a git clone).
Maybe the oh-my-zsh git integration is more advanced, no idea. Luckily this visualization in $PS1 is very fast.
trigen@Firefly21:/projects> cd smashbattle
trigen@Firefly21:/projects/smashbattle[network_multiplayer]> git branch
  master
* network_multiplayer
trigen@Firefly21:/projects/smashbattle[network_multiplayer]>
Fix "cd" (with no params) to be the equivalent of "cd ~" again
Fixed with a simple alias around cd provided by /usr/share/ksh/functions/dirs. For dirs usage check here.
trigen@Firefly21:/usr/local/src/wxWidgets-3.0.0> cd <<<< this didn't work on Ubuntu 13.10 anyways.
trigen@Firefly21:/home/trigen>
Integrated my "launcher tool" I wrote for windows a long time ago.
The browser is assumed to be "chromium-browser" (sudo apt-get install chromium-browser).

The result for
gi dan flavin is opened in a new chromium tab.
i <url>- open url in browserg <search terms>- search with google.comgi <search terms>- search with google imagesgv <search terms>- search with google videosgnl <search terms>- search with google.nlgs <search term>- search google scholarw <search term>- search wikipediawa <search terms>- search wolfram alphayv <search terms>- search youtubey <search terms>- search yahooyi <search terms>- search yahoo imagesyv <search terms>- search yahoo videosimdb <search terms>- search imdbh <search term>- search hyperdictionaryv <search term>- search vandale (dutch dictionary)
Usage example: Open run menu (ALT+F2). Then type gi dan flavin to get the example result from screenshot.
I had to abandon my pure-ksh-functions approach to make the launcher commands available everywhere.
So you have call install_launcher as root to install the shortcuts as scripts in /usr/local/bin/.
Ubuntu does not respect shell functions in run unfortunately.
The performance problem
Opening phpmyadmin becomes quite annoying if the initial loading takes around 30 seconds, after logging in. Viewing the queries being executed by phpmyadmin with meta log monitor easily shows the bottleneck is "SHOW TABLE STATUS FROM '<DATABASE>'". It is the only query requiring > 14 seconds in this case.
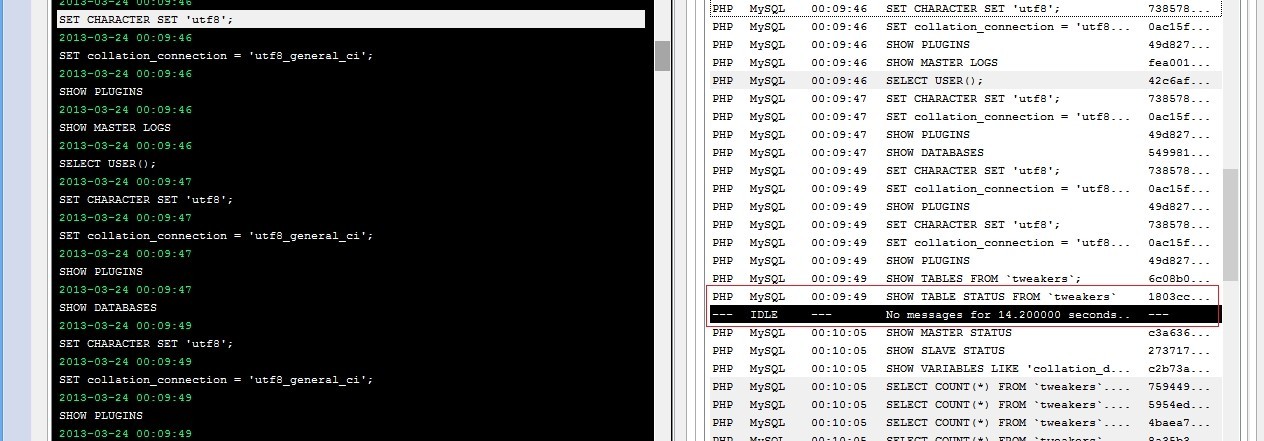
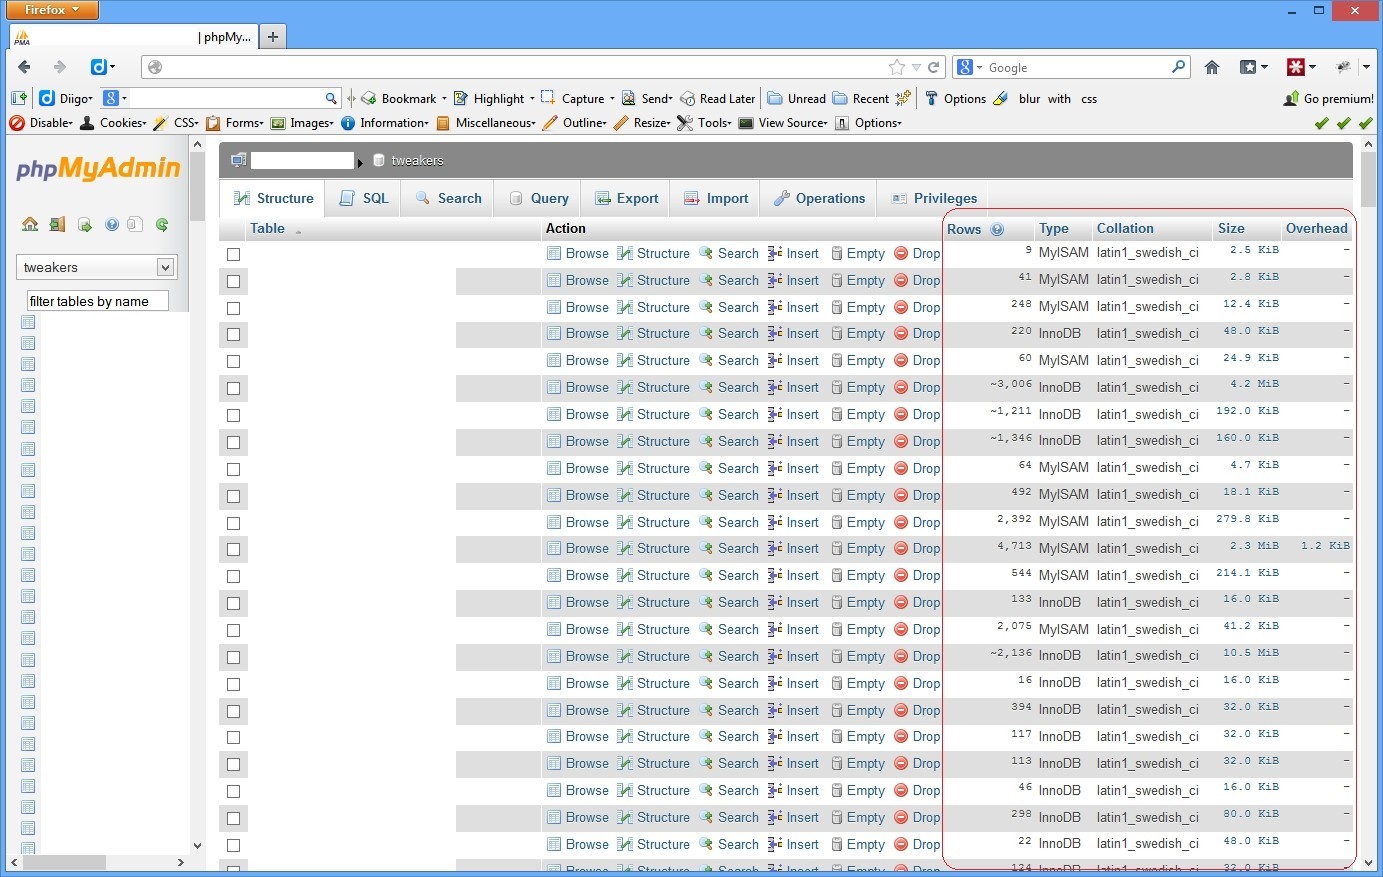
Phpmyadmin executes this query twice: in it's navigation frame for a listing of tables and in the right frame for the detailed listing.
Create cache for: SHOW TABLE STATUS FROM <DATABASE>
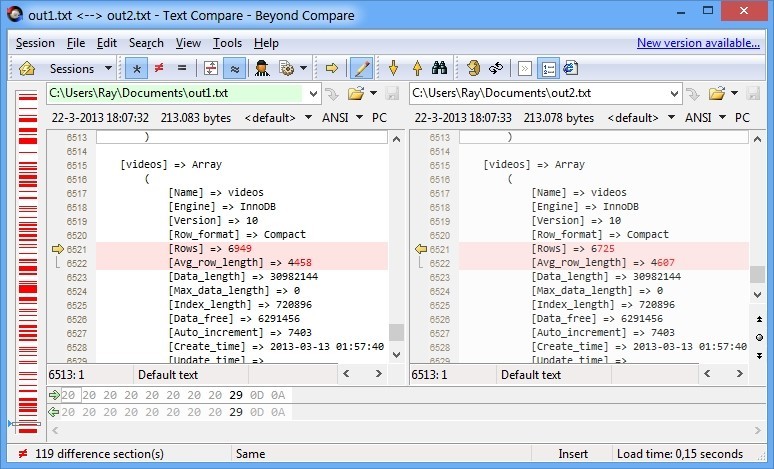
The output of this query is not that accurate. Running it twice, and comparing the output shows some columns are estimates. So if we would cache it for two minutes that would probably not harm phpmyadmin.
Then I created a table where to store the SHOW TABLE STATUS output into (I realize the types I used are probably overkill for some fields ).
CREATE TABLE showtablecache (
  Database_       VarChar(255) CHARACTER SET latin1 COLLATE latin1_swedish_ci,
  Name_           VarChar(255) CHARACTER SET latin1 COLLATE latin1_swedish_ci,
  Engine_         VarChar(255) CHARACTER SET latin1 COLLATE latin1_swedish_ci,
  Version         Integer(11),
  Row_format_     VarChar(255) CHARACTER SET latin1 COLLATE latin1_swedish_ci,
  Rows_           BigInt(20),
  Avg_row_length  BigInt(20),
  Data_length     BigInt(20),
  Max_data_length BigInt(20),
  Index_length    BigInt(20),
  Data_free       BigInt(20),
  Auto_increment_ BigInt(20),
  Create_time     DateTime,
  Update_time     DateTime,
  Check_time      DateTime,
  Collation_      VarChar(255) CHARACTER SET latin1 COLLATE latin1_swedish_ci,
  Checksum        VarChar(255) CHARACTER SET latin1 COLLATE latin1_swedish_ci,
  Create_options  VarChar(255) CHARACTER SET latin1 COLLATE latin1_swedish_ci,
  Comment_        VarChar(255) CHARACTER SET latin1 COLLATE latin1_swedish_ci
) ENGINE=InnoDB DEFAULT CHARACTER SET latin1 COLLATE latin1_swedish_ci;
This doesn't work by the way:
INSERT INTO showtablecache SHOW TABLE STATUS FROM '<DATABASE>' (leaving the "Database_" column from above CREATE TABLE).
I didn't really expect that to work, but I would have been pleasantly surprised if it did .
I created a resultset with similar output to the SHOW TABLE STATUS query with a SELECT query on INFORMATION_SCHEMA.TABLES. And perform INSERT's with the following cron:
<?php
$res = $conn->select('SHOW DATABASES');

while ($row = $res->assoc())
{
    $dbname = current($row);
    print "Caching $dbname...";

    $conn->startTransaction();
    $conn->update('DELETE FROM showtablecache WHERE Database_ = \'' . $conn->escape($dbname) . '\'');
    $conn->update('INSERT INTO showtablecache
                   SELECT \''.$conn->escape($dbname).'\'
                     ,TABLE_NAME
                     ,ENGINE
                     ,VERSION
                     ,ROW_FORMAT
                     ,TABLE_ROWS
                     ,AVG_ROW_LENGTH
                     ,DATA_LENGTH
                     ,MAX_DATA_LENGTH
                     ,INDEX_LENGTH
                     ,DATA_FREE
                     ,AUTO_INCREMENT
                     ,CREATE_TIME
                     ,UPDATE_TIME
                     ,CHECK_TIME
                     ,TABLE_COLLATION
                     ,CHECKSUM
                     ,CREATE_OPTIONS
                     ,TABLE_COMMENT
                   FROM
                     INFORMATION_SCHEMA.TABLES
                   WHERE
                     table_schema = \'' . $conn->escape($dbname).'\'');
    $conn->endTransaction(true);
    print "done.\n";
}
?>
I run this script every 2 minutes. You really want the transaction because you don't want the cache to be empty between the DELETE and the time the INSERT finishes.
Rewrite query to use our cache using mysql-proxy
The final step was to rewrite the SHOW TABLE STATUS queries to SELECT queries on our new cache table. This turns out to be quite simple using a neat Lua script for mysql-proxy:
   0 ---
   1 -- Uses MySQL-Proxy to rewrite annoyingly slow SHOW TABLE STATUS FROM `<DATABASE>` queries to a SELECT from our periodic cache
   2 --
   3 -- @author trigen
   4 --
   5 function read_query( packet )
   6     if string.byte(packet) == proxy.COM_QUERY then
   7         local query = string.sub(packet, 2)
   8
   9         -- attempt to match the query, and more specifically extract the requested database
  10         local dbname = string.match(string.upper(query), "^SHOW TABLE STATUS FROM \`(%a*)\`")
  11         if dbname then
  12             local newquery = string.format('SELECT' ..
  13                 '  Name_ AS `Name`,' ..
  14                 '  Engine_ AS `Engine`,' ..
  15                 '  Version,' ..
  16                 '  Row_format_ AS `Row_format`,' ..
  17                 '  Rows_ AS `Rows`,' ..
  18                 '  Avg_row_length,' ..
  19                 '  Data_length,' ..
  20                 '  Max_data_length,' ..
  21                 '  Index_length,' ..
  22                 '  Data_free,' ..
  23                 '  Auto_increment_ AS `Auto_increment`,' ..
  24                 '  Create_time,' ..
  25                 '  Update_time,' ..
  26                 '  Check_time,' ..
  27                 '  Collation_ AS `Collation`,' ..
  28                 '  Checksum,' ..
  29                 '  Comment_ AS `Comment`,' ..
  30                 '  Create_options' ..
  31                 ' FROM' ..
  32                 '  tweakers.showtablecache' ..
  33                 ' WHERE Database_ = %q', dbname);
  34             print('CONVERTING ' .. query .. '  ===>  ' .. newquery);
  35             proxy.queries:append(1, string.char(proxy.COM_QUERY) .. newquery )
  36             return proxy.PROXY_SEND_QUERY
  37         end
  38     end
  39 end
Save that script to pma.lua, start proxy with:
mysql-proxy -P :4041 --keepalive --proxy-backend-addresses=YOUR_SERVER:3306 --proxy-lua-script=pma.luaExample output of mysql-proxy:
CONVERTING SHOW TABLE STATUS FROM `tweakers`  ===>  SELECT  Name_ AS `Name`,  Engine_ AS `Engine`,  Version,  Row_format_ AS `Row_format`,  Rows_ AS `Rows`,  Avg_row_length,  Data_length,  Max_data_length,  Index_length,  Data_free,  Auto_increment_ AS `Auto_increment`,  Create_time,  Update_time,  Check_time,  Collation_ AS `Collation`,  Checksum,  Comment_ AS `Comment`,  Create_options FROM  tweakers.showtablecache WHERE Database_ = "TWEAKERS"
CONVERTING SHOW TABLE STATUS FROM `tweakers`  ===>  SELECT  Name_ AS `Name`,  Engine_ AS `Engine`,  Version,  Row_format_ AS `Row_format`,  Rows_ AS `Rows`,  Avg_row_length,  Data_length,  Max_data_length,  Index_length,  Data_free,  Auto_increment_ AS `Auto_increment`,  Create_time,  Update_time,  Check_time,  Collation_ AS `Collation`,  Checksum,  Comment_ AS `Comment`,  Create_options FROM  tweakers.showtablecache WHERE Database_ = "TWEAKERS"
...
Example output for metalogmon:
Some notes
I never did any Lua scripting before, I find this website quite useful as it provides a console for Lua (but for other languages as well). This way you can test some stuff without constantly restarting mysql-proxy.
With regards to the caching, if you create a new table, this table will become visible once the cron updated the cache. So you don't want to set the delay for too long. You could do some extra scripting for encountered CREATE TABLE statements in mysql-proxy, or make a more advanced cron script that checks the faster "SHOW TABLES;" more often to see if any caching needs more priority.
The New KornShell
I prefer ksh (Version JM 93u+ 2012-02-29) for my shell (with "set -o vi"). Not that it's soooo much better than bash as a cli (and it's probably pwnd by some of zsh's features like programmable autocomplete). But I do find it alot cleaner than bash for scripting. Anyway, currently I've given all machines I work with a /bin/ksh and chsh'd it for my user, but I noticed I missed bookmarking the current directory with "pushd ." for returning to it later with "popd" (after i.e. some subtask that will make you endup /nowhere/near/your/old/far/away/path).
Sometimes you just don't want to open a new tab in screen. (And you are right, you could of course also use goto.cpp for bookmarking )
An alternative solution would be starting- and exiting a subshell.
Found: dirstack.ksh by Eddie
So I googled and found this stack overflow answer which has a pretty nice pushd/popd/dirs implementation. But it behaves a little different: "pushd /usr" bookmarks and changes to that directory (the normal behaviour).
But what I often want is to store a directory right before I'm about to leave it. (Chances are I didn't use "pushd" but "cd" to get there in the first place.) Normally you simply use "pushd ." to put it on the stack (and ignore the useless changedir on the side ).
But this implementation is explicitly designed so that the current directory is already (and always) the first (or zeroth position) on the stack and from that line of thought it would be "useless" to put it as a "duplicate" in the list.
I still want to use pushd on $PWD, so I commented these four lines in dirstack.ksh:
     # check for duplicate stack entries
     # current "top of stack" = ids; compare ids+dsdel to $PWD
     # either "ids" or "dsdel" must increment with each loop
     #
     (( ids = 1 ))          # loop from bottom of stack up
     (( dsdel = 0 ))        # no deleted entries yet
     while [ ids+dsdel -le sd ] ; do
>>>>    #if [ "${dir_stack[ids+dsdel]}" = "$PWD" ] ; then
>>>>    #   (( dsdel = dsdel + 1 ))  # logically remove duplicate
>>>>    #else
           if [ dsdel -gt 0 ] ; then        # copy down
              dir_stack[ids]="${dir_stack[ids+dsdel]}"
           fi
           (( ids = ids + 1 ))
>>>>    #fi
     done
Then I remembered my book (that has caused me many jealous colleagues :+) also provided pushd and popd as examples in the appendix .
So I was curious to see if these were usable (the book is from 1995).
Found: fun/{pushd|popd|dirs} by David G. Korn himself*
* by my guess
SuSE provides these scripts in /usr/share/ksh/fun so I didn't need to type them in. If you need them, I tarballed them into kshfun.tar.gz (md5=7173831211d3d54f26f630f3cc720282). I was surprised by /usr/share/ksh/fun/dirs, they re-alias "cd" with a custom "_cd" function that does basically "pushd" all the time, with a stack of max. 32 dirs. That's a cool idea, you can view your stack with "dirs" or even use the "mcd" (menu change dir) command. You use this "cd" alias like "cd N" as well, where N is the index on the stack (given by "dirs" output). And pushd and popd work on this same stack.
For your .kshrc profile:
. /usr/share/ksh/fun/popd <<<< includes pushd as well **
. /usr/share/ksh/fun/dirs <<<< if you also want the custom cd + dirs
**ls -althr /usr/share/ksh/fun:
total 16K
-rwxr-xr-x 1 root root 2.5K Jun  6  2012 pushd
-rwxr-xr-x 1 root root 2.3K Jun  6  2012 dirs
lrwxrwxrwx 1 root root    5 Jan 19 23:43 popd -> pushd     <<<< symlink
These work great! (example)
trigen@ip-10-235-45-12:/etc/apache2> cd /var/log/
/var/log
trigen@ip-10-235-45-12:/var/log> dirs
1) /var/log
2) /etc/apache2
3) /usr/local/src
4) ~
trigen@ip-10-235-45-12:/var/log> cd 2             <<<< If you have a directory named '2', use "cd ./2" :P
/etc/apache2
trigen@ip-10-235-45-12:/etc/apache2> mcd
1) /etc/apache2
2) /var/log
3) /usr/local/src
4) ~
Select by number or enter a name: 3
/usr/local/src
trigen@ip-10-235-45-12:/usr/local/src>
or what I was talking about:
trigen@ip-10-235-45-12:/home/trigen> cd /usr/local/lib
/usr/local/lib
trigen@ip-10-235-45-12:/usr/local/lib> pushd .
/usr/local/lib ~ /usr/local/lib
trigen@ip-10-235-45-12:/usr/local/lib> cd /
/
trigen@ip-10-235-45-12:/> popd                 <<<< In this trivial example "cd -" (where - is previous dir) would also work.
/usr/local/lib ~ /usr/local/lib
trigen@ip-10-235-45-12:/usr/local/lib>
Topics:
Other interests:
EBPF Flamegraphs C++ Ubuntu 20.04
Site generated using ![]() ArticleManager © 2010-2013
ArticleManager © 2010-2013