Neither one nor Many
Software engineering blog about my projects, geometry, visualization and music.
Some of the stuff I'm posting on my 'blog' might be better categorized as a knowledge base articles, or more simply 'notes'..
In any case, this might be one more such posts ![]() , just some caveats I ran into setting stuff up on my Ubuntu Server 20.04 LTS.
, just some caveats I ran into setting stuff up on my Ubuntu Server 20.04 LTS.
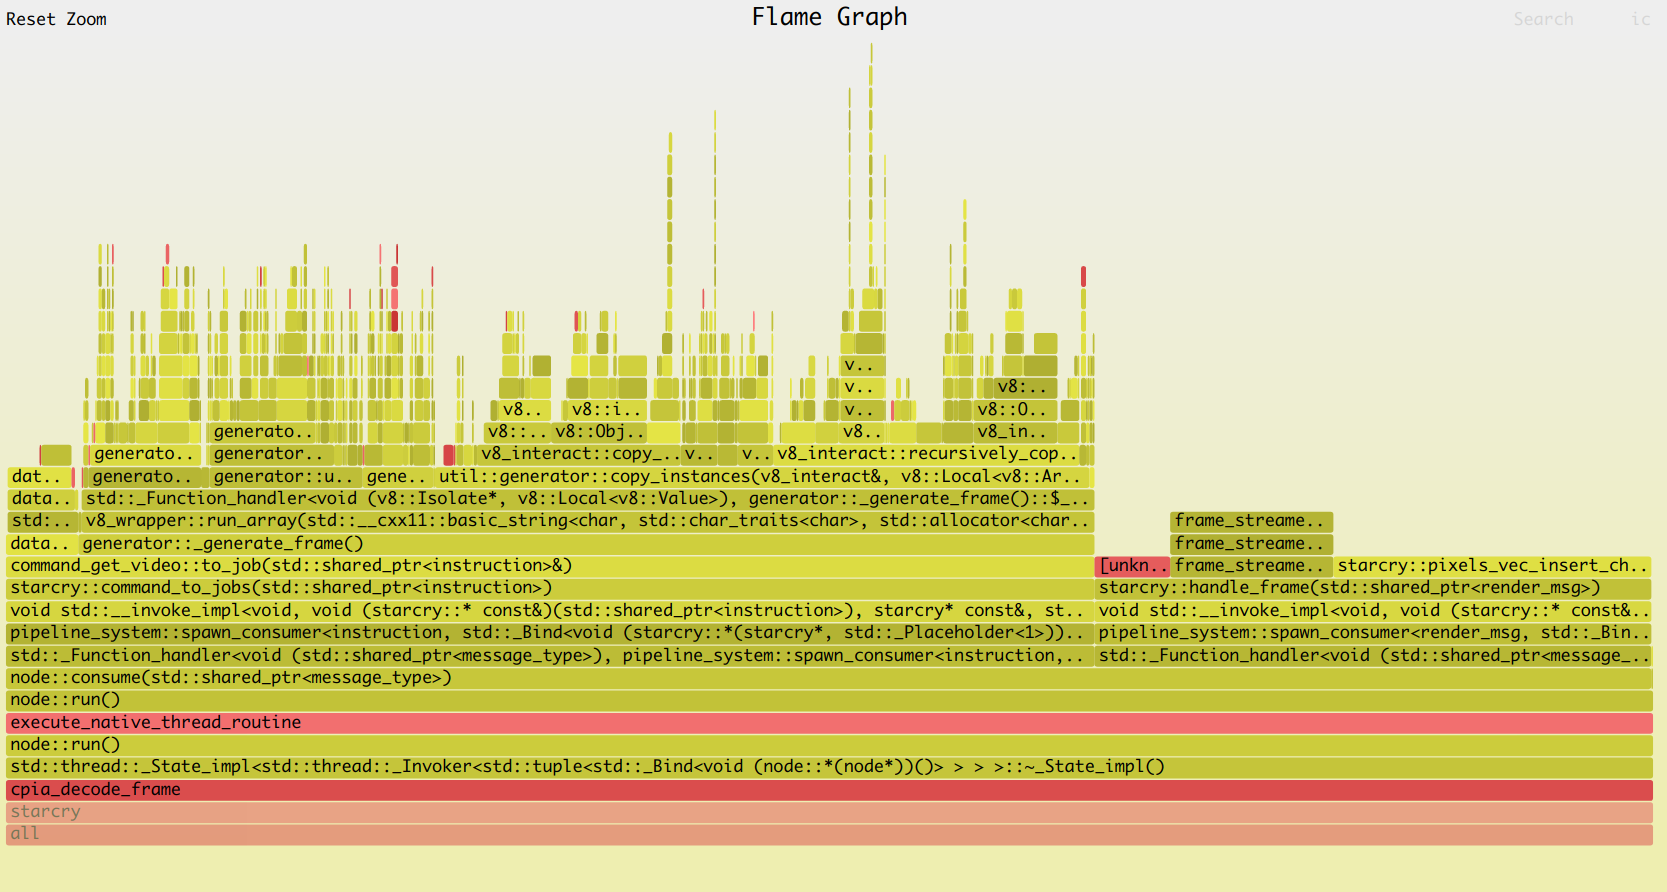
Flame Graphs
Invented by Brendan Gregg, who is someone that I honestly greatly admire. He is behind a lot of amazing presentations/talks, online content and tools w/r/t performance. Recently, when I got very interested in EBPF, stumbled upon his work again.
I've used Flame Graphs in the past with perf, and so I was curious to try it with ebpf this time. Flame Graphs can give very useful insights into potential bottlenecks.
Below is one that I've created as an example, but will refer to Brendan's website if you want to dive into them more, and see more interesting examples.
As I tried to make all the tools work, I discovered the Ubuntu packages are a bit old, and I ran into a few issues. The steps that worked for me are based on this link, section 4.2.:
1) Install prerequisites
sudo apt install -y bison build-essential cmake flex git libedit-dev \
  libllvm7 llvm-7-dev libclang-7-dev python zlib1g-dev libelf-dev libfl-dev python3-distutils
Remove the old bpfcc-tools package, if you've installed them before (gave me nothing but issues, such as python scripts raising errors, that have already been fixed upstream). We will fetch the latest version from github instead.
apt remove -y bpfcc-tools2) Install bcc tools (bpfcc-tools)
git clone https://github.com/iovisor/bcc
cd bcc
Then execute the following:
mkdir -p build; cd build
export LLVM_ROOT=/usr/lib/llvm-7
cmake ..
make
sudo make install
cmake -DPYTHON_CMD=python3 .. # build python3 binding
pushd src/python/
make
sudo make install
popd
Note the export LLVM_ROOT=/usr/lib/llvm-7, this was critical in my case, since I had newer versions:
trigen@ideapad:~> find /usr/lib -name 'llvm-*' -type d
/usr/lib/llvm-7
/usr/lib/llvm-10
/usr/lib/llvm-12
CMake would pick up the latest llvm-12, and that would cause compilation errors. See: https://github.com/iovisor/bcc/issues/3601
3) Do the profiling with EBPF
- Step 1: I would start my executable program
starcryin a terminal, have it render a bunch of stuff. - Step 2: Then sample for 60 seconds on the specific pid as
root, see below.
export PYTHONPATH=$(dirname `find /usr/lib -name bcc | grep dist-packages`):$PYTHONPATH
/usr/share/bcc/tools/profile  # see if it produces meaningful output
The PYTHONPATH had to be exported correctly first (on my system in any case) or the profile tool would raise a Python error.
THen do the actual sampling with:
sudo python3 /usr/share/bcc/tools/profile -F 99 -adf 10 -p $(pidof starcry) > /path/to/out.profile-folded4) Generate the Flame Graph
git clone https://github.com/brendangregg/FlameGraph
cd FlameGraph
./flamegraph.pl --colors=java /path/to/out.profile-folded > profile.svg
That should be it!
Example
From the example PNG included in this blog post:
trigen@ideapad:~/projects/FlameGraph[master]> export PYTHONPATH=$(dirname `find /usr/lib -name bcc | grep dist-packages`):$PYTHONPATH
trigen@ideapad:~/projects/FlameGraph[master]> sudo python3 /usr/share/bcc/tools/profile -U -F 99 -adf 10 -p $(pidof starcry) > out.profile-folded
WARNING: 17 stack traces could not be displayed. Consider increasing --stack-storage-size.
trigen@ideapad:~/projects/FlameGraph[master]> ./flamegraph.pl --colors=java ./out.profile-folded > profile.svg
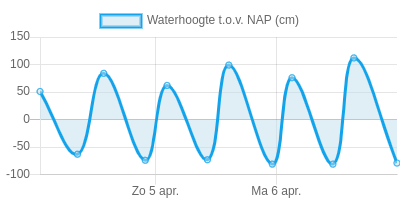
lunitidal interval
In ADJUST Settings set the right Longitude. I.e., if Lat/Lon for my city is: 52.601234, 4.700493
The only relevant part is the longitude, +4 or +5 in this case. I configured 4 for longitude, and E for EAST, negative numbers should be WEST.
Then lookup whatever beach you are interested in, the closest to me is Egmond Aan Zee. The manual contains a bunch of them, but this list is not very complete, or useful at all IMO. And I learned in The Netherlands these times differ greatly per beach.
So, better find the High and Low tide times yourself, in my case for Egmond Aan Zee:
https://egmondaanzee.org/nl/getijden-eb-vloed.php
This lunitidal interval (HH:MM) is called a "havengetal" or "haventijd" in my language. And it's dutch definition is:
"De haventijd is het tijdsverschil tussen de hoogste waterstand en de doorgang van zon of maan door de meridiaan, voor een gegeven plaats."
Translated: the difference between the highest tide and the passing of the sun or moon through the meridian, for a given place.
Today is the 4th of april 2020 with the highest tide at 13:44 (84 cm).

According to this site the moon passes the meridian at exactly 23:00 for my location today.
https://www.timeanddate.com/moon/@2754516

We need the difference:
From 23:00 to 13:44 is: 14:44.
This results in settings for my casio: 4 LONG E + INT 14:44.
testing
Then test in the tide mode for different dates, and it should work! Personally I noticed that low tide is not completely synchronized, it's one "bar" later with the wave on the watch. I suspect that is because the actual graph is not a perfect sine wave, but looks a little skewed. I guess this may vary per beach.
For this tutorial I'm assuming Kubernetes with Helm + Ingress is already deployed. If not, I still included the commands I used near the end of this article.

OwnCloud
My NAS is running at home with Rockstor, and I'm using RAID10 with btrfs. Rockstor has (docker) apps support with the feature called Rock-on's, they also include OwnCloud, but after updating and some other issues with Rockstor at some point my deployment broke. This frustrated me so I've decided to switch to Kubernetes instead.
I use my own cloud (no pun intended) as an alternative over using services owned by Google/Amazon/Apple. When you plan to do the same, just make sure to also make proper backups.
Deploy OwnCloud with Helm
Following the instructions; copy their default values.yaml (from here). Tweak all the values. It seems important to define a hostname! (If you try accessing the service later via IP address, the webinterface will not accept this.)
helm install --name my-owncloud -f owncloud.yaml stable/owncloud --set rbac.create=true
Notes: owncloud.yaml is my values.yaml, and I expect the rbac.create=true not to be needed but I used it anyway it was left over when copy & pasting another command.. For convenience you can download my owncloud.yaml.
Owncloud will require some storage.
In my case I made a btrfs share named /mnt2/NAS/kubeowncloudstorage.
Then created three folders inside it:
mkdir -p /mnt2/NAS/kubeowncloudstorage/data
mkdir -p /mnt2/NAS/kubeowncloudstorage/mariadb
mkdir -p /mnt2/NAS/kubeowncloudstorage/apache
Set the right permissions for these folders, owncloud will write as user id(1).
chown 1:1 /mnt2/NAS/kubeowncloudstorage -RThen apply the following yaml (kubectl apply -f kube_owncloud_storage.yaml):
nas:/root # cat kube_owncloud_storage.yaml
kind: PersistentVolume
apiVersion: v1
metadata:
  name: kube-owncloud-storage-data
  labels:
    type: local
spec:
  capacity:
    storage: 3072Gi
  storageClassName: owncloud-storage-data
  accessModes:
    - ReadWriteOnce
  hostPath:
    path: /mnt2/NAS/kubeowncloudstorage/data
---
kind: PersistentVolume
apiVersion: v1
metadata:
  name: kube-owncloud-storage-mariadb
  labels:
    type: local
spec:
  capacity:
    storage: 8Gi
  storageClassName: owncloud-storage-mariadb
  accessModes:
    - ReadWriteOnce
  hostPath:
    path: /mnt2/NAS/kubeowncloudstorage/mariadb
---
kind: PersistentVolume
apiVersion: v1
metadata:
  name: kube-owncloud-storage-apache
  labels:
    type: local
spec:
  capacity:
    storage: 1Gi
  storageClassName: owncloud-storage-apache
  accessModes:
    - ReadWriteOnce
  hostPath:
    path: /mnt2/NAS/kubeowncloudstorage/apache
If you redeploy Kubernetes and/or the system in general, I forgot when exactly but a PersistentVolume may end up in a state that prevents PersistentVolumeClaim's to not bind to the Volumes.
There was a trick to force it to bind, IIRC kubectl edit pv kube-owncloud-storage-data and you can remove the reference it has to an existing PVC. But it was a few weeks ago I experimented with this so sorry I don't remember the details.
Only now I stumbled upon my notes and decided to wrap it up in a blog post.
Setup ingress (beware of caveat!)
nas:/root # cat owncloud_ingress.yaml
apiVersion: extensions/v1beta1
kind: Ingress
metadata:
  annotations:
    kubernetes.io/ingress.class: nginx
    ingress.kubernetes.io/proxy-body-size: 500m
    nginx.ingress.kubernetes.io/proxy-body-size: 500m
  name: owncloud
  namespace: default
spec:
  rules:
    - host: ******DOMAIN NAME*******
      http:
    paths:
      - backend:
          serviceName: my-owncloud-owncloud
          servicePort: 80
        path: /
Take a careful look at these two options in the annotations:
ingress.kubernetes.io/proxy-body-size: 500m
nginx.ingress.kubernetes.io/proxy-body-size: 500m
They took me two hours of debugging, owncloud was throwing errors 413 Request Entity Too Large when syncing some larger video files from my phone to owncloud. Thinking this must be an issue inside owncloud I experimented with lots of parameters, fixes for php, apache, etc. Then realized it could be the Ingress in Kubernetes. The above example makes sure it doesn't block uploads up to half a gigabyte.
DONE!
The end result should look something like this in Kubernetes:
nas:/root # kubectl get all
NAME                                                          READY   STATUS    RESTARTS   AGE
pod/my-nginx-nginx-ingress-controller-664f4547d8-vjgkt        1/1     Running   0          16d
pod/my-nginx-nginx-ingress-default-backend-5bcb65f5f4-qrwcd   1/1     Running   0          16d
pod/my-owncloud-mariadb-0                                     1/1     Running   0          16d
pod/my-owncloud-owncloud-6cddfdc8f4-hmrh5                     1/1     Running   2          16d

NAME                                             TYPE           CLUSTER-IP      EXTERNAL-IP     PORT(S)                      AGE
service/kubernetes                               ClusterIP      10.96.0.1       <none>          443/TCP                      16d
service/my-nginx-nginx-ingress-controller        LoadBalancer   10.103.57.37    192.168.2.122   80:32030/TCP,443:30453/TCP   16d
service/my-nginx-nginx-ingress-default-backend   ClusterIP      10.101.16.224   <none>          80/TCP                       16d
service/my-owncloud-mariadb                      ClusterIP      10.104.48.71    <none>          3306/TCP                     16d
service/my-owncloud-owncloud                     LoadBalancer   10.102.95.4     <pending>       80:32287/TCP                 16d

NAME                                                     DESIRED   CURRENT   UP-TO-DATE   AVAILABLE   AGE
deployment.apps/my-nginx-nginx-ingress-controller        1         1         1            1           16d
deployment.apps/my-nginx-nginx-ingress-default-backend   1         1         1            1           16d
deployment.apps/my-owncloud-owncloud                     1         1         1            1           16d

NAME                                                                DESIRED   CURRENT   READY   AGE
replicaset.apps/my-nginx-nginx-ingress-controller-664f4547d8        1         1         1       16d
replicaset.apps/my-nginx-nginx-ingress-default-backend-5bcb65f5f4   1         1         1       16d
replicaset.apps/my-owncloud-owncloud-6cddfdc8f4                     1         1         1       16d

NAME                                   DESIRED   CURRENT   AGE
statefulset.apps/my-owncloud-mariadb   1         1         16d
nas:/root # kubectl get ingress
NAME       HOSTS               ADDRESS   PORTS   AGE
owncloud   *****************             80      16d
nas:/root # kubectl get pv
NAME                            CAPACITY   ACCESS MODES   RECLAIM POLICY   STATUS   CLAIM                                   STORAGECLASS               REASON   AGE
kube-owncloud-storage-apache    1Gi        RWO            Retain           Bound    default/my-owncloud-owncloud-apache     owncloud-storage-apache             16d
kube-owncloud-storage-data      3Ti        RWO            Retain           Bound    default/my-owncloud-owncloud-owncloud   owncloud-storage-data               16d
kube-owncloud-storage-mariadb   8Gi        RWO            Retain           Bound    default/data-my-owncloud-mariadb-0      owncloud-storage-mariadb            16d
nas:/root # kubectl get pvc
NAME                            STATUS   VOLUME                          CAPACITY   ACCESS MODES   STORAGECLASS               AGE
data-my-owncloud-mariadb-0      Bound    kube-owncloud-storage-mariadb   8Gi        RWO            owncloud-storage-mariadb   16d
my-owncloud-owncloud-apache     Bound    kube-owncloud-storage-apache    1Gi        RWO            owncloud-storage-apache    16d
my-owncloud-owncloud-owncloud   Bound    kube-owncloud-storage-data      3Ti        RWO            owncloud-storage-data      16d
Deploying Kube on a single node machine notes
Just in case you are also attempting to install Kubernetes for the first time, a reference of the commands used in my setup. First I followed the official docs to deploy kubeadm,kubelet etc. See here.
My init looked like this:
kubeadm init --pod-network-cidr=192.168.0.0/16At this point you may get some errors, and you have to fix the errors, maybe even kubeadm reset and then retry.
Until I was okay with the remaining errors, I proceeded with:
kubeadm init --pod-network-cidr=192.168.0.0/16 --ignore-preflight-errors=all

# these steps will be recommended from above command:
mkdir -p $HOME/.kube
sudo cp -f /etc/kubernetes/admin.conf $HOME/.kube/config
sudo chown $(id -u):$(id -g) $HOME/.kube/config

# I chose calico for networking
kubectl apply -f https://docs.projectcalico.org/v3.1/getting-started/kubernetes/installation/hosted/rbac-kdd.yaml
kubectl apply -f https://docs.projectcalico.org/v3.1/getting-started/kubernetes/installation/hosted/kubernetes-datastore/calico-networking/1.7/calico.yaml

# Then after a while (maybe check if kubelet etc. come up correctly, try "kubectl get no")
# Make sure the master node is not excluded for running pods.
kubectl taint nodes --all node-role.kubernetes.io/master-

# I also executed this patch, but I think it's not needed anymore, it was still in my helper script
kubectl -n kube-system get deployment coredns -o yaml |   sed 's/allowPrivilegeEscalation: false/allowPrivilegeEscalation: true/g' |   kubectl apply -f -

# Then I looked up the kubelet service file with `systemctl cat kubelet` and edited:
vim /etc/systemd/system/kubelet.service.d/10-kubeadm.conf
# added this to above file, the --resolv-conf:
#
#ExecStart=/usr/bin/kubelet $KUBELET_KUBECONFIG_ARGS $KUBELET_CONFIG_ARGS $KUBELET_KUBEADM_ARGS $KUBELET_EXTRA_ARGS --resolv-conf=/etc/resolv.conf
#
#ALSO: I edited /etc/resolv.conf, I removed the ipv6 nameserver entry, and added 8.8.8.8 as per https://hk.saowen.com/a/e6cffc1e02c2b4643bdd525ff9e8e4cfb49a4790062508dca478c0c8a0361b5a
systemctl daemon-reload
systemctl restart kubelet

kubectl get pod -n kube-system
kubectl delete pod coredns-68fb79bcf6-9zdtz -n kube-system
kubectl delete pod coredns-68fb79bcf6-t7vsm -n kube-system
kubectl get pod -n kube-system -o wide
Solution for the last bit I got from here. However this may have been a random issue that I just ran into, because on different servers I don't recall I had to the steps regarding coredns.
Possible commands
helm reset --force
helm init --upgrade --service-account tiller

# don't remember if these two commands were still necessary
kubectl create serviceaccount --namespace kube-system tiller
kubectl create clusterrolebinding tiller-cluster-rule --clusterrole=cluster-admin --serviceaccount=kube-system:tiller
Unrelated notes about Owncloud itself
Links for solutions for problems that I ran into at some point in time:
- https://central.owncloud.org/t/file-is-locked-how-to-unlock/985
Links that eventually pointed me in the right direction for the 413 Request Entity Too Large error.
- https://forum.owncloud.org/viewtopic.php?t=23199
- https://www.keycdn.com/support/413-request-entity-too-large
- https://stackoverflow.com/questions/18740419/how-to-set-allowoverride-all
- https://github.com/nginxinc/kubernetes-ingress/issues/21
Not really a "proper" blog post but maybe useful to someone, it's basically the notes I took for myself after a few attempts to properly deploy it. It's easy to do some steps wrong if you are not super familiar with Cloudera Manager (CM).
I am not going into detail with every caveat, but https://www.cloudera.com/documentation/data-science-workbench/latest/topics/cdsw_install.html is what I used as a basis for installing Cloudera Data Science Workbench (CDSW) on top of CM.
- Do not try to deploy CM + CDSW inside Docker, because CDSW will run Kubernetes and docker inside docker AFAIK is not possible.
- Install CDSW on a computenode not the Headnode (where you deploy CM) because it needs the gateway role for finding Spark 2, etc.
In my case I am using OpenStack nodes with the following layout:
Headnode master.cm.cluster, Computenodes node00[1-6].cm.cluster (10.141.0.0/24) (. All with 8GiB Memory and 4VCPU's and 80GiB disks.
Note that you have to assign two additional volumes of 500 GiB to one of the computenodes.
I created two 200 GiB volumes (it will only give a warning that it's probably not enough, but for demo purposes it is.) and assigned them to node002.cm.cluster where I will deploy CDSW.
Versions used
- Cloudera Manager 5.11.0
- Cloudera Data Science Workbench 1.0.1.
Supported OS currently is CentOS 7.2 (apparently CDSW does not support 7.3)
Make sure port 7180 will be reachable on your Headnode so you can configure Cloudera Manager later.
Step 1: Install Cloudera Manager
Easiest for me is to just copy & paste the commands I prepared for the Docker image. First Headnode then do the same on the Compute nodes.
- Headnode - Dockerfile on Bitbucket
- Computenodes - Dockerfile on Bitbucket
If you use something like Bright Cluster Manager you probably just do the computenode stuff once in the desired computenode image and start an image transfer.
Step 2: Follow the Cloudera Manager Wizard
I install the free version and I don't install Spark, because version 1.6.0 is not supported by CDSW. You can uninstall it and replace it later if you already deployed it.
I am not going to write out every detail, but you need to install:
- The Anaconda Parcel - Link to Cloudera Blog
- The Spark 2 Parcel - Link to Cloudera Documentation
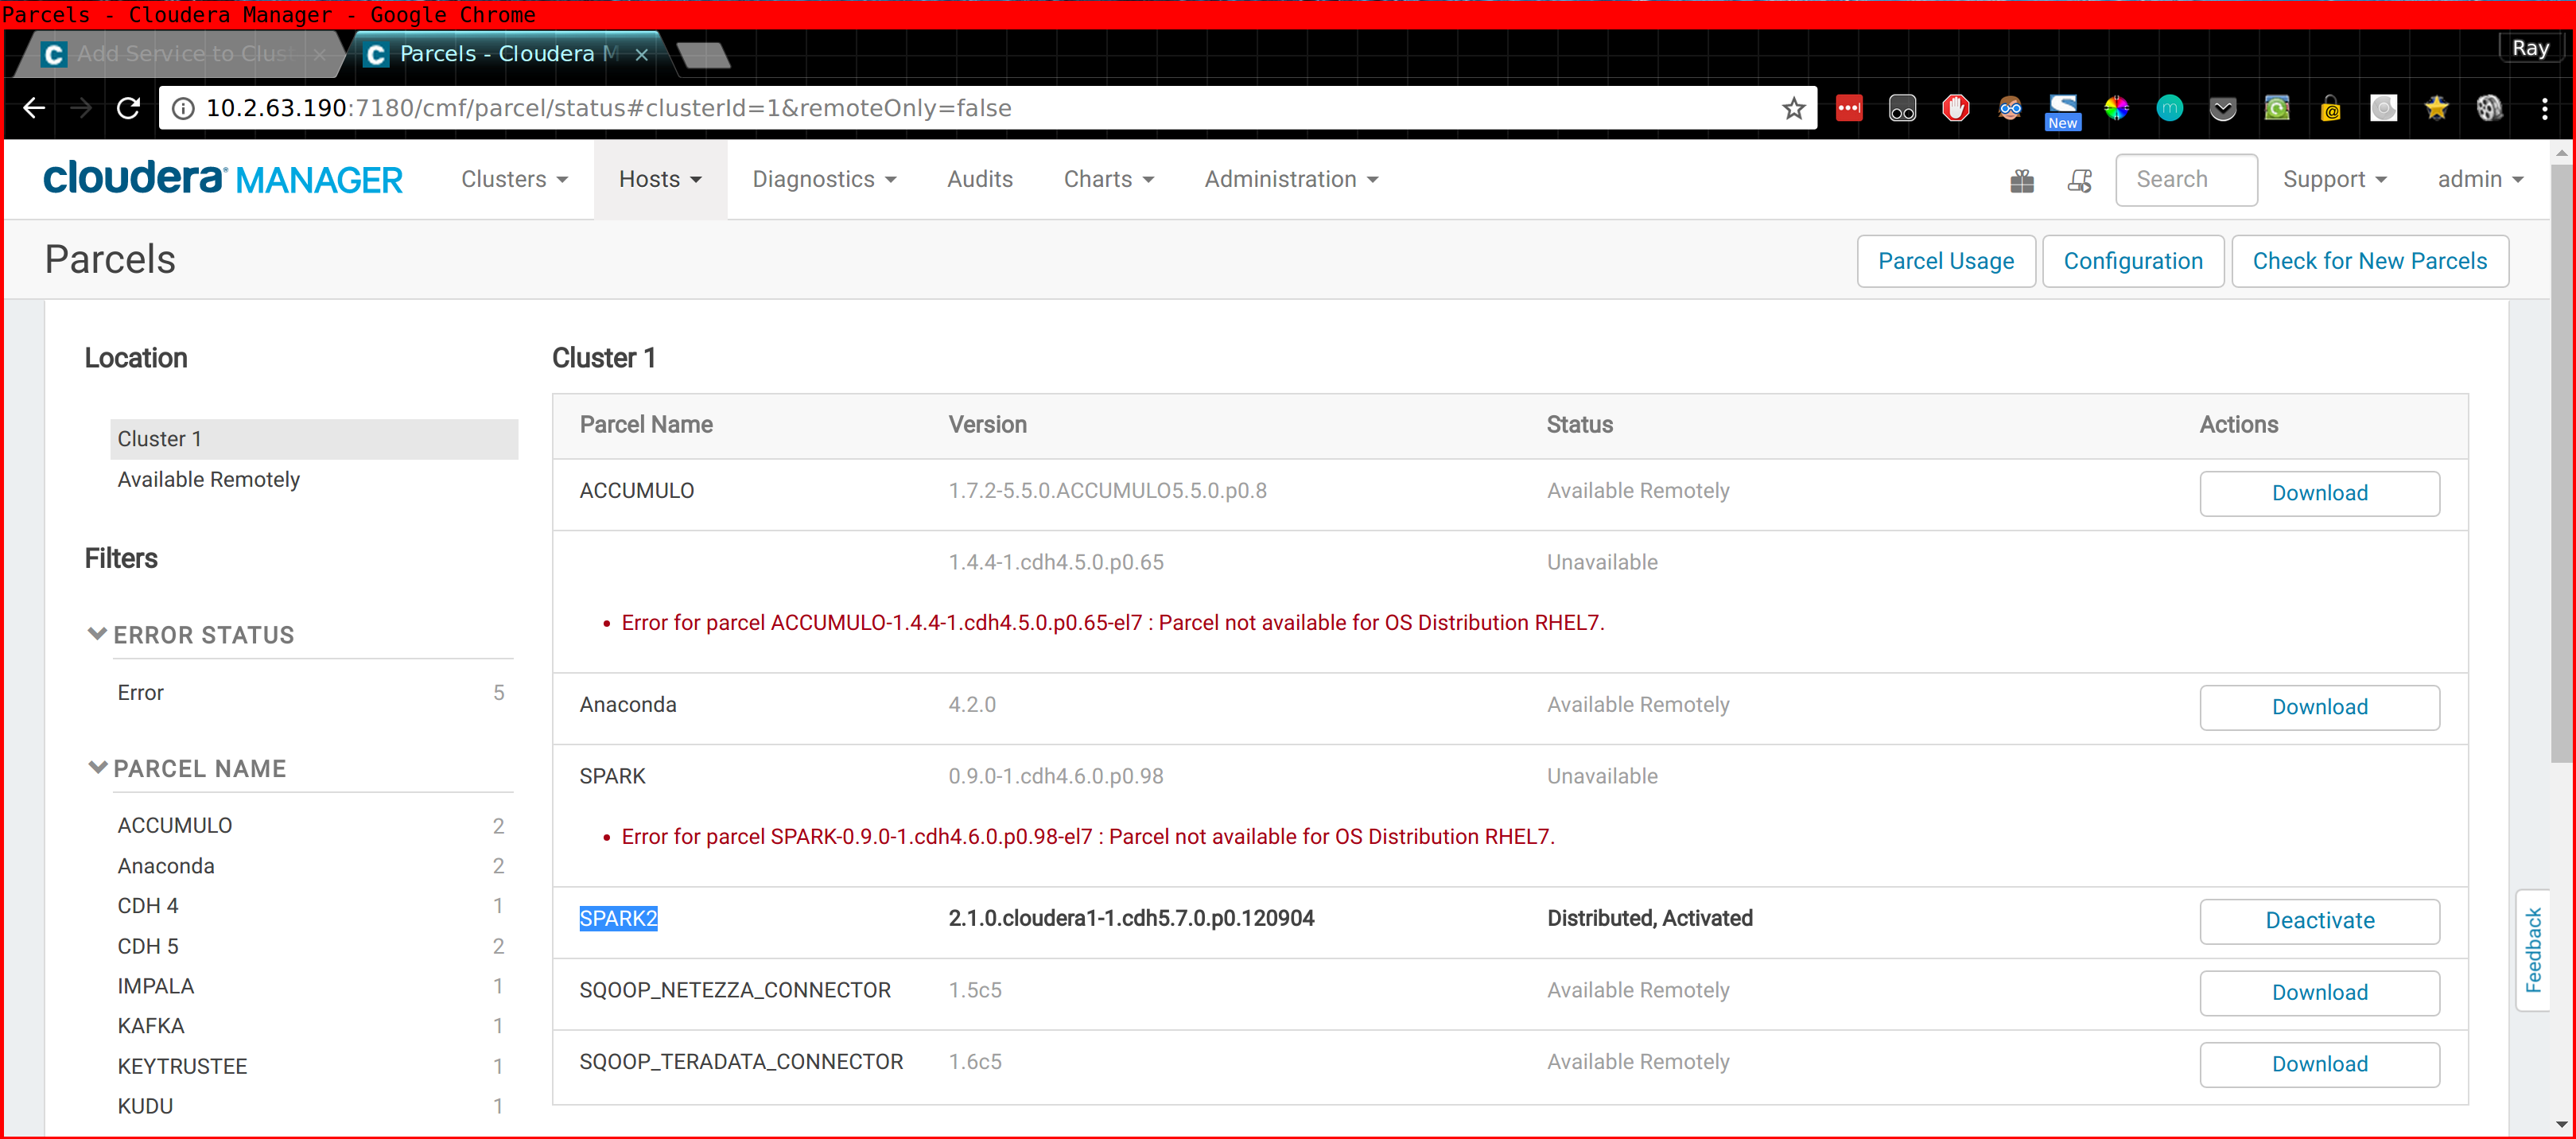
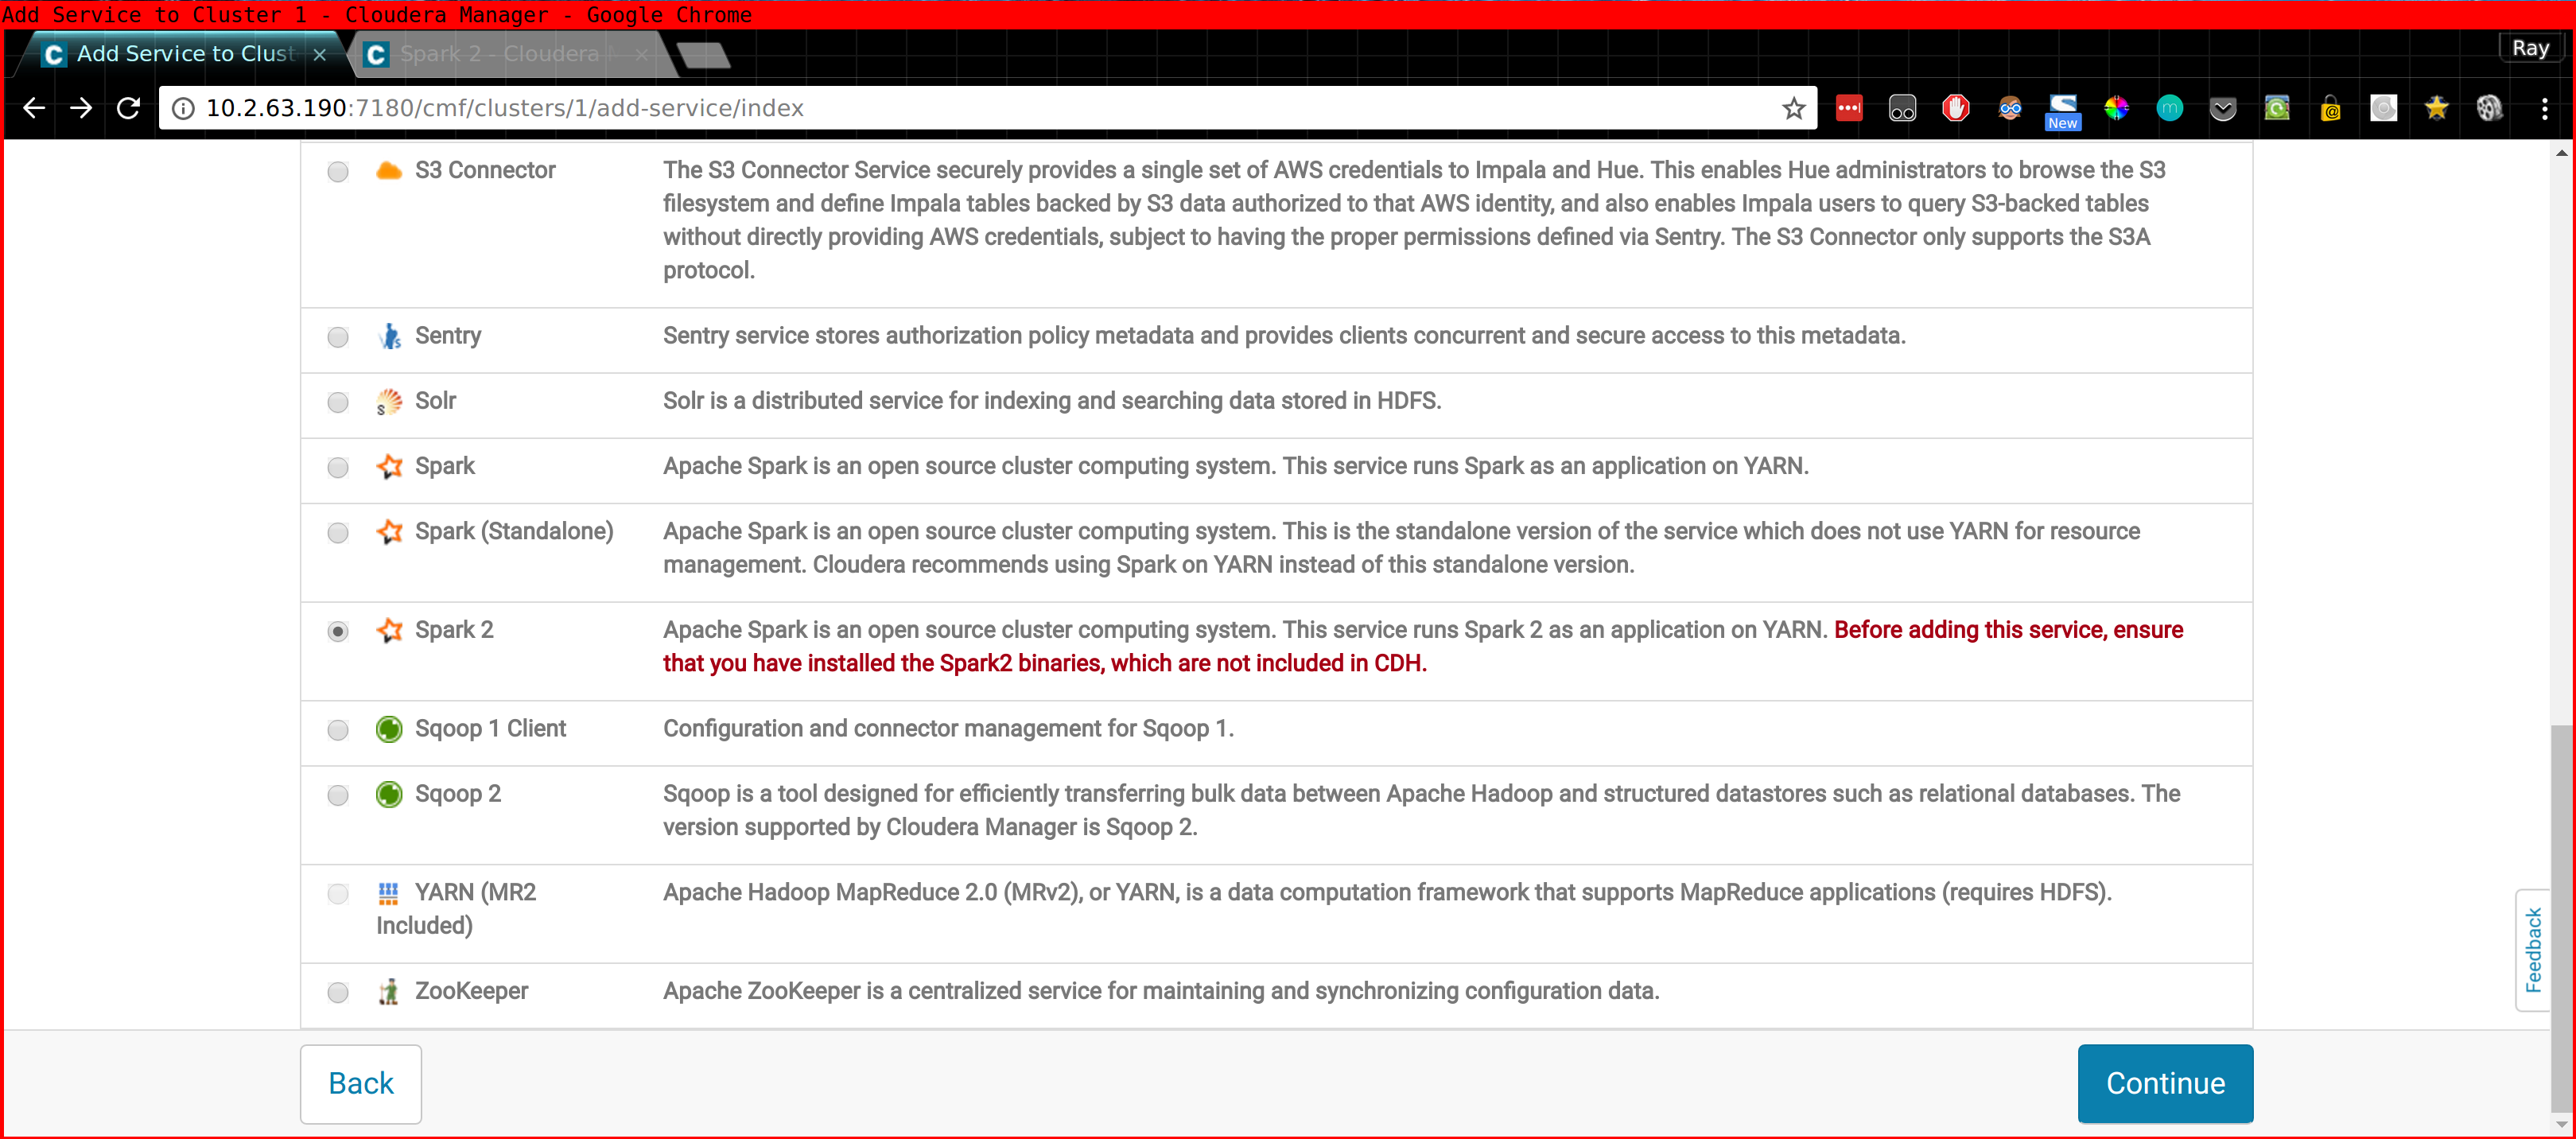
Please note that in the case of Spark 2 you also need to install the CSD (Custom Service Definition!) Or you won't find "Spark 2" when you do "Add new Service" inside CM. This stuff is described in the above links.
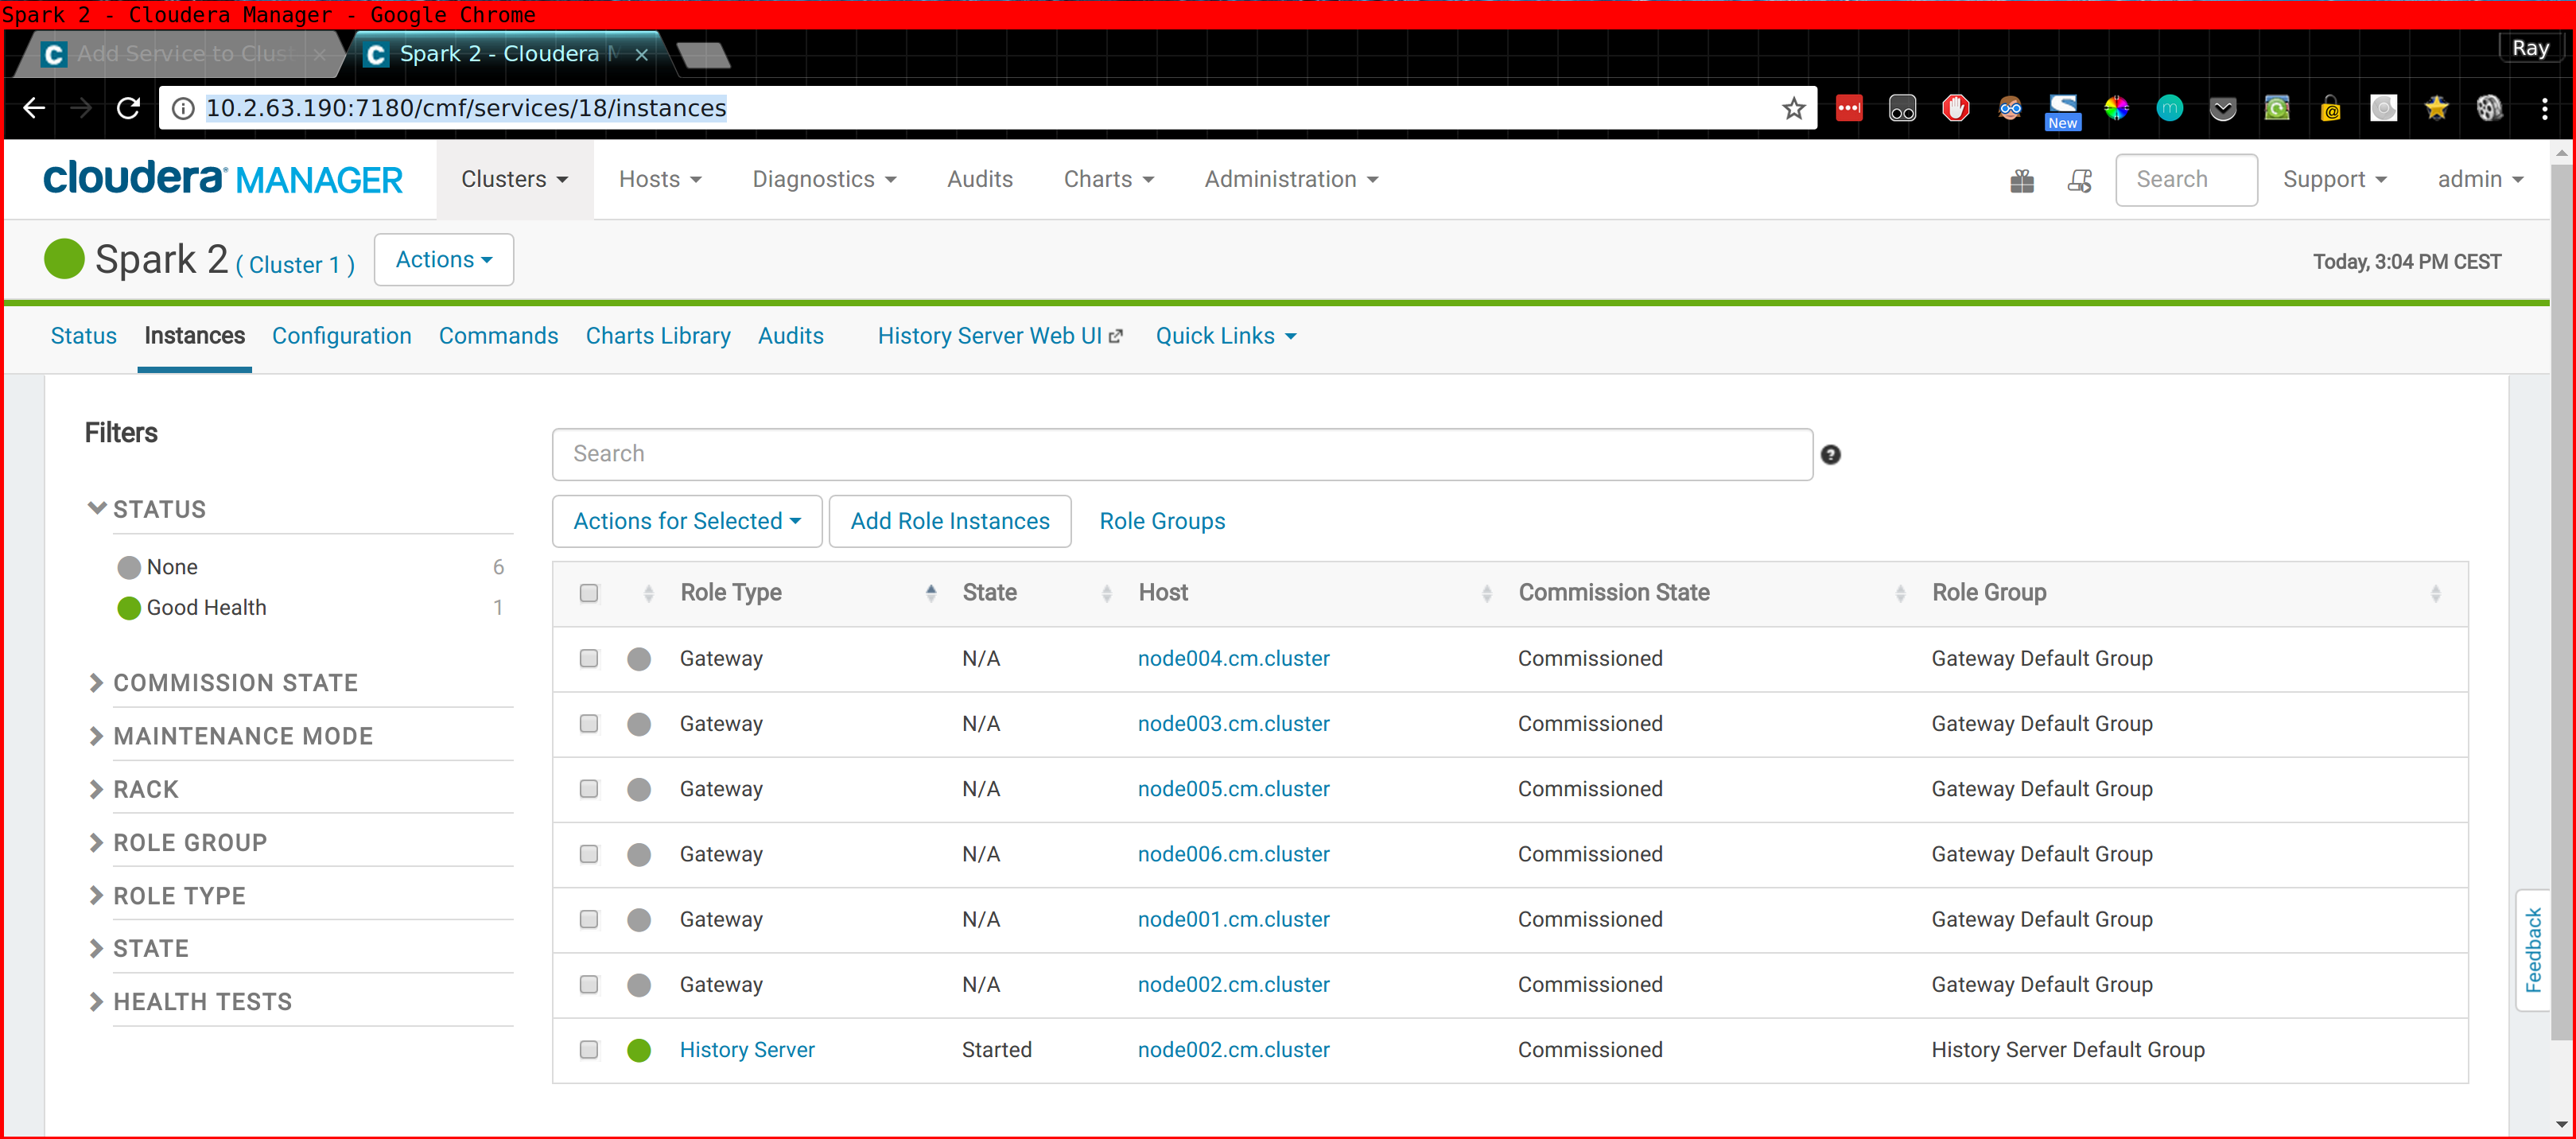
It is important that the Spark2 gateway role is assigned to the computenode where you intend to run CDSW.
Step 3: Install CDSW
Now that you have spark2-submit hopefully working on your node002.cm.cluster node, you can start to deploy CDSW there.
Write down where the additional 200GiB volumes are, something like /dev/vdc and /dev/vdd for example.
Simply yum localinstall /path/to/cloudera-data-science-workbench-1.0.1-1.el7.centos.x86_64.rpm and follow the instructions.
It should print out details on how to proceed (and you have to click OK on a lot of warnings probably)
The instructions include editing the cdsw.conf*
Which should be easy:
[root@node002 ~]# grep = /etc/cdsw/config/cdsw.conf
DOMAIN="node002.cm.cluster"
MASTER_IP="10.141.0.2"
DOCKER_BLOCK_DEVICES="/dev/vdd"
APPLICATION_BLOCK_DEVICE="/dev/vdc"
TLS_ENABLE=""
# You must also set TLS_ENABLE=true above to enable and enforce termination.
TLS_CERT=""
TLS_KEY=""
HTTP_PROXY=""
HTTPS_PROXY=""
ALL_PROXY=""
NO_PROXY=""
KUBE_TOKEN=05023c.3a168925213858dc
If a previous cdsw init failed, just run cdsw reset first.
One of the steps that failed during cdsw init in my case was docker, I edited the Docker service file (systemctl status docker to find the location)
I removed the --storage parameters from /etc/systemd/system/docker.service:
ExecStart=/usr/bin/docker daemon \
  --log-driver=journald \
  -s devicemapper \
  --storage-opt dm.basesize=100G \
  --storage-opt dm.thinpooldev=/dev/mapper/docker-thinpool \
  --storage-opt dm.use_deferred_removal=true \
  --iptables=false
Leaving:
ExecStart=/usr/bin/docker daemon \
  --log-driver=journald \
  -s devicemapper \
  --iptables=false
Before running cdsw init.
Please write down the kubeadm join command that is suggested, and have fun waiting for watch cdsw status.
- Make sure you create a user in HDFS (i.e., su hdfs, hdfs dfs ... on one of the computenodes)
Adding extra nodes to the CDSW Kubernetes cluster
Forgot to write details down for this, but I think you can just yum localinstall the cdsw rpm first for all dependencies like docker, kubernetes. Then there is the following command you can execute:
kubeadm join --token=05023c.3a168925213858dc 10.141.0.2This was printed earlier when we ran cdsw init on node002.
Test setup
In my case I did not really properly configure DNS etc., it's just a test setup. So I needed to add the following to my hosts file and add some of the more important hosts:
10.141.0.2 node002 node002.cm.cluster livelog.node002.cm.cluster consoles.node002.cm.cluster(For console access some random hostname is used, you may have to add those in case you stumble upon a non resolving hostname..)
You might need to start a tunnel to the cluster if your computenodes are not exposed like this:
function tun {
    sshuttle -r root@$1 10.141.0.0/16
}

tun <IP>
A while ago, 10 years ago actually, I attended London calling 2006, only
one of the two days. Mostly bands from the UK making noise ![]() , Howling Bells
definitely was the odd one out here.
These videos were broadcasted in The Netherlands on TV by the VPRO, and
recorded by 3voor12, I don't know exactly but both kind of cultural/subsidized
entities.
Anyway I didn't record from TV but I downloaded the internet stream, it was
rotating all the recorded gigs. Anyway I got lucky it
was the third one so I didn't have to wait long. Howling Bells was the only one
I was interested in.
, Howling Bells
definitely was the odd one out here.
These videos were broadcasted in The Netherlands on TV by the VPRO, and
recorded by 3voor12, I don't know exactly but both kind of cultural/subsidized
entities.
Anyway I didn't record from TV but I downloaded the internet stream, it was
rotating all the recorded gigs. Anyway I got lucky it
was the third one so I didn't have to wait long. Howling Bells was the only one
I was interested in.
You can download the original file: HowlingBells.asf (356 MiB). I was still capturing the previous concert, so you have to skip through it first, or just view the YouTube one where I extracted only the Howling Bells part (but that file is > 1 GiB because I used a huge bitrate "Just in case").. I couldn't find any video editing software (at least ~ 2006, even even a later years) that could process this .asf file, as it's a bit corrupt because it was an endless stream that I interrupted after the concert.
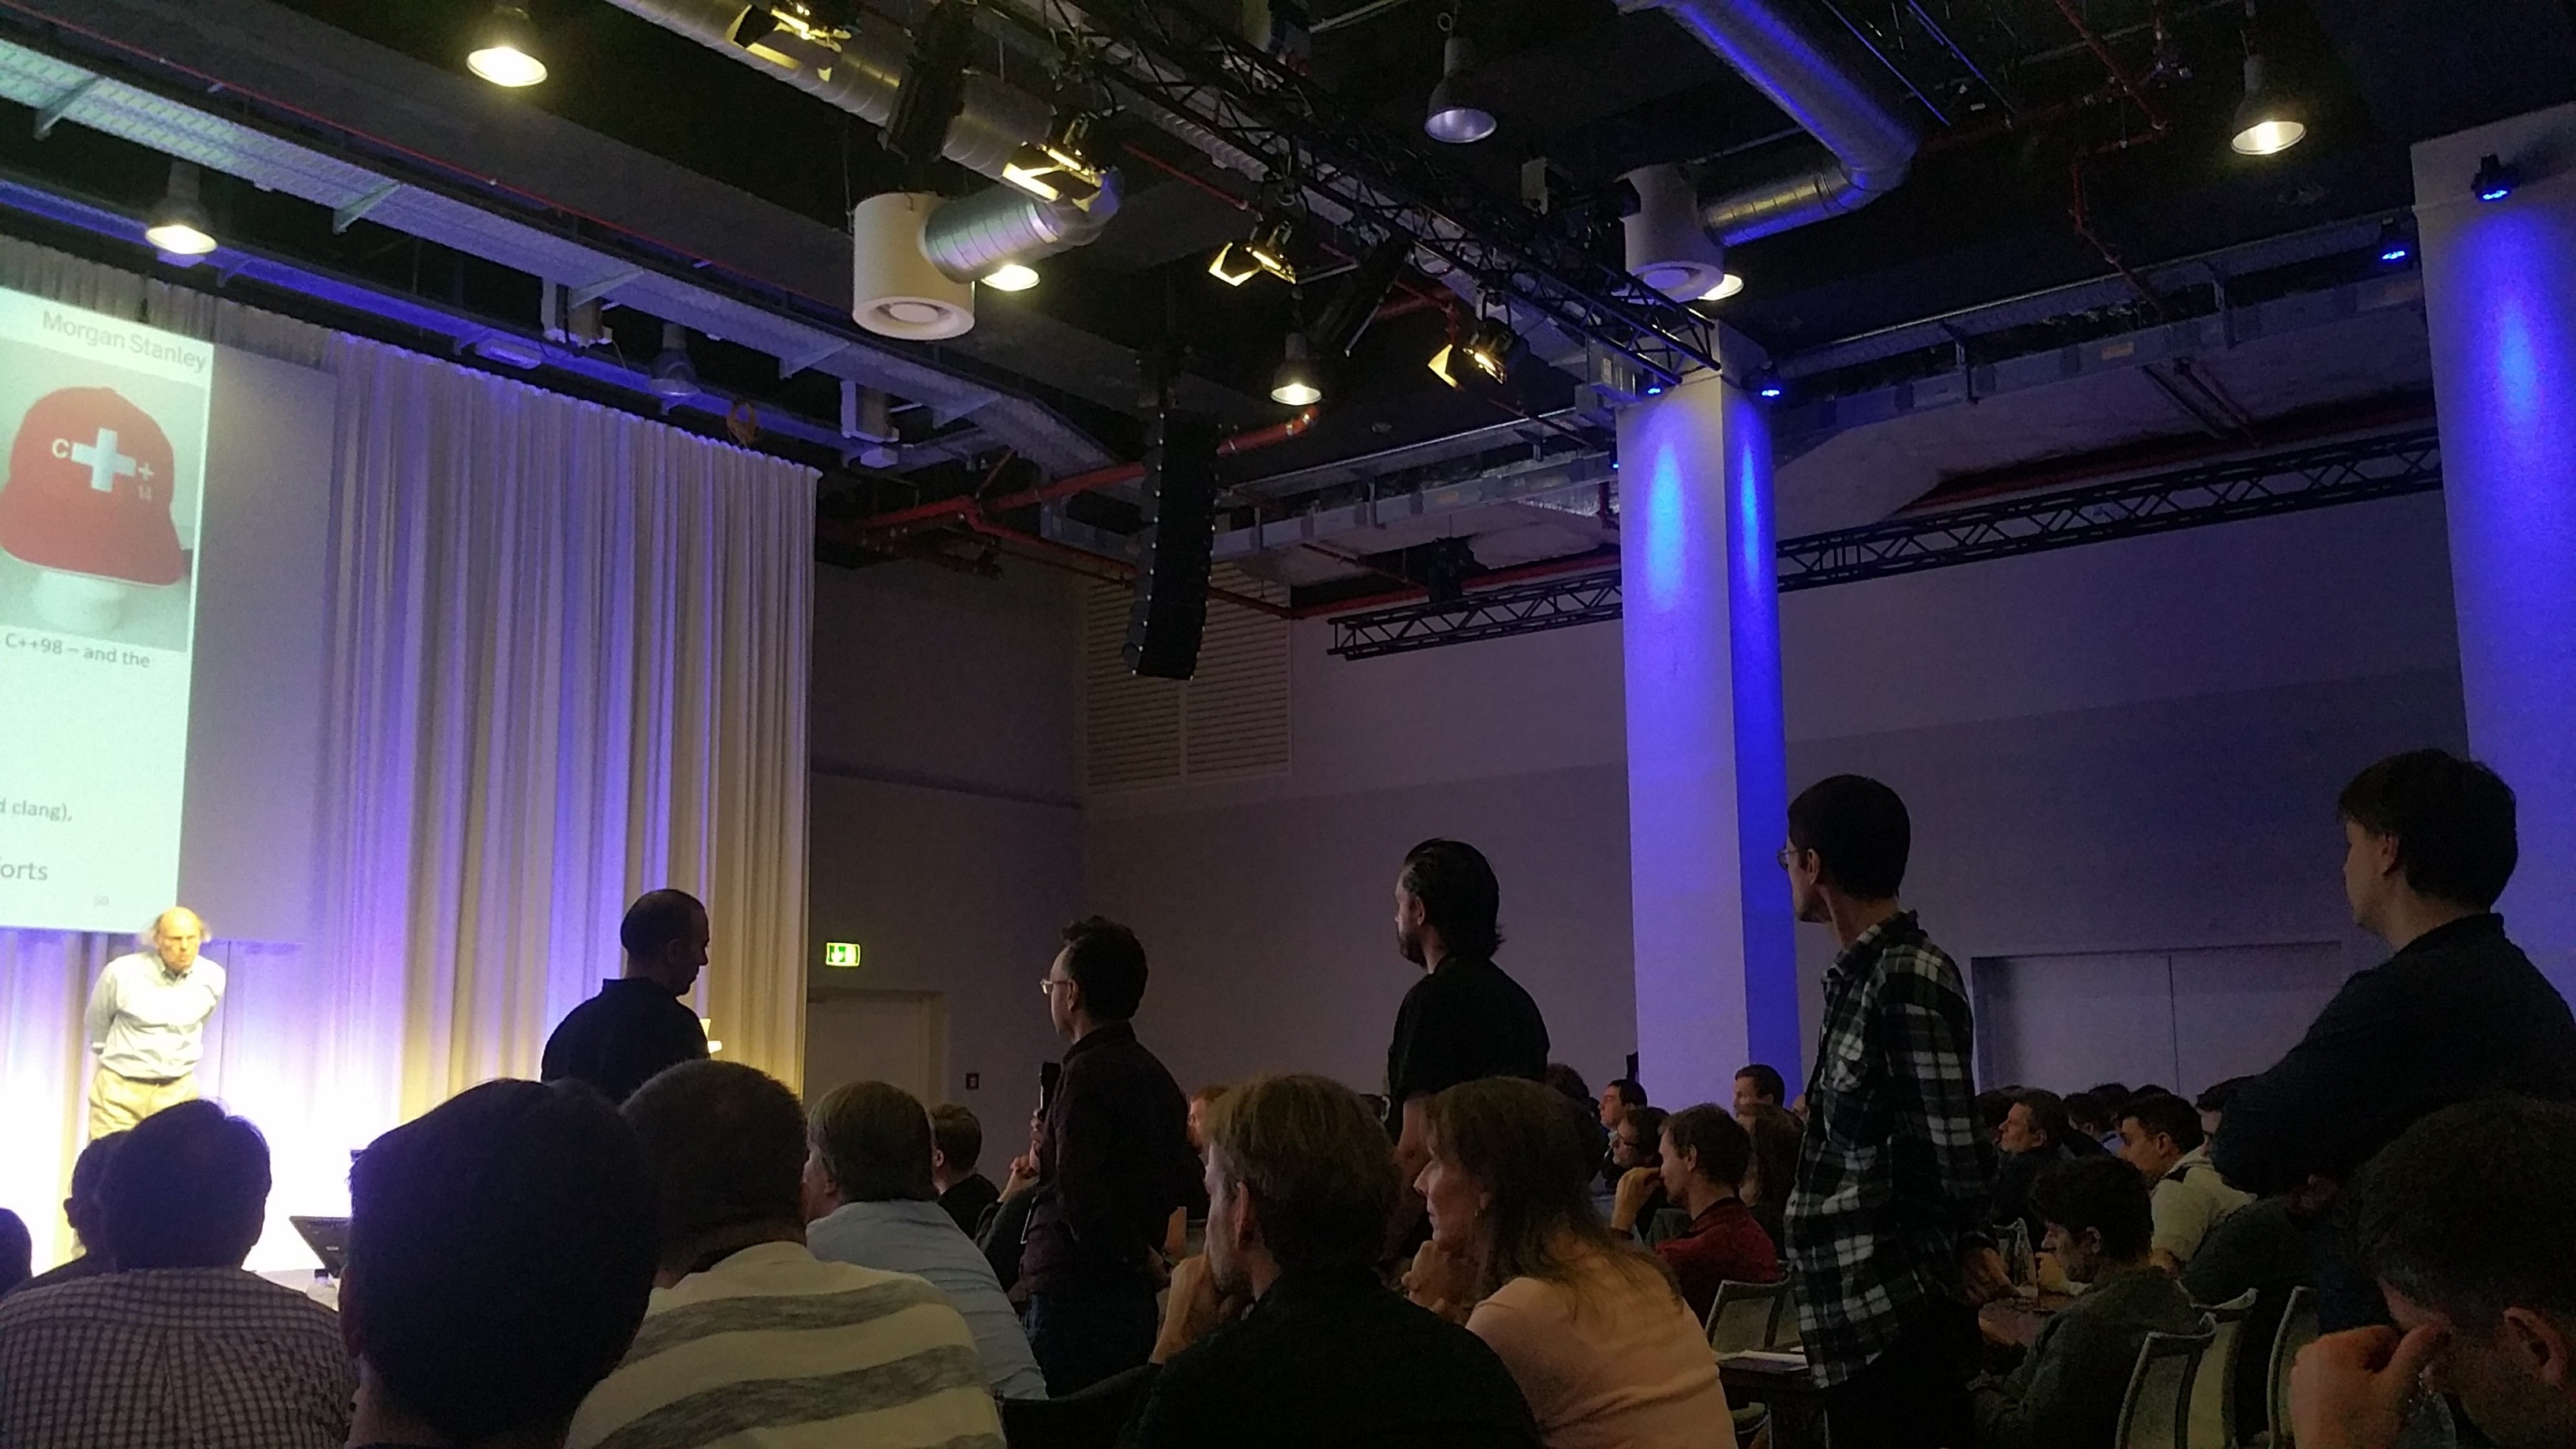
 Finally, I was able to attend this conference, missing out two years in a row, and it was great.
So far it has been the largest yet with 600 attendees, and AFAIK Bjarne Stroustrup was present for the first time this year.
Finally, I was able to attend this conference, missing out two years in a row, and it was great.
So far it has been the largest yet with 600 attendees, and AFAIK Bjarne Stroustrup was present for the first time this year.
I went to Berlin with my girlfriend two days before the event so we had a chance to see Berlin. Even though the weather was very much what you would expect around this time of year, cloudy, rainy, etc. we had a great time. Especially renting bikes and sightseeing.
[Image caption] Brief moment of no-rain..
Talks I attended... DAY 1
Opening Keynote - Bjarne Stroustrup
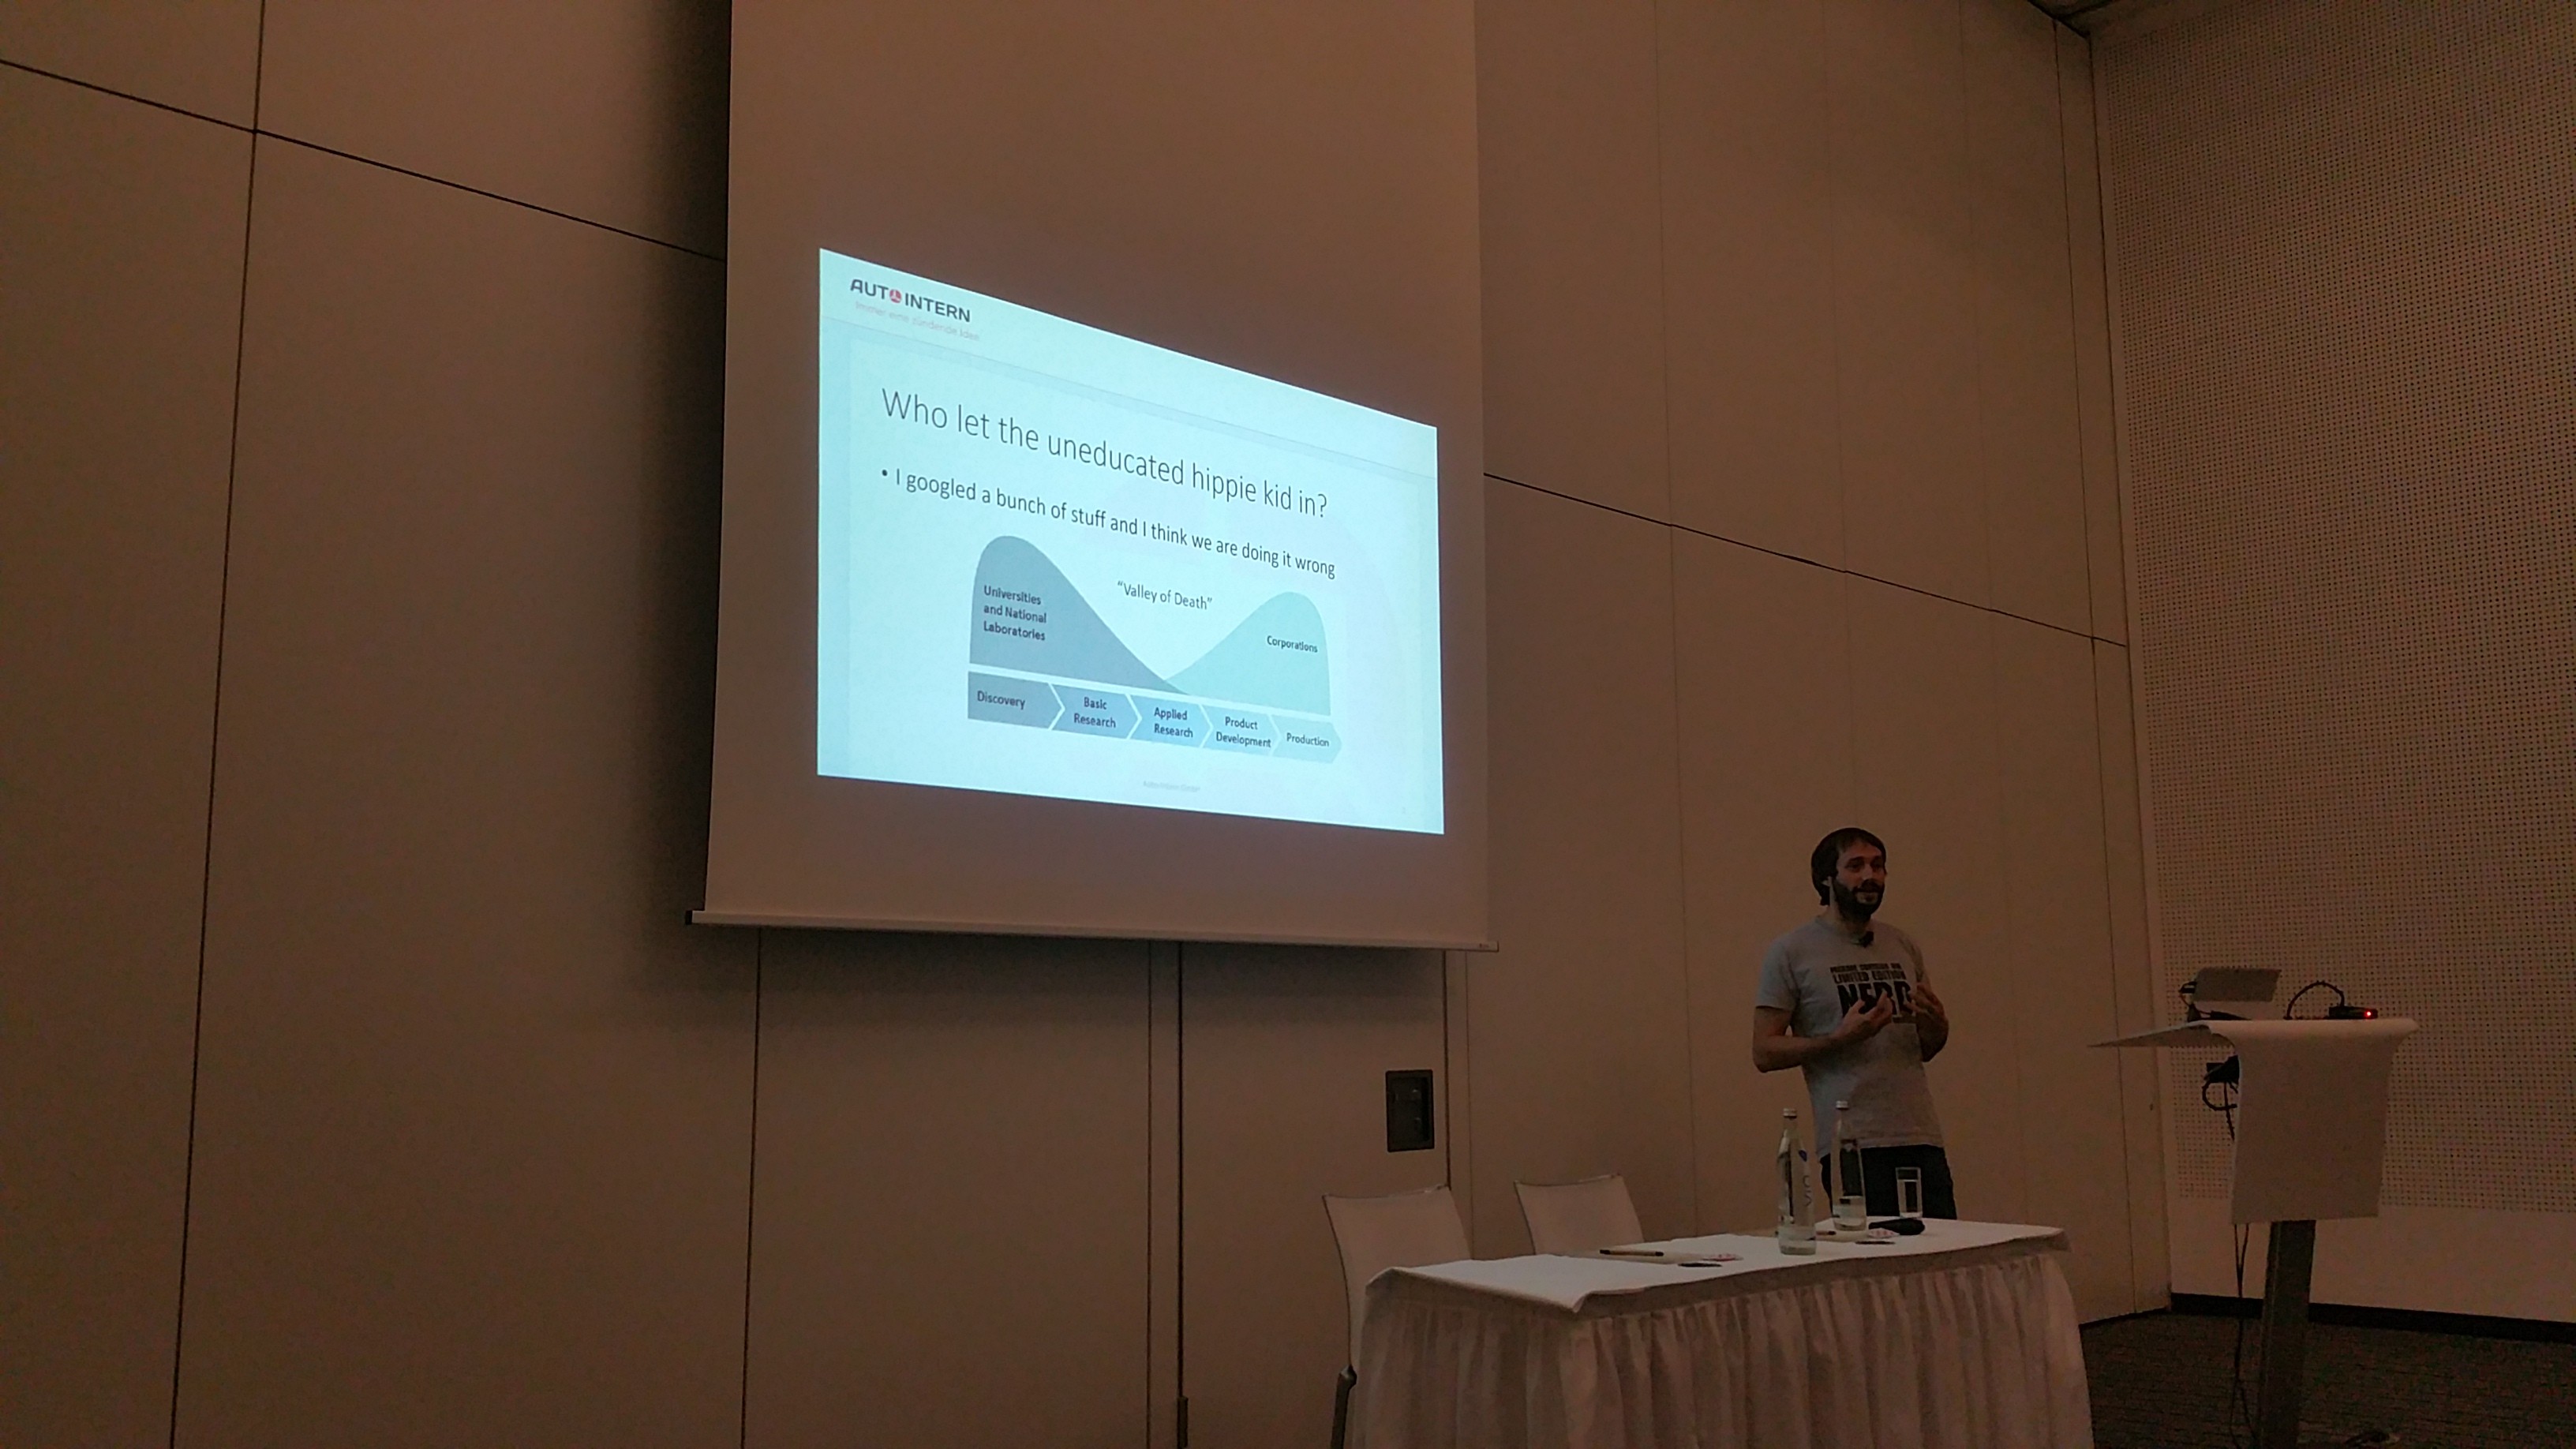
What is C++ and what will it become? It was a nice presentation showing the strength of C++ and providing a little history here and there (like code below). Funny quote from the presentation "Only a computer scientist makes a copy then destroys the original"; The committee has a difficult task, making the C++ language less complex, but the only thing the committee can do is add more to it ![]() , but they still succeed (i.e., with
, but they still succeed (i.e., with auto, constexpr, ..).
int i; // 70's?
for (i=0; i<10; i++) a[i] = 0;
----------
for (int i=0; i<10; i++) a[i] = 0; // 80's? no declaration outside the for
----------
for (auto &el : a) el = 0; // mistakes like reading out of bounds no longer possible
                           // ... also mistakes like; for (int i=0; i<10; j++) {}
Boris Schäling asked "Scott Meyers retired from C++ a year ago; do we need to be worried about you?", luckily we don't have to worry ;-). Bjarne answered that he tried a few times to quit C++ in the past, but apparently he is not very good at it ![]() .
.

Learning and teaching Modern C++ - Arne Mertz
The speaker made an interesting point regarding some pitfalls, i.e. that many C++ developers learned C first, pointers, pointer arithmetic, C++03, C++11, .., basically a "layered evolution". However Modern C++ isn't a layered evolution, rather it is a "moving target". Nowadays we prefer make_unique, unique_ptr and therefor why not postpone teaching new, delete, new[], delete[], pointer arithmetic etc. when teaching Modern C++? The same goes for C-style arrays, more complex to teach as opposed to std::array.
Actually kind of sad news; there are still schools in some Countries where C++ is taught with Turbo C++ (see this SO question from a few days ago) compiler (which is extremely outdated). Other notes I scribbled down were for me to check "clang tidy" and adding "isocpp.org" to my RSS feeds.
Wouter van OOijen--a professor teaching C++ in the context of embedded devices--made a good point: the order in which material is presented to students is the most difficult thing to get right. In most books on C++ the order doesn't make sense for embedded, that's why he creates his own material.
Implementation of a multithreaded compile-time ECS in C++14 - Vittorio Romeo
This was quite interesting, maybe it was just me but in the beginning of the presentation it wasn't clear to me what an Entity Component System was, it became clear to me during the talk though. He walked us through the implementation, advanced templating, lambdas, bit fiddling, all quite interesting, maybe a bit too much content for one presentation but very impressive stuff. The room temperature during the presentation was extremely hot, making it sometimes difficult to concentrate and the talk went a bit over the scheduled time.
Some stuff I found interesting: the usage of sparse sets, the use of proxy objects to make sure that certain methods of the library cannot be called at the wrong time.
ctx->step([&](auto& proxy)
    {
        // do something with proxy
    });
He went through a large list of features and how they are implemented ![]()
Ranges v3 and microcontrollers, a revolution -- Odin Holmes
 Quite an awesome talk this one, the speaker is extremely knowledgeable on meta programming and embedded programming.
His company works with devices with very little memory (just a few kilobyte) and this talk was very forward looking.
There was a crash course regarding limitations for such devices, there is limited stack space, how do exceptions and interrupts play along with it.
Quite an awesome talk this one, the speaker is extremely knowledgeable on meta programming and embedded programming.
His company works with devices with very little memory (just a few kilobyte) and this talk was very forward looking.
There was a crash course regarding limitations for such devices, there is limited stack space, how do exceptions and interrupts play along with it.
He then started with real demo/hello world for such a device and demonstrated how even that small code contained bugs and a lot of boilerplate.
The rest of the talk he showed how to improve it, like instead of parsing (dangerously) with scanf (you can overflow the buffer, so you need a "large enough" buffer up-front... "And we all know that coming up with a size for a large enough buffer is easy, right?" ![]() ) can be replaced with a statemachine known at compile time.
Ranges can be applied to lazy evaluate input, and as a result it would consume only the minimal memory.
) can be replaced with a statemachine known at compile time.
Ranges can be applied to lazy evaluate input, and as a result it would consume only the minimal memory.
C++ Today - The Beast is back - Jon Kalb
Why was C/C++ successful? It was based on proven track record, and not a "pure theoretical language". High-level abstractions at low cost, with a goal of zero-abstraction principle. In other words; not slower than you could do by coding the same feature by hand (i.e., vtables).
If you like a good story and are curious about why there was a big red button on the IBM 360, the reason behind the C++ "Dark ages" (2000 - 2010), where very little seem to happen, then this is the presentation to watch. Spoiler alert: cough Java cough, OOP was the buzzword at the time, it was "almost as fast", computers got faster and faster, we "solved the performance issue"!
Interesting statements I jotted down "Managed code optimizes the wrong thing (ease of programming)", and regarding Java's finally (try {} catch {} finally {}): "finally violates DRY". He then asked the audience a few times what DRY stands for, which is quite funny as some people realize they were indeed repeating themselves, not all as someone else yelled "the opposite of WET" ![]() .
He also "pulled the age card" when discussing Alexander Stephanov (the author of the STL) "You kids think
.
He also "pulled the age card" when discussing Alexander Stephanov (the author of the STL) "You kids think std::vector grew on trees!".
DAY 2
Functional reactive programming in C++ - Ivan Cukic
Talk of two parts, first functional programming: higher order functions, purity, immutable state. Functional thinking = data transformation. He discussed referential transparency, f.i. replacing any function with its value should produce the same outcome. This can depend on your definition.
int foobar()
{
    std::cout << "Returning 42..." << '\n';
    return 42;
}
Above function when used in int n = foobar(); can be replaced by 42, and the line of code would result in exactly the same thing (n containing 42), however the console output won't be printed. Whether you consider std::cout to count as part of the referential transparency is up to you.
He continued with Object thinking = no getters, ask the object to do it. "Objects tend to become immutable.". I will have to review the presentation to get exactly what was meant by this.
Next: reactive programming, if I am correct this was his definition:
- responds quickly
- resilient to failure
- responsive under workload
- based on message-passing
Note: reacting not replying, i.e., piping Linux shell commands there is only one-way data flow. To conclude, some random notes I made during his talk below.
- He's writing a book on Functional programming in C++
flatmapfrom functional programming does[x, a], [y, b, c]->x, a, y, b, c.- His talk reminded me to lookup the meaning of placing
&&behind a member function declaration.
See below for an example from cppreference.com.
#include <iostream>

struct S {
    void f() & { std::cout << "lvalue\n"; }
    void f() &&{ std::cout << "rvalue\n"; }
};

int main(){
    S s;
    s.f();            // prints "lvalue"
    std::move(s).f(); // prints "rvalue"
    S().f();          // prints "rvalue"
}
The Speed Game: Automated Trading Systems in C++ - Carl Cook
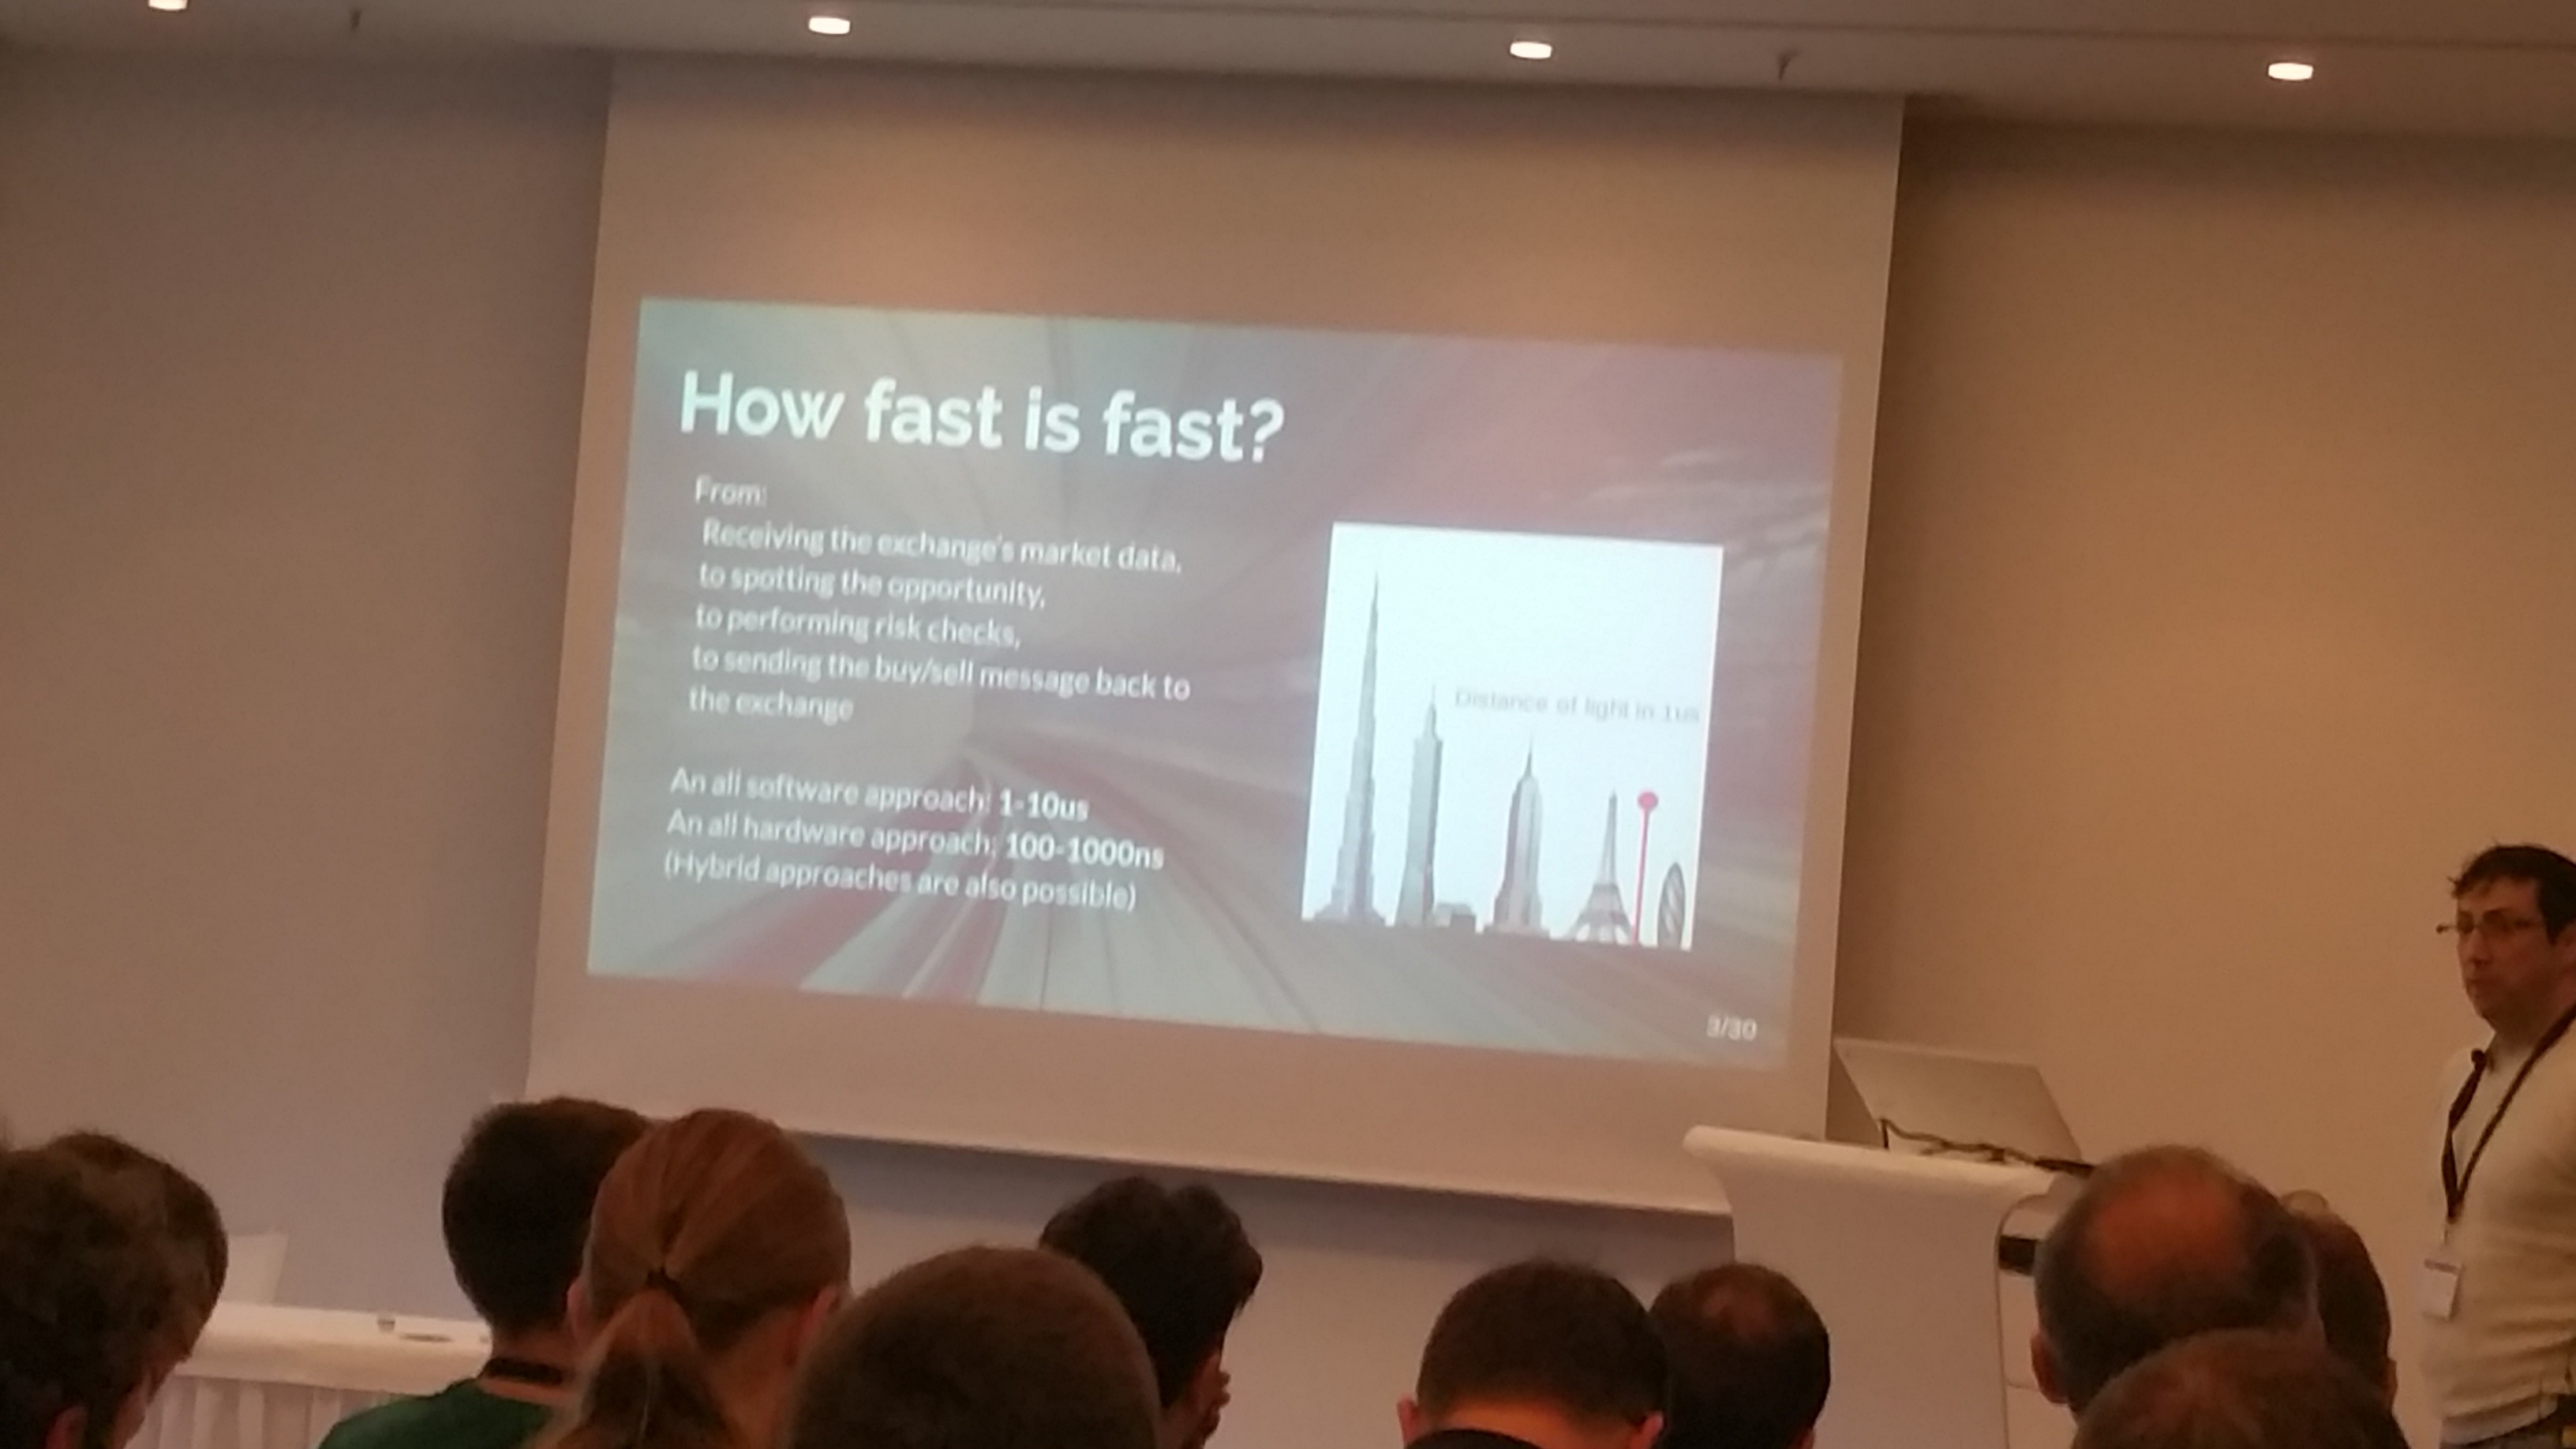 This talk was probably one of the most well attended talks at the conference. The room was packed.
Coming in slightly late I had to sit down on my knees for the entire talk.
Which was worth it, I think I liked this talk most of all I attended.
It was just the right mix of super interesting material and practical advice.
This talk was probably one of the most well attended talks at the conference. The room was packed.
Coming in slightly late I had to sit down on my knees for the entire talk.
Which was worth it, I think I liked this talk most of all I attended.
It was just the right mix of super interesting material and practical advice.
Coming from Amsterdam where Automated Trading companies seem to kind of dominate C++, it has always been very mysterious what exactly it is they do. It felt to me like it was basically the first time the veil was lifted a little bit. It's just amazing to hear how far they go in order to get the lowest latency possible. Within the time it takes for light to travel from the ground to the top of the Eiffel tower they can take an order, assess whether it's interesting or not, and place the order... times ten!
// Some practical advice, instead of the following..
if (checkForErrorA)
    handleErrorA();
elseif (checkForErrorB)
    handleErrorB();
elseif (checkForErrorC)
    handleErrorC();
else
    executeHotPath();

// Aim for this..
uint32_t errorFlags;
if (errorFlags)
    handleError(errorFlags);
else
{
    ... hotpath
}
Really interesting talk to watch whenever it comes online, it shows the importance of optimizing hardware,
bypassing the kernel completely in the hot path, staying in user space for 100%, this includes network I/O (f.i., OpenOnload), cache warming, beware of signed/unsigned conversions, check the assembly, inplace_function (the speakers proposals, stdext::inplace_function<void(), 32>), benchmarking without the 'observable effect' by observing network packets, and more.
One note regarding Network I/O for example; if you read a lot but very little is interesting to the hot path, you may negatively affect your cache. A solution would be to offload all the reads to a different CPU and cherry-pick only the interesting reads and send them to the "hot" CPU.
Lock-free concurrent toolkit for hazard pointers and RCU - Michael Wong
Well, I was a bit tired at this point, so I cannot do the talk justice with a very thorough summary. Even if I could it's better to watch it from Michael Wong himself, because the slides help a lot in understanding the story.
I did learn a few things, maybe the first lesson for me is to try stay away from all of this.. ![]() Still, aside from being super complicated, it's also an interesting topic, and good to know more about.
The ABA problem: he had good slides that visualized actually step-by-step the challenge of updating data in a multi-threading situation, having readers while writing to it, all wrapped in a fun story of Schrödingers Cat (and Zoo).
Solutions discussed were hazard pointers and RCU (Read Copy Update).
Still, aside from being super complicated, it's also an interesting topic, and good to know more about.
The ABA problem: he had good slides that visualized actually step-by-step the challenge of updating data in a multi-threading situation, having readers while writing to it, all wrapped in a fun story of Schrödingers Cat (and Zoo).
Solutions discussed were hazard pointers and RCU (Read Copy Update).
The gains you can get by starting late, having a grace period so you can do multiple updates at the same time are interesting to learn about. Situations where "being lazy" actually pays off!
Lightning talks!
 Surprise! They had secret lightning talks planned. To be honest at first I thought it was a bit long to have 1 hour and 40 minutes planned for a Meeting C++ update/review, so this was a nice surprise.
My favorite lightning talk was from Michael Caisse reading from the standard as if it were a very exiting story, hilarious.
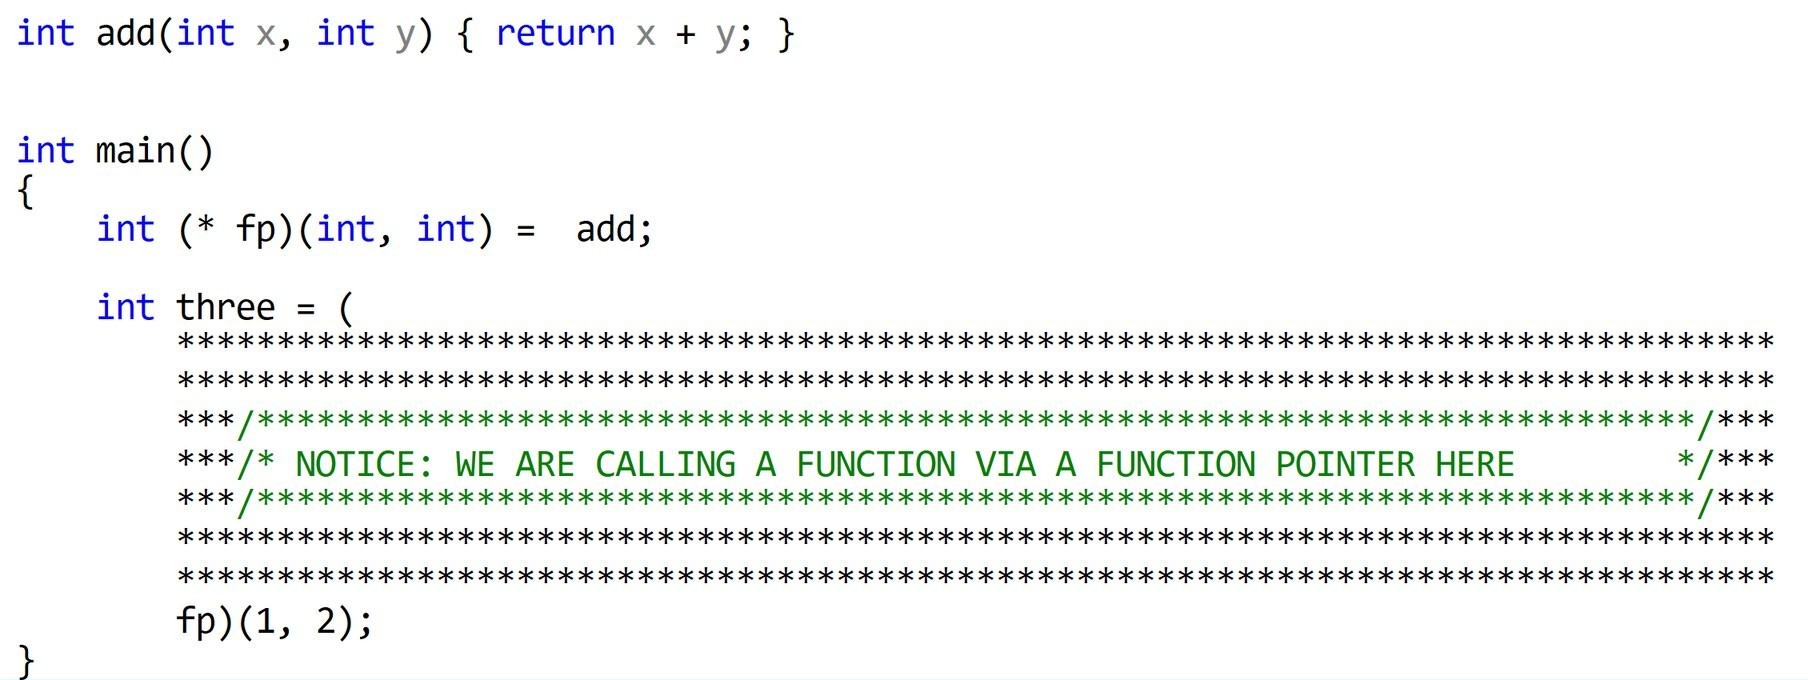
Second James McNellis' "function pointers all the way down" (like "Turtles all the way down", actually Bjarne also had a reference to this in his keynote).
The remaining lightning talks were also very good: Michael Wong, Jens Weller, Chandler Carruth, and Bjarne's.
The latter on Concepts was quite interesting; "what makes a good concept?" It has to have semantics specifying it, which in practice seems to be an efficient design technique. Quite funny was his "Onion principle" on abstractions (IIRC?), "you peel away layer by layer, and you cry more and more as you go along"
Surprise! They had secret lightning talks planned. To be honest at first I thought it was a bit long to have 1 hour and 40 minutes planned for a Meeting C++ update/review, so this was a nice surprise.
My favorite lightning talk was from Michael Caisse reading from the standard as if it were a very exiting story, hilarious.
Second James McNellis' "function pointers all the way down" (like "Turtles all the way down", actually Bjarne also had a reference to this in his keynote).
The remaining lightning talks were also very good: Michael Wong, Jens Weller, Chandler Carruth, and Bjarne's.
The latter on Concepts was quite interesting; "what makes a good concept?" It has to have semantics specifying it, which in practice seems to be an efficient design technique. Quite funny was his "Onion principle" on abstractions (IIRC?), "you peel away layer by layer, and you cry more and more as you go along" ![]() . Also Jens talk was really fun, it started with end of the world scenarios, working towards the future C++ standards.
. Also Jens talk was really fun, it started with end of the world scenarios, working towards the future C++ standards.
C++ metaprogramming: evolution and future directions - Louis Dionne
The closing keynote was a really clear and relaxed presentation of how meta programming evolved,
and in particular how boost::hana did. Again a nice lesson of history where Alexandrescu's Modern C++, boost::mpl, boost::fusion and the like all passed the revue. He showed what you can do with boost::hana at compile-time and runtime. His talk really opened my eyes on using constexpr, integral_constant, differences in meta programming with types and objects, and a lot more. It's amazing what his library can do. He argued the world needs more meta programming, but less template meta programming and concluded by sharing his view for the future.
The conference
There was a fun quiz, with really difficult puzzles (C++ programs) that had to be solved in < 3 minutes each. This was basically similar to peeling Bjarne's Onion.. but in a good way.
Between talks there were lunch-break Meetups planned (each 20 minutes, each had a specific topic). I attended two and my view is that it's a great idea, but the fact people have to come from talks, and leave on time to catch the next one, sometimes caused the time to be way too short (or yourself missing out on a talk because the room is now full).
The organization was super, the drinks and food, especially the second day. The Andel's Hotel is a really good location, the Hotel as well (if you are lucky enough to get a room there). For me it was all really worth the money.
Personally I like to write down a summary for myself, but I hope this blog post was also a fun to read to someone else!
The following steps are to quickly test how this stuff works.
Using my docker images (master, slave) and helper scripts on github, it's easy to get Cloudera Manager running inside a few docker containers. Steps: get most recent docker, install (GNU) screen, checkout the repo, in there do cd cloudera, bash start_all.sh. This should do it. Note that the image(s) require being able to invoke --privileged and the scripts currently invoke sudo. After running the script you get something like (full example output here).
CONTAINER ID        IMAGE                               COMMAND             CREATED             STATUS              PORTS                    NAMES
31e5ee6b7e65        rayburgemeestre/cloudera-slave:3    "/usr/sbin/init"    20 seconds ago      Up 17 seconds                                node003
f052c52b02bf        rayburgemeestre/cloudera-slave:3    "/usr/sbin/init"    25 seconds ago      Up 23 seconds                                node002
1a50df894f28        rayburgemeestre/cloudera-slave:3    "/usr/sbin/init"    30 seconds ago      Up 29 seconds       0.0.0.0:8888->8888/tcp   node001
54fd3c1cf93b        rayburgemeestre/cloudera-master:3   "/usr/sbin/init"    50 seconds ago      Up 48 seconds       0.0.0.0:7180->7180/tcp   cloudera
Not really in the way docker was designed perhaps, it's running systemd inside, but for simple experimentation this is fine. These images have not been designed to run in production, but perhaps with some more orchestration it's possible ![]() .
.
Step 1: install Cloudera Manager
One caveat because of the way docker controls /etc/resolv.conf, /etc/hostname, /etc/hosts, these guys show up in the output for the mount command.
The Cloudera Manager Wizard does some parsing of this (I guess) and pre-fills some directories with values like:
/etc/hostname/<path dn>
/etc/resolv.conf/<path dn>
/etc/hosts/<path dn>
Just remove the additional two paths, and change one to <path dn> only. There is a few of these configuration parameters that get screwed up. (Checked until <= CDH 5.8)
Step 2: install kerberos packages on the headnode
docker exec -i -t cloudera /bin/bash # go into the docker image for headnode

yum install krb5-server krb5-workstation krb5-libs

# ntp is already working

systemctl enable krb5kdc
systemctl enable kadmin
Configuration files need to be fixed, so starting will not work yet.
Step 3: modify /etc/krb5.conf
Into something like:
[logging]
 default = FILE:/var/log/krb5libs.log
 kdc = FILE:/var/log/krb5kdc.log
 admin_server = FILE:/var/log/kadmind.log

[libdefaults]
 dns_lookup_realm = false
 ticket_lifetime = 24h
 renew_lifetime = 7d
 forwardable = true
 rdns = false
 default_realm = MYNET
 default_ccache_name = KEYRING:persistent:%{uid}

[realms]
 MYNET = {
  kdc = cloudera.mynet
  admin_server = cloudera.mynet
 }

[domain_realm]
 .mynet = MYNET
 mynet = MYNET
In this example cloudera.mynet is just hostname --fqdn of the headnode which will be running kerberos.
(Note that mynet / MYNET could also be something like foo.bar / FOO.BAR.)
Step 4: modify /var/kerberos/krb5kdc/kdc.conf
[kdcdefaults]
 kdc_ports = 88
 kdc_tcp_ports = 88

[realms]
 MYNET = {
  #master_key_type = aes256-cts

  master_key_type = aes256-cts-hmac-sha1-96
  max_life = 24h 10m 0s
  max_renewable_life = 30d 0h 0m 0s

  acl_file = /var/kerberos/krb5kdc/kadm5.acl
  dict_file = /usr/share/dict/words
  admin_keytab = /var/kerberos/krb5kdc/kadm5.keytab
  supported_enctypes = aes256-cts:normal aes128-cts:normal des3-hmac-sha1:normal arcfour-hmac:normal camellia256-cts:normal camellia128-cts:normal des-hmac-sha1:normal des-cbc-md5:normal des-cbc-crc:normal aes256-cts-hmac-sha1-96
 }
I specifically added aes256-cts-hmac-sha1-96 as master key and supported encryption types,
and the max_life plus max_renewable_life properties.
But there is a chance Cloudera Manager might add this stuff as well.
Step 5: modify /var/kerberos/krb5kdc/kadm5.acl
*/admin@MYNET *Step 6: initialize the database
# kdb5_util create -r MYNET -s
Loading random data
Initializing database '/var/kerberos/krb5kdc/principal' for realm 'MYNET',
master key name 'K/M@MYNET'
You will be prompted for the database Master Password.
It is important that you NOT FORGET this password.
Enter KDC database master key: ******
Re-enter KDC database master key to verify: ******
Step 7: add master root/admin user
[root@rb-clouderahadoop2 krb5kdc]# kadmin.local
Authenticating as principal root/admin@MYNET with password.
kadmin.local:  addprinc root/admin
WARNING: no policy specified for root/admin@MYNET; defaulting to no policy
Enter password for principal "root/admin@MYNET": ******
Re-enter password for principal "root/admin@MYNET": ******
Principal "root/admin@MYNET" created.
kadmin.local:  ktadd -k /var/kerberos/krb5kdc/kadm5.keytab kadmin/admin
Entry for principal kadmin/admin with kvno 2, encryption type aes256-cts-hmac-sha1-96 added to keytab WRFILE:/var/kerberos/krb5kdc/kadm5.keytab.
Entry for principal kadmin/admin with kvno 2, encryption type aes128-cts-hmac-sha1-96 added to keytab WRFILE:/var/kerberos/krb5kdc/kadm5.keytab.
Entry for principal kadmin/admin with kvno 2, encryption type des3-cbc-sha1 added to keytab WRFILE:/var/kerberos/krb5kdc/kadm5.keytab.
Entry for principal kadmin/admin with kvno 2, encryption type arcfour-hmac added to keytab WRFILE:/var/kerberos/krb5kdc/kadm5.keytab.
Entry for principal kadmin/admin with kvno 2, encryption type camellia256-cts-cmac added to keytab WRFILE:/var/kerberos/krb5kdc/kadm5.keytab.
Entry for principal kadmin/admin with kvno 2, encryption type camellia128-cts-cmac added to keytab WRFILE:/var/kerberos/krb5kdc/kadm5.keytab.
Entry for principal kadmin/admin with kvno 2, encryption type des-hmac-sha1 added to keytab WRFILE:/var/kerberos/krb5kdc/kadm5.keytab.
Entry for principal kadmin/admin with kvno 2, encryption type des-cbc-md5 added to keytab WRFILE:/var/kerberos/krb5kdc/kadm5.keytab.
kadmin.local:  ktadd -kt /var/kerberos/krb5kdc/kadm5.keytab kadmin/changepw
Entry for principal kadmin/changepw with kvno 2, encryption type aes256-cts-hmac-sha1-96 added to keytab WRFILE:/var/kerberos/krb5kdc/kadm5.keytab.
Entry for principal kadmin/changepw with kvno 2, encryption type aes128-cts-hmac-sha1-96 added to keytab WRFILE:/var/kerberos/krb5kdc/kadm5.keytab.
Entry for principal kadmin/changepw with kvno 2, encryption type des3-cbc-sha1 added to keytab WRFILE:/var/kerberos/krb5kdc/kadm5.keytab.
Entry for principal kadmin/changepw with kvno 2, encryption type arcfour-hmac added to keytab WRFILE:/var/kerberos/krb5kdc/kadm5.keytab.
Entry for principal kadmin/changepw with kvno 2, encryption type camellia256-cts-cmac added to keytab WRFILE:/var/kerberos/krb5kdc/kadm5.keytab.
Entry for principal kadmin/changepw with kvno 2, encryption type camellia128-cts-cmac added to keytab WRFILE:/var/kerberos/krb5kdc/kadm5.keytab.
Entry for principal kadmin/changepw with kvno 2, encryption type des-hmac-sha1 added to keytab WRFILE:/var/kerberos/krb5kdc/kadm5.keytab.
Entry for principal kadmin/changepw with kvno 2, encryption type des-cbc-md5 added to keytab WRFILE:/var/kerberos/krb5kdc/kadm5.keytab.
kadmin.local:  exit
This will be the user we will give Cloudera to take over managing kerberos.
Step 8: start services
systemctl start krb5kdc
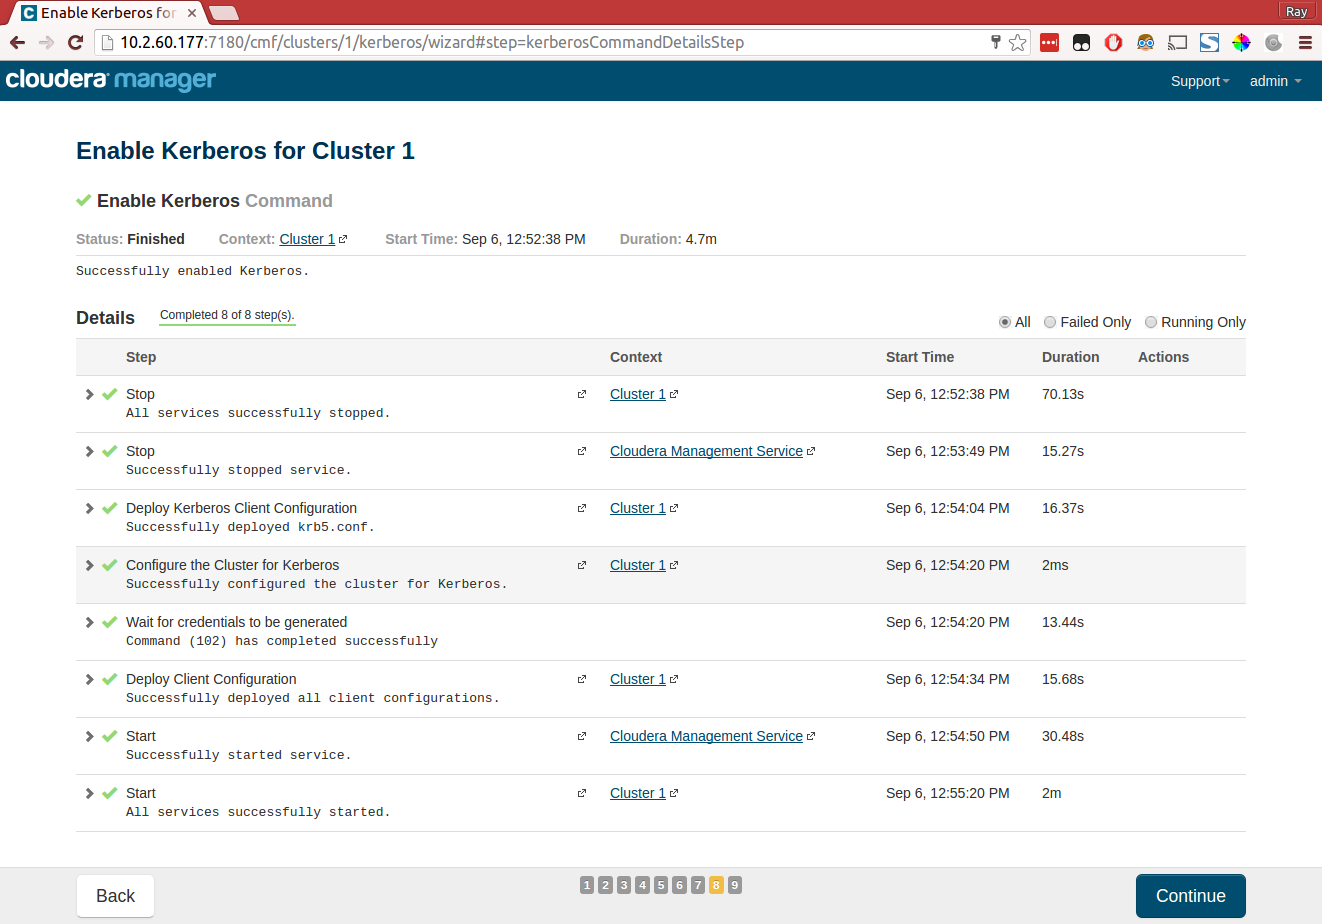
systemctl start kadminStep 9: do the Enable security wizard in Cloudera Manager
This should be self explanatory, but in summary:
- Enable the four checkboxes on the first page of the wizard.
- Next page, kdc =
hostname --fqdnheadnode, realm = MYNET (in our example). Leave other defaults. - Next page, select Manage
krb5.confthrough Cloudera Manager. Leave all defaults. - Next page, Username
root/adminand password you typed in step 7.
The wizard will do it's magic and hopefully succeed without problems.
In case you are looking for a free alternative to Camtasia Studio or many other alternatives... One of my favorite tools of all time, ffmpeg can do it for free!
The simplest thing that will work is ffmpeg -f gdigrab -framerate 10 -i desktop output.mkv (source)
This gives pretty good results already (if you use an MKV container, FLV will give worse results for example).
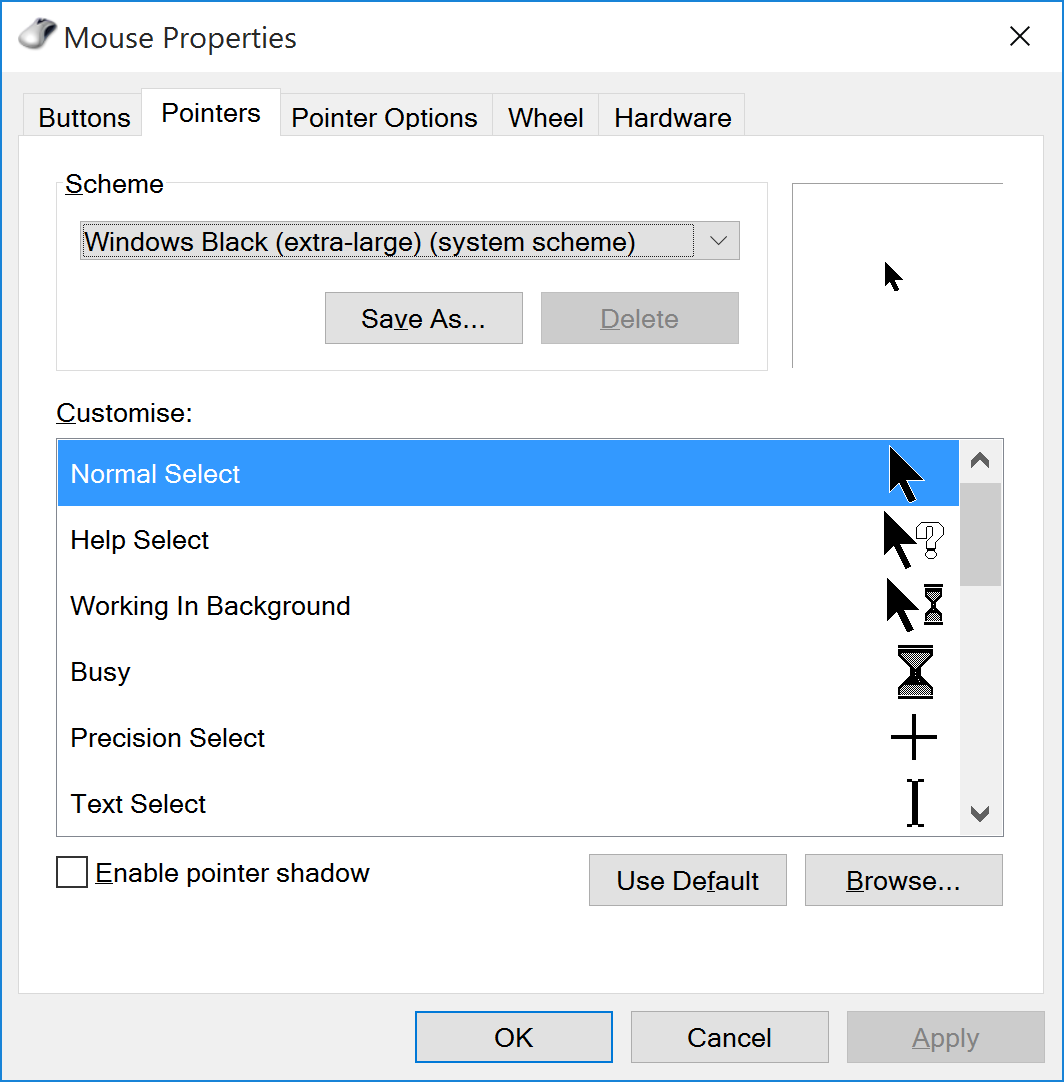
HiDPI: Fix mouse pointer
gdigrab adds a mouse pointer to the video but does not scale it according to HiDPI settings, so it will be extremely small.
You can configure the mouse pointer to extra large to fix that. That mouse pointer won't scale either, but at least you end up with a regular size pointer in the video ![]()
Optional: Use H264 codec
More options you can find here, I've settled with single pass encoding using -c:v libx264 -preset ultrafast -crf 22.
ffmpeg -f gdigrab -framerate 30 -i desktop ^
       -c:v libx264 -preset ultrafast -crf 22 output.mkv
Optional: Include sound in the video
First execute ffmpeg -list_devices true -f dshow -i dummy this will give you directshow devices. (source)
On my laptop this command outputs:
[dshow @ 00000000023224a0] DirectShow video devices (some may be both video and audio devices)
[dshow @ 00000000023224a0]  "USB2.0 HD UVC WebCam"
[dshow @ 00000000023224a0]     Alternative name "@device_pnp_\\?\usb#vid_04f2&pid_b3fd&mi_00#6&11eacec2&0&0000#{65e8773d-8f56-11d0-a3b9-00a0c9223196}\global"
[dshow @ 00000000023224a0]  "UScreenCapture"
[dshow @ 00000000023224a0]     Alternative name "@device_sw_{860BB310-5D01-11D0-BD3B-00A0C911CE86}\UScreenCapture"
[dshow @ 00000000023224a0] DirectShow audio devices
[dshow @ 00000000023224a0]  "Microphone (Realtek High Definition Audio)"
[dshow @ 00000000023224a0]     Alternative name "@device_cm_{33D9A762-90C8-11D0-BD43-00A0C911CE86}\wave_{1DDF1986-9476-451F-A6A4-7EBB5FB1D2AB}"
Now I know the device name I can use for audio is "Microphone (Realtek High Definition Audio)". Use it for the following parameters in ffmpeg -f dshow -i audio="Microphone (Realtek High Definition Audio)".
The end result
I ended up with capture-video.bat like this:
ffmpeg -f dshow -i audio="Microphone (Realtek High Definition Audio)" ^
       -f gdigrab -framerate 30 -i desktop ^
       -c:v libx264 -preset ultrafast -crf 22 output.mkv
This is a resulting video where I used this command, resolution of the video is 3840x2160 and the HiDPI scale is set to 2.5.
Update 1> Add more keyframes for better editing
For this I use the following command, to insert a keyframe every 25 frames (the closer to one, the larger the output file will be):
ffmpeg.exe -i %1 -qscale 0 -g 25 %2The option -qscale 0 is for preserving the quality of the video.
(Changing the container to .mov was probably not necessary, I tried this hoping that Adobe Premiere would support it, but it didn't!)
Update 2> Editing 4K on Windows 10...
Found the following tool for editing: Filmora and (on my laptop) it was able to smoothly edit the footage. They support GPU acceleration, but the additional keyrames really help with a smooth experience.
![]()
Once you get the hang of it (shortcut keys are your friend) it's pretty easy to cut & paste your videos.
Update 3> Support Adobe Premiere
As I discovered Adobe Premiere earlier, doesn't like MKV, but it also doesn't like 4:4:4 (yuv444p), the pixel format used by default (it seems).
You can view such information using ffprobe <VIDEO FILE>. Anyway, it seems to like yuv420p, so add -pix_fmt yuv420p to make it work for Premiere:
ffmpeg.exe -i input.mkv -qscale 0 -g 25 -pix_fmt yuv420p output.mov A crazy idea, building a profiler/visualizer based on strace output. Just for fun. But, who knows there may even be something useful we can do with this..
The following image shows exactly such a visualization for a specific HTTP GET request (f.i., to http://default-wordpress.cppse.nl/wp-admin/index.php (URL not accessible online)).
The analysis from the image is based on the strace log output from the Apache HTTP server thread handling the request. Parameters for the strace call include -f and -F so it includes basically everything the Apache worker thread does for itself.
(If it were to start a child process, it would be included.)

This request took 1700 milliseconds, which seems exceptionally slow, even for a very cheap micro compute instance. It is, I had to cheat a little by restarting Apache and MySQL in advance, to introduce some delays that make the graph more interesting. ![]() It's still still normal though that
It's still still normal though that strace will slow down the program execution speed.
I grouped all strace lines by process ID and their activity on a specific FD (file descriptor). Pairs like open()/close() or socket()/close() introduce a specific FD and in between are likely functions operating on that FD (like read()/write()). I group these related strace lines together and called them "stream"s in the above image.
In the image you can see that the longest and slowest "stream" is 1241 milliseconds, this one is used for querying MySQL and probably intentionally closed last to allow re-use of the DB connection during processing of the request.
The three streams lower in the visualization follow each other sequentially and appear to be performing a lookup in /etc/hosts, follewed by two DNS lookups directed to 8.8.4.4.
Why are we doing this? (Other than because it's Awesome!)
This works for any strace output, but my idea originated while doing web development. This was for a relatively complicated web application, that was divided in many sub-systems that communicate mostly via REST calls with each other. All these systems had lots of external calls to other systems, and I wanted a view where I could see regardless of which sub-system or actual PHP code being executed, how the performance was for specifically: I/O with (i.e. for i18n/locale) files, scripts, SQL queries to MySQL, Oracle, the REST API calls to system X, Y & Z, Redis, Memcached, Solr, Shared memory even and Disk caching.
If only there was a tool really good at capturing that kind of I/O... ahh yeah there is, strace!
I switched jobs 7 months ago, before applying my strace tool to this code-base, but I've applied it to similar complex applications with success.
We already had tools for (more traditional) profiling of PHP requests. Quite often the interpretation was difficult, probably because of a lot of nasty runtime reflection being used. Also when you needed to follow a slow function (doing a REST call) it was a lot of effort to move profiling efforts to the other system (because of OAuth 1.0b(omg..), expired tokens, ..). Nothing unsolveable of course, but with strace you can just trace everything at once on a development environment (especially in Vagrant which we used), spanning multiple vhosts. If it's just you on the VM, perhaps you can strace the main Apache PID recursively, I didn't try that however, but I think that would work.
Products like NewRelic provide dashboards for requests where you can gain such
deep insights, "off the shelve", basically, but the downside is that it's not cheap.
NewRelic f.i. hooks into Apache & PHP and has access to actual PHP function calls, SQL queries, etc.
strace cant do that, because it only sits between the process(es) and the Linux kernel.
First, let's take one step back & properly parse the strace output..
It quickly became apparent that I couldn't get away with some trivial regex for parsing it, so I turned to bnfc and created the following BNF grammer to generate the parser. I was quite suprised that this was so easy that it took me less than a working day to find a tool for the job, learn it and get the grammer right for some strace output.
With this tool you are provided with an autogenerated base class "Skeleton" which you can extend to create your own Visitor implementation. With this pattern it becomes quite easy to extract some meta-data you are interested in. I will show a simply example.
The grammer
I came up with the following grammer that bnfc uses to generate the Parser. Reading it from top to bottom is more or less the way you can incrementally construct this kind of stuff. You start really small; first chunking multiple strace-lines into single strace-lines, then chunk strace-lines into Pid, Timestamp and (remaining) Line. Then further specify a Pid, the Timestamp, Line, etc., slowly making the grammer more coarse-grained.
EStraceLines.          StraceLines         ::= [StraceLine];
EStraceLine.           StraceLine          ::= [Pid] [Timestamp] Line;

EPidStdOut.            Pid                 ::= "[pid " PidNumber "] ";
EPidOutput.            Pid                 ::= PidNumber [Whitespace] ;
EPidNumber.            PidNumber           ::= Integer;

ETimestamp.            Timestamp           ::= EpochElapsedTime;

ELine.                 Line                ::= Function "(" Params ")" [Whitespace] "=" [Whitespace] ReturnValue [TrailingData];
ELineUnfinished.       Line                ::= Function "(" Params "<unfinished ...>";
ELineContinued.        Line                ::= "<... " Function " resumed> )" [Whitespace] "=" [Whitespace] ReturnValue [TrailingData];
ELineExited.           Line                ::= "+++ exited with" [Whitespace] Integer [Whitespace] "+++" ;

EFunction.             Function            ::= Ident ;
EFunctionPrivate.      Function            ::= "_" Ident ;

EParams.               Params              ::= [Param];

EParamArray.           Param               ::= "[" [Param] "]" ;
EParamObject.          Param               ::= "{" [Param] "}" ;
EParamComment.         Param               ::= "/* " [CommentString] " */";
EParamInteger.         Param               ::= Number ;
EParamFlags.           Param               ::= [Flag] ;
EParamIdent.           Param               ::= Ident ;
EParamString.          Param               ::= String ;
EParamWhitespace.      Param               ::= Whitespace ;
EParamAddress.         Param               ::= Address ;
EParamDateTime.        Param               ::= DateYear "/" DateMonth "/" DateDay "-" TimeHour ":" TimeMinute ":" TimeSecond ;
EParamKeyValue.        Param               ::= Param "=" Param ;
EParamKeyValueCont.    Param               ::= "...";
EParamExpression.      Param               ::= Integer Operator Integer;
EParamFunction.        Param               ::= Function "(" [Param] ")" ;

EDateYear.             DateYear            ::= Integer ;
EDateMonth.            DateMonth           ::= Integer ;
EDateDay.              DateDay             ::= Integer ;
ETimeHour.             TimeHour            ::= Integer ;
ETimeMinute.           TimeMinute          ::= Integer ;
ETimeSecond.           TimeSecond          ::= Integer ;

EOperatorMul.          Operator            ::= "*";
EOperatorAdd.          Operator            ::= "+";

EEpochElapsedTime.     EpochElapsedTime    ::= Seconds "." Microseconds ;
ESeconds.              Seconds             ::= Integer ;
EMicroseconds.         Microseconds        ::= Integer ;

ECSString.             CommentString       ::= String ;
ECSIdent.              CommentString       ::= Ident ;
ECSInteger.            CommentString       ::= Integer ;

ENegativeNumber.       Number              ::= "-" Integer;
EPositiveNumber.       Number              ::= Integer;

EFlag.                 Flag                ::= Ident;
EFlagUmask.            Flag                ::= Integer;

ERetvalAddress.        ReturnValue         ::= Address ;
ERetvalNumber.         ReturnValue         ::= Number ;
ERetvalUnknown.        ReturnValue         ::= "?";

EAddress.              Address             ::= HexChar;

ETrailingDataConst.    TrailingData        ::= " " [Param] " (" [CommentString] ")";
ETrailingDataParams.   TrailingData        ::= " (" [Param] ")" ;

ESpace.                Whitespace          ::= " ";
ESpace4x.              Whitespace          ::= "    ";
ETab.                  Whitespace          ::= "    ";

terminator             CommentString       "" ;
terminator             Param               "" ;
terminator             Pid                 " " ;
terminator             Timestamp           " " ;
terminator             TrailingData        "" ;
terminator             Whitespace          "" ;

separator              CommentString       " " ;
separator              Flag                "|" ;
separator              Param               ", " ;
separator              Pid                 " " ;
separator              StraceLine          "";

token HexChar ('0' 'x' (digit | letter)*);
Given the above grammer bnfc can parse this strace line 15757 1429444463.750111 poll([{fd=3, events=POLLIN|POLLPRI|POLLRDNORM|POLLRDBAND}], 1, 0) = 1 ([{fd=3, revents=POLLIN|POLLRDNORM}]) into an Abstract Syntax Tree.
[Abstract Syntax]

(EStraceLines [
    (EStraceLine
        [(EPidOutput [(EPidNumber 15757)])]
        [(ETimestamp [(EEpochElapsedTime
                         [(ESeconds 1429444463)]
                         [(EMicroseconds 750111)])])]
        [(ELine
            [(EFunction "poll")]
            [(EParams [
                (EParamArray [
                    (EParamObject [
                        (EParamKeyValue (EParamIdent "fd")
                                        (EParamInteger [(EPositiveNumber 3)])),
                        (EParamKeyValue (EParamIdent "events")
                                        (EParamFlags [
                                            (EFlag "POLLIN"),
                                            (EFlag "POLLPRI"),
                                            (EFlag "POLLRDNORM"),
                                            (EFlag "POLLRDBAND")]))])]),
                (EParamInteger [(EPositiveNumber 1)]),
                (EParamInteger [(EPositiveNumber 0)])])]

            ESpace ESpace

            [(ERetvalNumber [(EPositiveNumber 1)])]

            [(ETrailingDataParams
                [(EParamArray
                    [(EParamObject [
                        (EParamKeyValue (EParamIdent "fd")
                                        (EParamInteger [(EPositiveNumber 3)])),
                        (EParamKeyValue (EParamIdent "revents")
                                        (EParamFlags [
                                            (EFlag "POLLIN"),
                                            (EFlag "POLLRDNORM")]))])])])
            ]
          )
        ]
     )
])
No matter how nested these lines get, it will parse them as long as I didn't forget anything in the grammer. (So far it seems to be complete to parse everything.)
Visitor example
Using the BNF grammer, the above structure and occasional peeking at the generated Skeleton base class, you can simply override methods in your own visitor to do something "useful". The following visitor is a less "useful" but simple example that outputs all the strings captured for strace lines containing the open() function. Just to illustrate how you use this Visitor.
class OutputOpenVisitor : public Skeleton
{
    string timestamp;
    string function;
    string strings;
public:
    void visitEStraceLine(EStraceLine* p)
    {
        timestamp = "";
        function  = "";
        strings   = "";
        Skeleton::visitEStraceLine(p);
        if (function == "open") {
            cout << timestamp << " " << function << " " << strings << endl;
        }
    }
    void visitEFunction(EFunction* p)
    {
        function = p->ident_;
        Skeleton::visitEFunction(p);
    }
    void visitEEpochElapsedTime(EEpochElapsedTime *p)
    {
        auto secs      = static_cast<ESeconds *>(p->seconds_);
        auto microsecs = static_cast<EMicroseconds *>(p->microseconds_);
        timestamp = to_elasticsearch_timestamp(secs, microsecs);
        Skeleton::visitEEpochElapsedTime(p);
    }
    void visitString(String x)
    {
        strings.append(x);
        Skeleton::visitString(x);
    }
};
You can find this example in the examples forder in the git repository here.
After compiling this example into strace-output-visualizer:
# capture a strace log
trigen@firefly:/projects/strace-output-parser[master]> strace -f -F -ttt -s 512 -o test.log uptime
17:53:02 up 32 days, 22:44, 23 users,  load average: 2.39, 2.20, 2.12

# strace log contains stuff like
trigen@firefly:/projects/strace-output-parser[master]> head -n 10 test.log
19151 1458147182.196711 execve("/usr/bin/uptime", ["uptime"], [/* 47 vars */]) = 0
19151 1458147182.197415 brk(0)          = 0x7c1000
19151 1458147182.197484 access("/etc/ld.so.nohwcap", F_OK) = -1 ENOENT (No such file or directory)
19151 1458147182.197555 mmap(NULL, 8192, PROT_READ|PROT_WRITE, MAP_PRIVATE|MAP_ANONYMOUS, -1, 0) = 0x7f45cd85e000
19151 1458147182.197618 access("/etc/ld.so.preload", R_OK) = -1 ENOENT (No such file or directory)
19151 1458147182.197679 open("/etc/ld.so.cache", O_RDONLY|O_CLOEXEC) = 3
19151 1458147182.197740 fstat(3, {st_mode=S_IFREG|0644, st_size=156161, ...}) = 0
19151 1458147182.197813 mmap(NULL, 156161, PROT_READ, MAP_PRIVATE, 3, 0) = 0x7f45cd830000
19151 1458147182.197888 close(3)        = 0
19151 1458147182.197969 access("/etc/ld.so.nohwcap", F_OK) = -1 ENOENT (No such file or directory)

# pipe the log through the example program
trigen@firefly:/projects/strace-output-parser[master]> cat test.log | ./strace-output-parser
2016-03-16T16:53:02.198Z open /etc/ld.so.cache
2016-03-16T16:53:02.198Z open /lib/x86_64-linux-gnu/libprocps.so.3
2016-03-16T16:53:02.199Z open /lib/x86_64-linux-gnu/libc.so.6
2016-03-16T16:53:02.200Z open /sys/devices/system/cpu/online
2016-03-16T16:53:02.200Z open /usr/lib/locale/locale-archive
2016-03-16T16:53:02.200Z open /etc/localtime
2016-03-16T16:53:02.201Z open /proc/uptime
2016-03-16T16:53:02.202Z open /var/run/utmp
2016-03-16T16:53:02.273Z open /proc/loadavg
Opposed to a simple Visitor like this example, I parse all the lines, prepare a JSON representation for each line and store that in ElasticSearch. This way selecting and filtering can be done afterwards. And also ElasticSearch is really a fast solution in case you want to do more complex queries on your log.
A Proof of concept for Web
This time at the beginning of each request I have PHP instruct some script to run a strace on the process id for the current PHP script's pid (or rather the Apache worker's) and all it's (virtual) threads and sub processes. (If I would track the Request accross the stack with "Cross application tracing" you can even combine all the relevant straces for a given request. I didn't implement this (again) because of I switched jobs. (Info on Cross application tracing in newrelic). This is even relatively easy to implement if you have a codebase where you can just make the change (like inject a unique id for the current request in curl call for example).)
The following image and code shows how I capture straces from specific PHP requests, like the wordpress example I started this blog with. You can skip this part. Eventually these straces are linked to a specific request, ran through a slightly more elaborate Visitor class and fed into ElasticSearch for later processing.
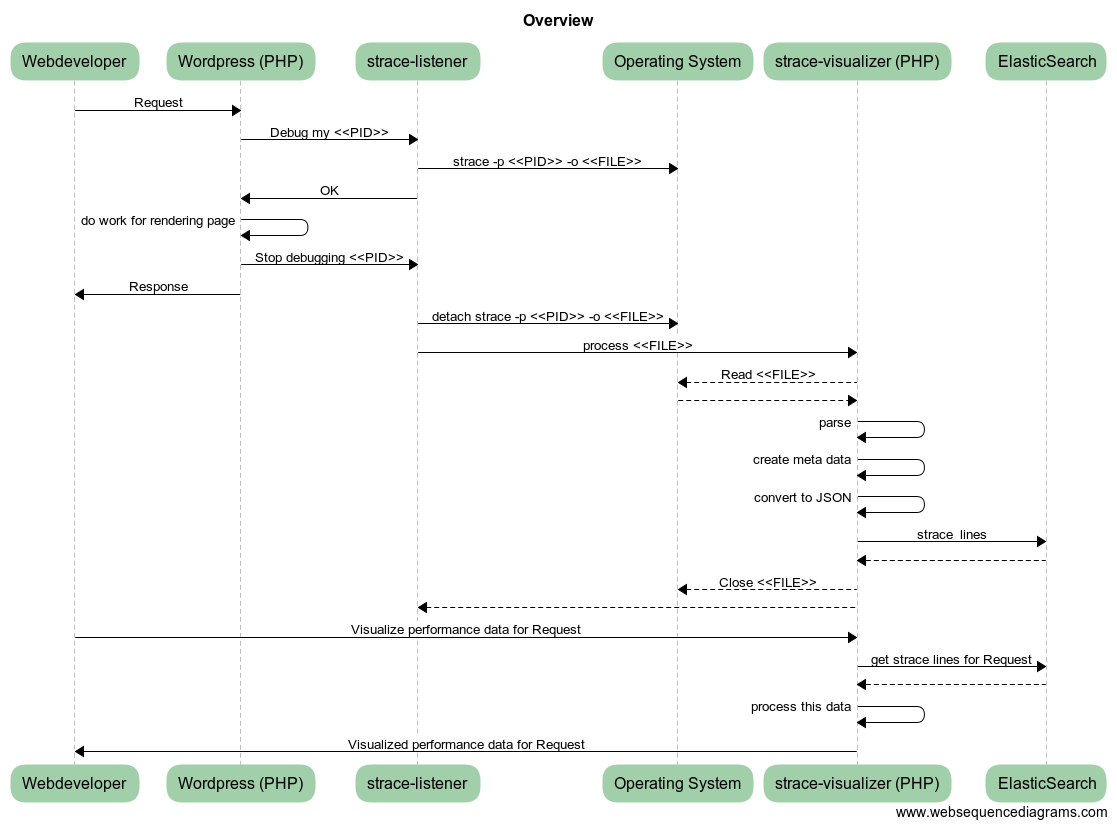
(This omits also some other details w/respect to generating a UUID for each request, and keeping track of what strace outputs are related to each request.)
Inject in your application 'header', i.e., top index.php:
register_shutdown_function(function () { touch("/tmp/strace-visualizer-test/done/" . getmypid()); });
$file = "/tmp/strace-visualizer-test/todo/" . getmypid();
touch($file);
while (file_exists($file)) { sleep(1); } // continue with the request when removed from todo folder
A separate long running process runs the following:
trigen@CppSe:~/strace-visualizer-test> cat run.ksh
#!/bin/ksh93
mkdir -p /tmp/strace-visualizer-test/todo
mkdir -p /tmp/strace-visualizer-test/done
while true; do
    find /tmp/strace-visualizer-test/todo/ -type f | \
        xargs -I{} -n 1 sh -c "strace -f -F -ttt -s 4096 -o \$(basename {}).strace -p \$(basename {}) & rm -rf {};"
    find /tmp/strace-visualizer-test/done/ -type f | \
        xargs -I{} -n 1 sh -c "(ps axufw | grep [s]trace.*\$(basename {}) | grep -v grep | awk -F ' ' '{print \$2}' | xargs -n 1 kill -1 ) & (sleep 1; rm -rf {};)"
    printf ".";
done
This way you end up with .strace files per process ID (it should probably include a timestamp too).
The long running process removes the file the client checks from the todo folder as soon as it started strace.
That way the client will no longer block and the interesting stuff will be captured.
It uses a shutdown handler to instruct the long running process to stop the capture (the Apache thread won't exit, it will wait for a next request).
Final step, To ElasticSearch!
I use a Visitor and my strace parser to create JSON representations for the strace log lines. Containing the meta-data I need: file descriptors, an array with all strings, a timestamp that ElasticSearch can understand out of the box, etc.
To get to my previous example, I can use cat test.log | ./strace-output-parser elasticsearch localhost 9200 strace_index to import the parsed lines to ElasticSearch.
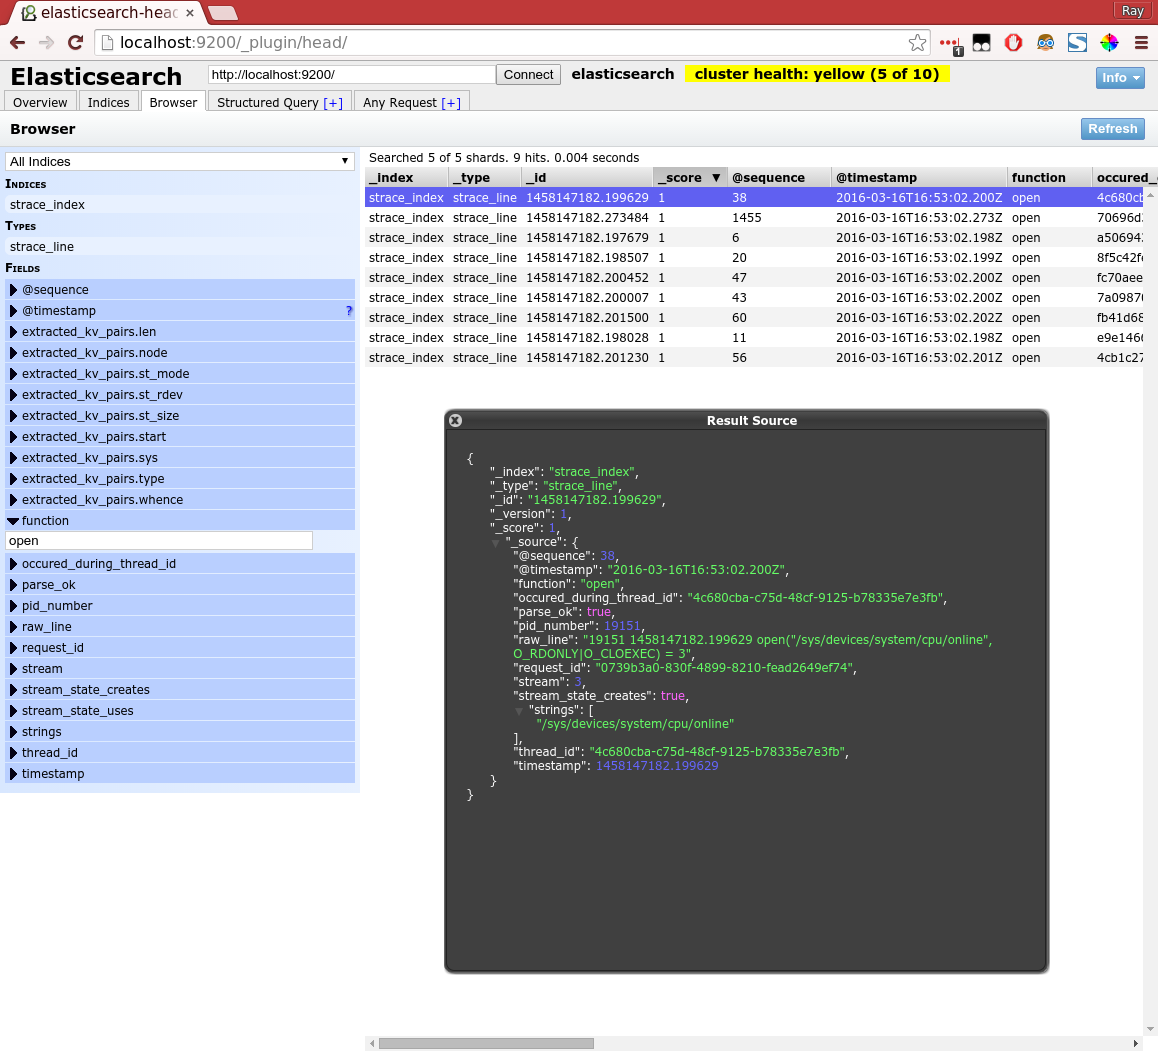
In above example I use filtering with a plugin called "head" to basically make the same selection as I did with the simple visitor example. I also highlighted one specific line to show the JSON representation.
I used PHP for processing the wordpress strace output from ElasticSearch and generated the visualization from the very first image in this blog post. You can view the HTML output here.
Hopefully this blog post was interesting to read, and maybe you find some use for the strace parser yourself. If you do, please let me know, that would be fun to know ![]() .
.
In addition to my previous blog post How to debug XUL applications.
Last friday I learned that you can use the DOM inspector on XUL applications as well. This is quite useful if you want to see what events are hidden behind a button, try out layout changes, etc., etc. It is also quite fast, I don't notice any performance difference.
These instructions are taken from a very useful stackoverflow answer. Summarizing:
- Add
[XRE] EnableExtensionManager=1to yourapplication.iniif it isn't already. - If you are using the
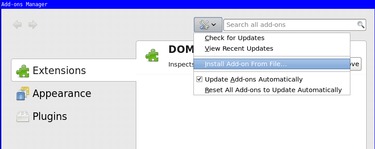
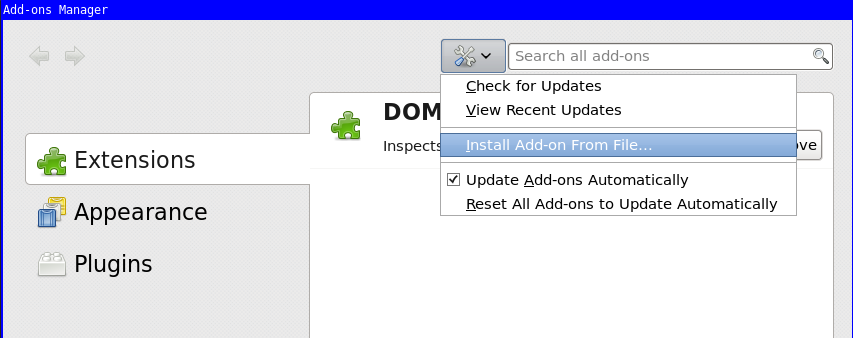
xulrunnerapp you already have the Error Console available (for info see my previous blog post for this). Type in it the following:window.openDialog("chrome://mozapps/content/extensions/extensions.xul", "", "chrome,dialog=no,resizable=yes");. - You will be presented the Add-ons Manager, in there choose "Install Add-on From File..." and download the "DOM Inspector". (I have a local copy here: addon-6622-latest.xpi (downloaded from: here)).
- You need to restart and start xulrunner with an additional
-inspectorflag.
One tip with the DOM inspector, if you use "File >> Inspect Chrome Document" and the list is huge, highlight an item with your mouse and press the End key on your keyboard. You likely need one at the bottom of the list because those are the XUL files loaded most recently.
You can use Mozilla Firefox (Javascript) debugging on your XUL application using the Remote Debugging facility. This blog post could be useful as a HOWTO, because I was lucky enough to attempt this 3rd of July 2015. You see had I tried this today I would have failed, because stuff seems broken in newer versions of xulrunner (and Firefox). This is true for the project I work on at least. The very fact that I struggled with setting this up today was my motivation to dig into why it wasn't working and made me think this might be useful to others.
I know everything in this blog post to work for both CentOS 6.6 and Ubuntu 15.04. These steps (except for the xulrunner download) should be platform independent.
First get a slightly older xulrunner
You need a reasonably new xulrunner in order for Remote Debugging to work. I downloaded xulrunner version 38 at the time from The Mozilla Project Page (xulrunner-38.0.5.en-US.linux-x86_64.tar should be on their FTP somewhere, but you can also use this local copy hosted with this blog). I think we should cherish that version, because that one works. ![]()
The newest and version is version 41, but also the last because they started integrating it in Mozilla Firefox since then.
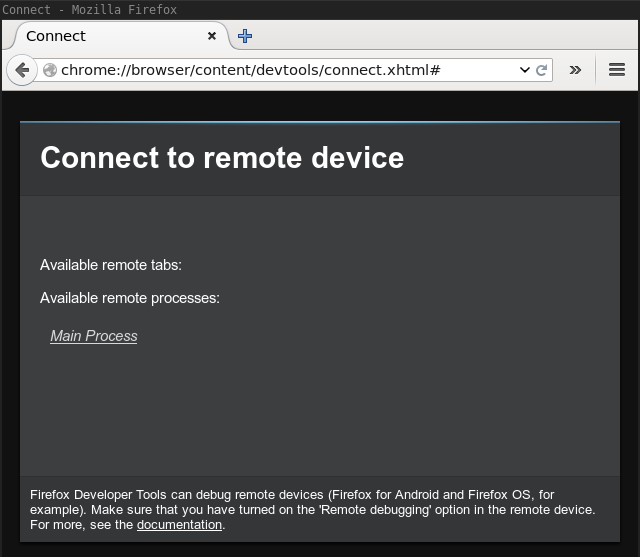
I tried version 41, and grabbing a recent Thunderbird Firefox, but all steps work, except when you arrive in the "Connect Dialog", the clickable Main Process hyperlink (as shown in the image) is simply not there for you to click on.
Enable a debug listener in the code
In your application you need to start the debug listener. Probably in the top of your main.js include the following lines.
Components.utils.import('resource://gre/modules/devtools/dbg-server.jsm');
if (!DebuggerServer.initialized) {
  DebuggerServer.init();
  // Don't specify a window type parameter below if "navigator:browser"
  // is suitable for your app.
  DebuggerServer.addBrowserActors("myXULRunnerAppWindowType");
}
var listener = DebuggerServer.createListener();
listener.portOrPath = '6000';
listener.open();
Also enable in the preferences (probably defaults/preferences/prefs.js).
pref("devtools.debugger.remote-enabled", true);If you forget to change this last preference you will get the following error.
JavaScript error: resource://gre/modules/commonjs/toolkit/loader.js -> resource://gre/modules/devtools/server/main.js, line 584: Error: Can't create listener, remote debugging disabledStart the application with this xulrunner
Extract the xulrunner runtime to somewhere, i.e. /projects/xulrunner, and issue from the your program's directory like this:
shell$> /projects/xulrunner/xulrunner application.iniAttach debugger from Mozilla Firefox
Open a fairly recent Firefox browser and open the remote debugger which is available via "Tools -> Web Developer -> Connect...".
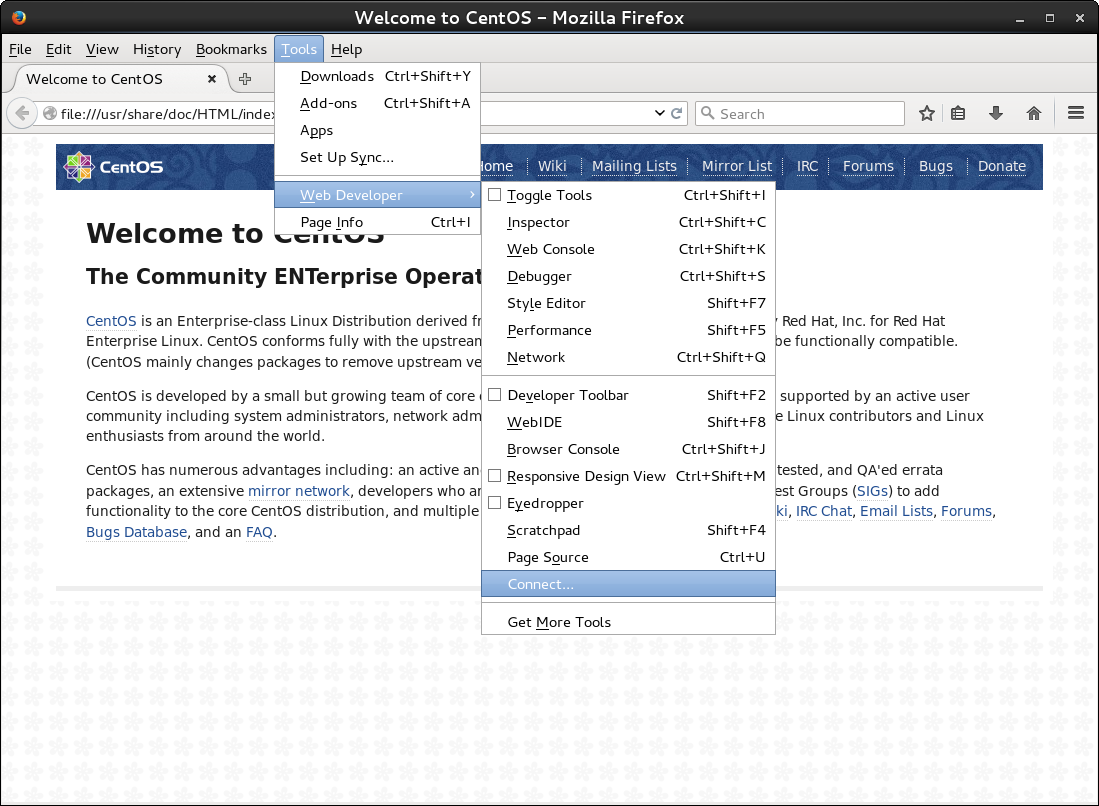
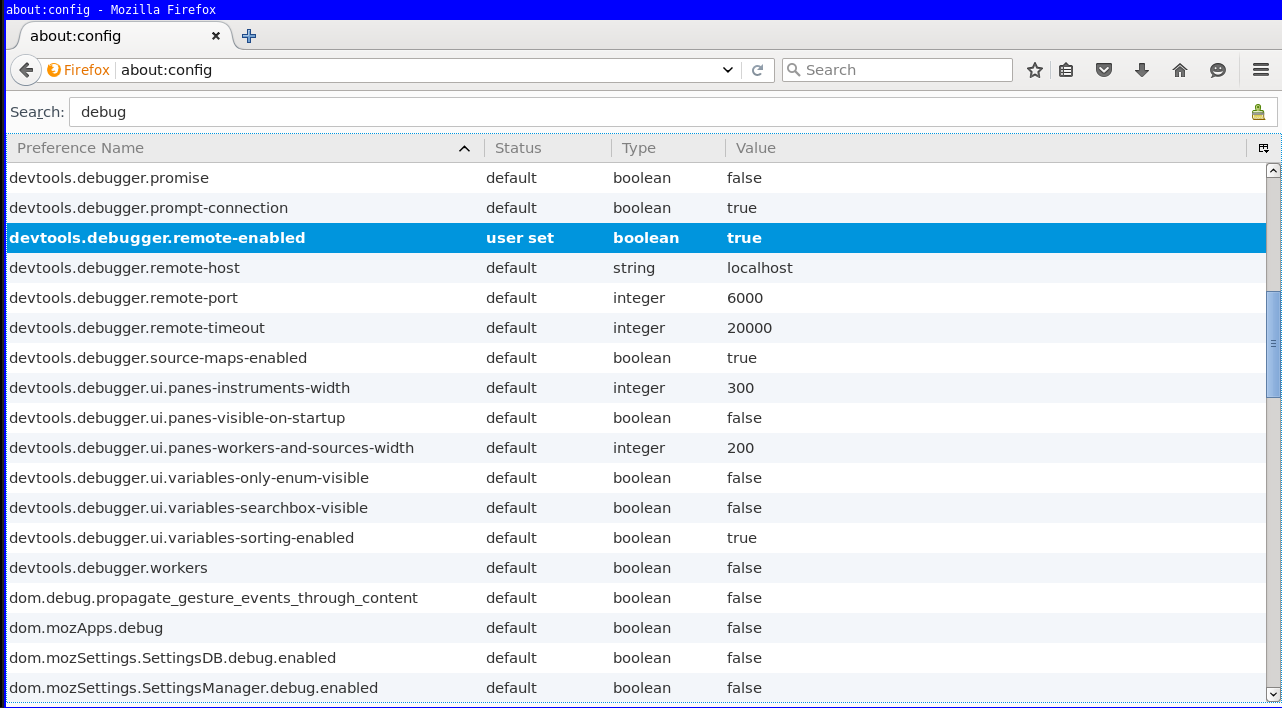
If the above "Connect.." option is not available, you have to enable the same preference inside Firefox in the "about:config" page. Search for remote-enabled.
Then connect to localhost port 6000.
Your program will present you a dialog to accept the incoming connection from the debugger.
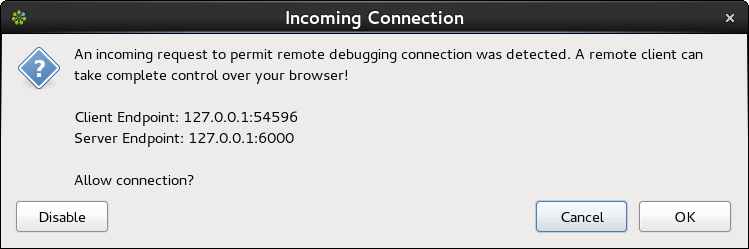
After accepting you can click to attach to "Main Process" (your program).
You should be presented with a debugger that will automatically break when it encounters the debugger keyword.
You can also set breakpoints inside.
This can look similar to the following image where a call stack is shown, and you have your usual ways to inspect variables and perform step debugging with F10, F11, Shift+F11 ![]()
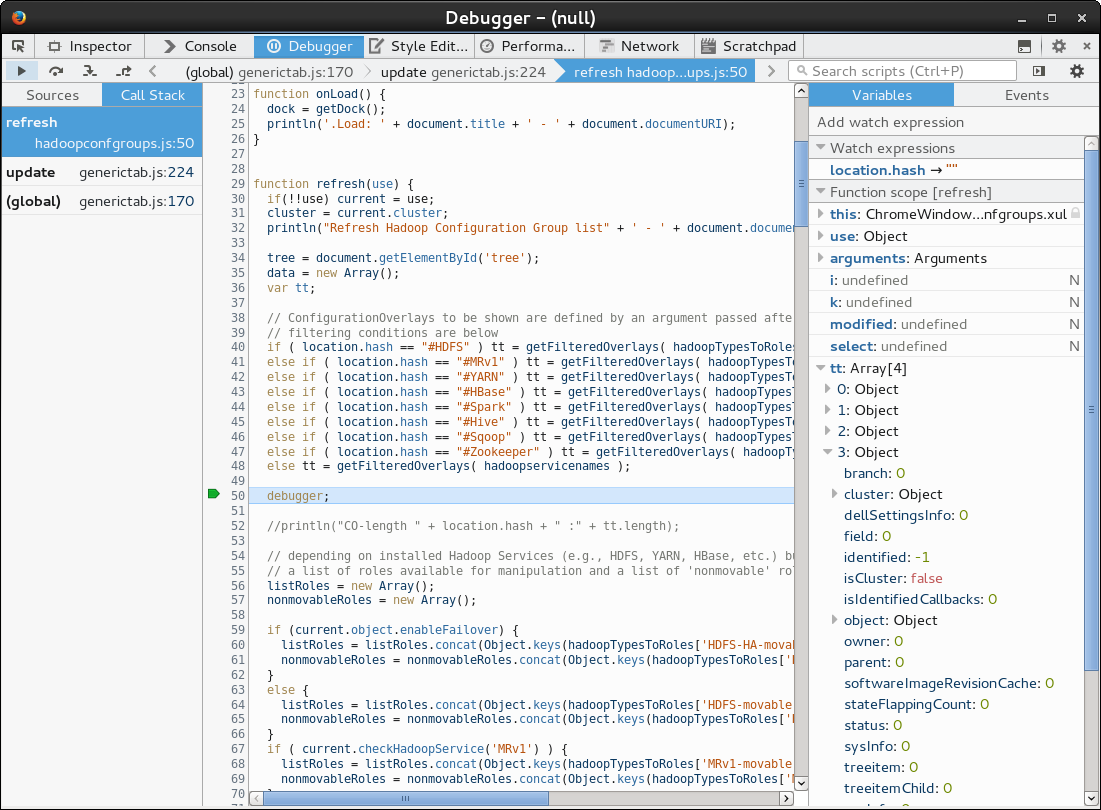
I am convinced it should also be possible to make it so that the javascript in can handle inspection from the debuggers console. In order to get a REPL working there (for inspecting variables), but I didn't find out how this can be achieved. Using the Watch (and Auto) expressions you can already inspect everything.
Just beware that once you attach to the process your program can freeze up for a while as the debugger is loading all the javascript files.
Today I published my first Android (Wear) App! ![]() . The idea behind this clock is that it uses concentric circles to show time, and doesn't use analog clock hands or numeric time notation.
This is something I have on a bigger LCD screen at home for a while now, and now that there is Android Wear for a while, I wanted to implement this for Android.
. The idea behind this clock is that it uses concentric circles to show time, and doesn't use analog clock hands or numeric time notation.
This is something I have on a bigger LCD screen at home for a while now, and now that there is Android Wear for a while, I wanted to implement this for Android.
Some example visualizations
There is more theory behind the visualization, more on that on the website: http://circlix.click.
Android Watch Face

WebGL from the Website
You need to have WebGL support in your browser in order to see the following live-clock.
Some comments on Android Wear development
Android Wear is relatively new, and I never read any book on the Android Framework. Luckily I had some Java experience. Overall I am impressed by the design of the Framework, although it also confused the hell out of me on various occasions @:|@.
Some stuff I needed to realize or discover during development:
- (Very basic:) an Activity only runs when it's the current activity.
- If you need stuff running for longer than an Activity, you need Services.
- In Java you don't have RAII like in C++/PHP. If you have handlers for threads etc. you should stop them in some
onDestroy()method. - Packaging, creating the APK for use in f.i. the Play Store was counter intuitive, at least for me. Follow the example project provided by Google closely in your project w/respect to Gradle files. I had a perfectly good working APK that came out of Android Studio, it worked whenever I sent it to others, but it was not accepted by the Play store.
- There is already OpenGL support for Watch Faces. You need to extend
Gles2WatchFaceService.

.... evolved from Smash Battle and was launched by Tweakers on April fools with the title (translated): “Tweakers releases Tweak Battle - Tech-site starts Game Studio”. It was pretty cool, the day before all Tweakers staff changed their avatars to their “8-bit” style character. Why blog about this now? Well, now some Tweakers created an Arcade machine a few days ago for it, it turned out to be quite awesome and I also accidentally stumbled upon some stats from April-fools day.
A while ago I added network multiplayer to Smash Battle (see old blog post) and then after that we/Jeroen got the idea to change all the characters into Tweakers editors/developers and launch the game as an April fools joke.
The deadline was pretty tight, we had a lot of ideas for improvements and there were many glitches but we fixed all of them. We had to work many long nights and the night- and morning before the publication of the News at 8 o'clock. ![]()
Play stats
22:00 we fixed a problem that occasionally made a server crash, also you may notice the "active" & "joined" players lines to swap at that point, before that they were mixed up. The difference between the two is simply the number of spectators (you are "joined" if you connect and "active" when you play). Spectators were necessary because the game can hold a maximum of 4 players.
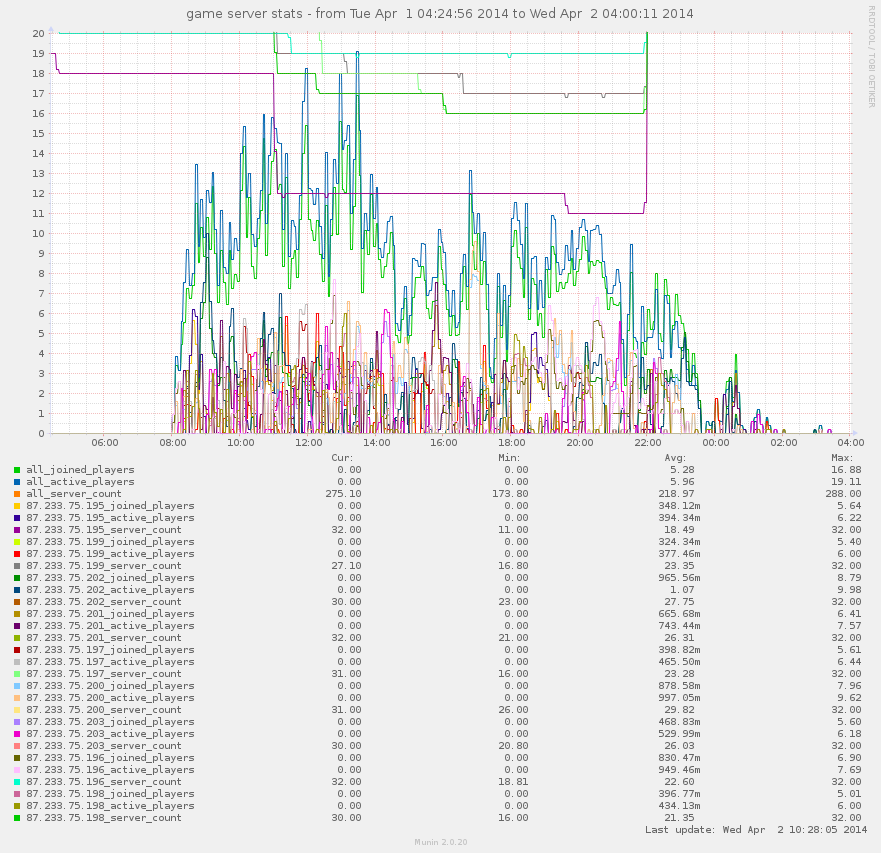
The only statistics we have, at the time gathered using a simple Munin plugin.
Ten blade servers
Ten seriously over-the-top servers were sponsored by True, and I'm sorry but I forgot the exact specs. We provisioned one of them as the main API server and the other we started nine games per (nine) server(s) on with all the different levels evenly distributed.
We did quite some last-minute optimizations, like removing the GUI for Servers, so running servers became a lot less CPU intensive. Previously we had to start them with xvfb (we basically used it as a /dev/null for the graphics). Even though I discovered by accident that SDL is so Awesome that it falls back to ncurses (see following image).
But in retrospect, we could have ran all the servers from my laptop ![]() . It was surely overkill for such a simple game with not that much Network traffic. But just in case it would go world-wide-viral, we could have handled it
. It was surely overkill for such a simple game with not that much Network traffic. But just in case it would go world-wide-viral, we could have handled it ![]() .
.

ncurses ASCII art rendering of a Tweak Battle server with no joined players.
Further improvements
Jeroen & Bert pushed me to replace the TCP/IP implementation with a UDP one, and this was a good idea. It made a big difference, even more than I expected. We also had to fix some glitches/artifacts that were caused by previous refactorings, i.e. that the game now runs on elapsed time, this created some problems with powerups to disappear too fast, and animations to go to fast here and there. Jeroen also designed and implemented all the Tweakers characters, which was a lot of work, Bert helped all-round and improved server provisioning a lot.
The “main” server
The main server is written in Symfony2 as a REST API (inspired by this implementation and Scenario Driven API Design). For documentation and source code check the bitbucket repo.
Maximum number of requests on /server/listing per second with- and without Varnish:
Requests per second:    43.34 [#/sec] (mean)
Requests per second:    12209.64 [#/sec] (mean) # with Varnish
We let Varnish cache this listing every 1 second(s). We talked to it asynchronously with C++ using libcurl. Storage used by the API was Redis.
The future
- git
network_multiplayerbranch merged intomaster. But I would like to preserve both character sets, Smash Battle and Tweak Battle. - refactoring^2
- nicknames support, online rankings.
- (for Tweak Battle:) actual Nerf Guns + Bullets.
- more game types like capture the flag, instagib, last man standing.
- intelligent bots.
In Jira's Agile Board the Ranks of the Issues are visualized underneath the Story point estimates. The highest rank is colored green, the lower the priority becomes, the more the color changes to red. This way it also becomes visible who is not working according to priorities. See the following screenshot.
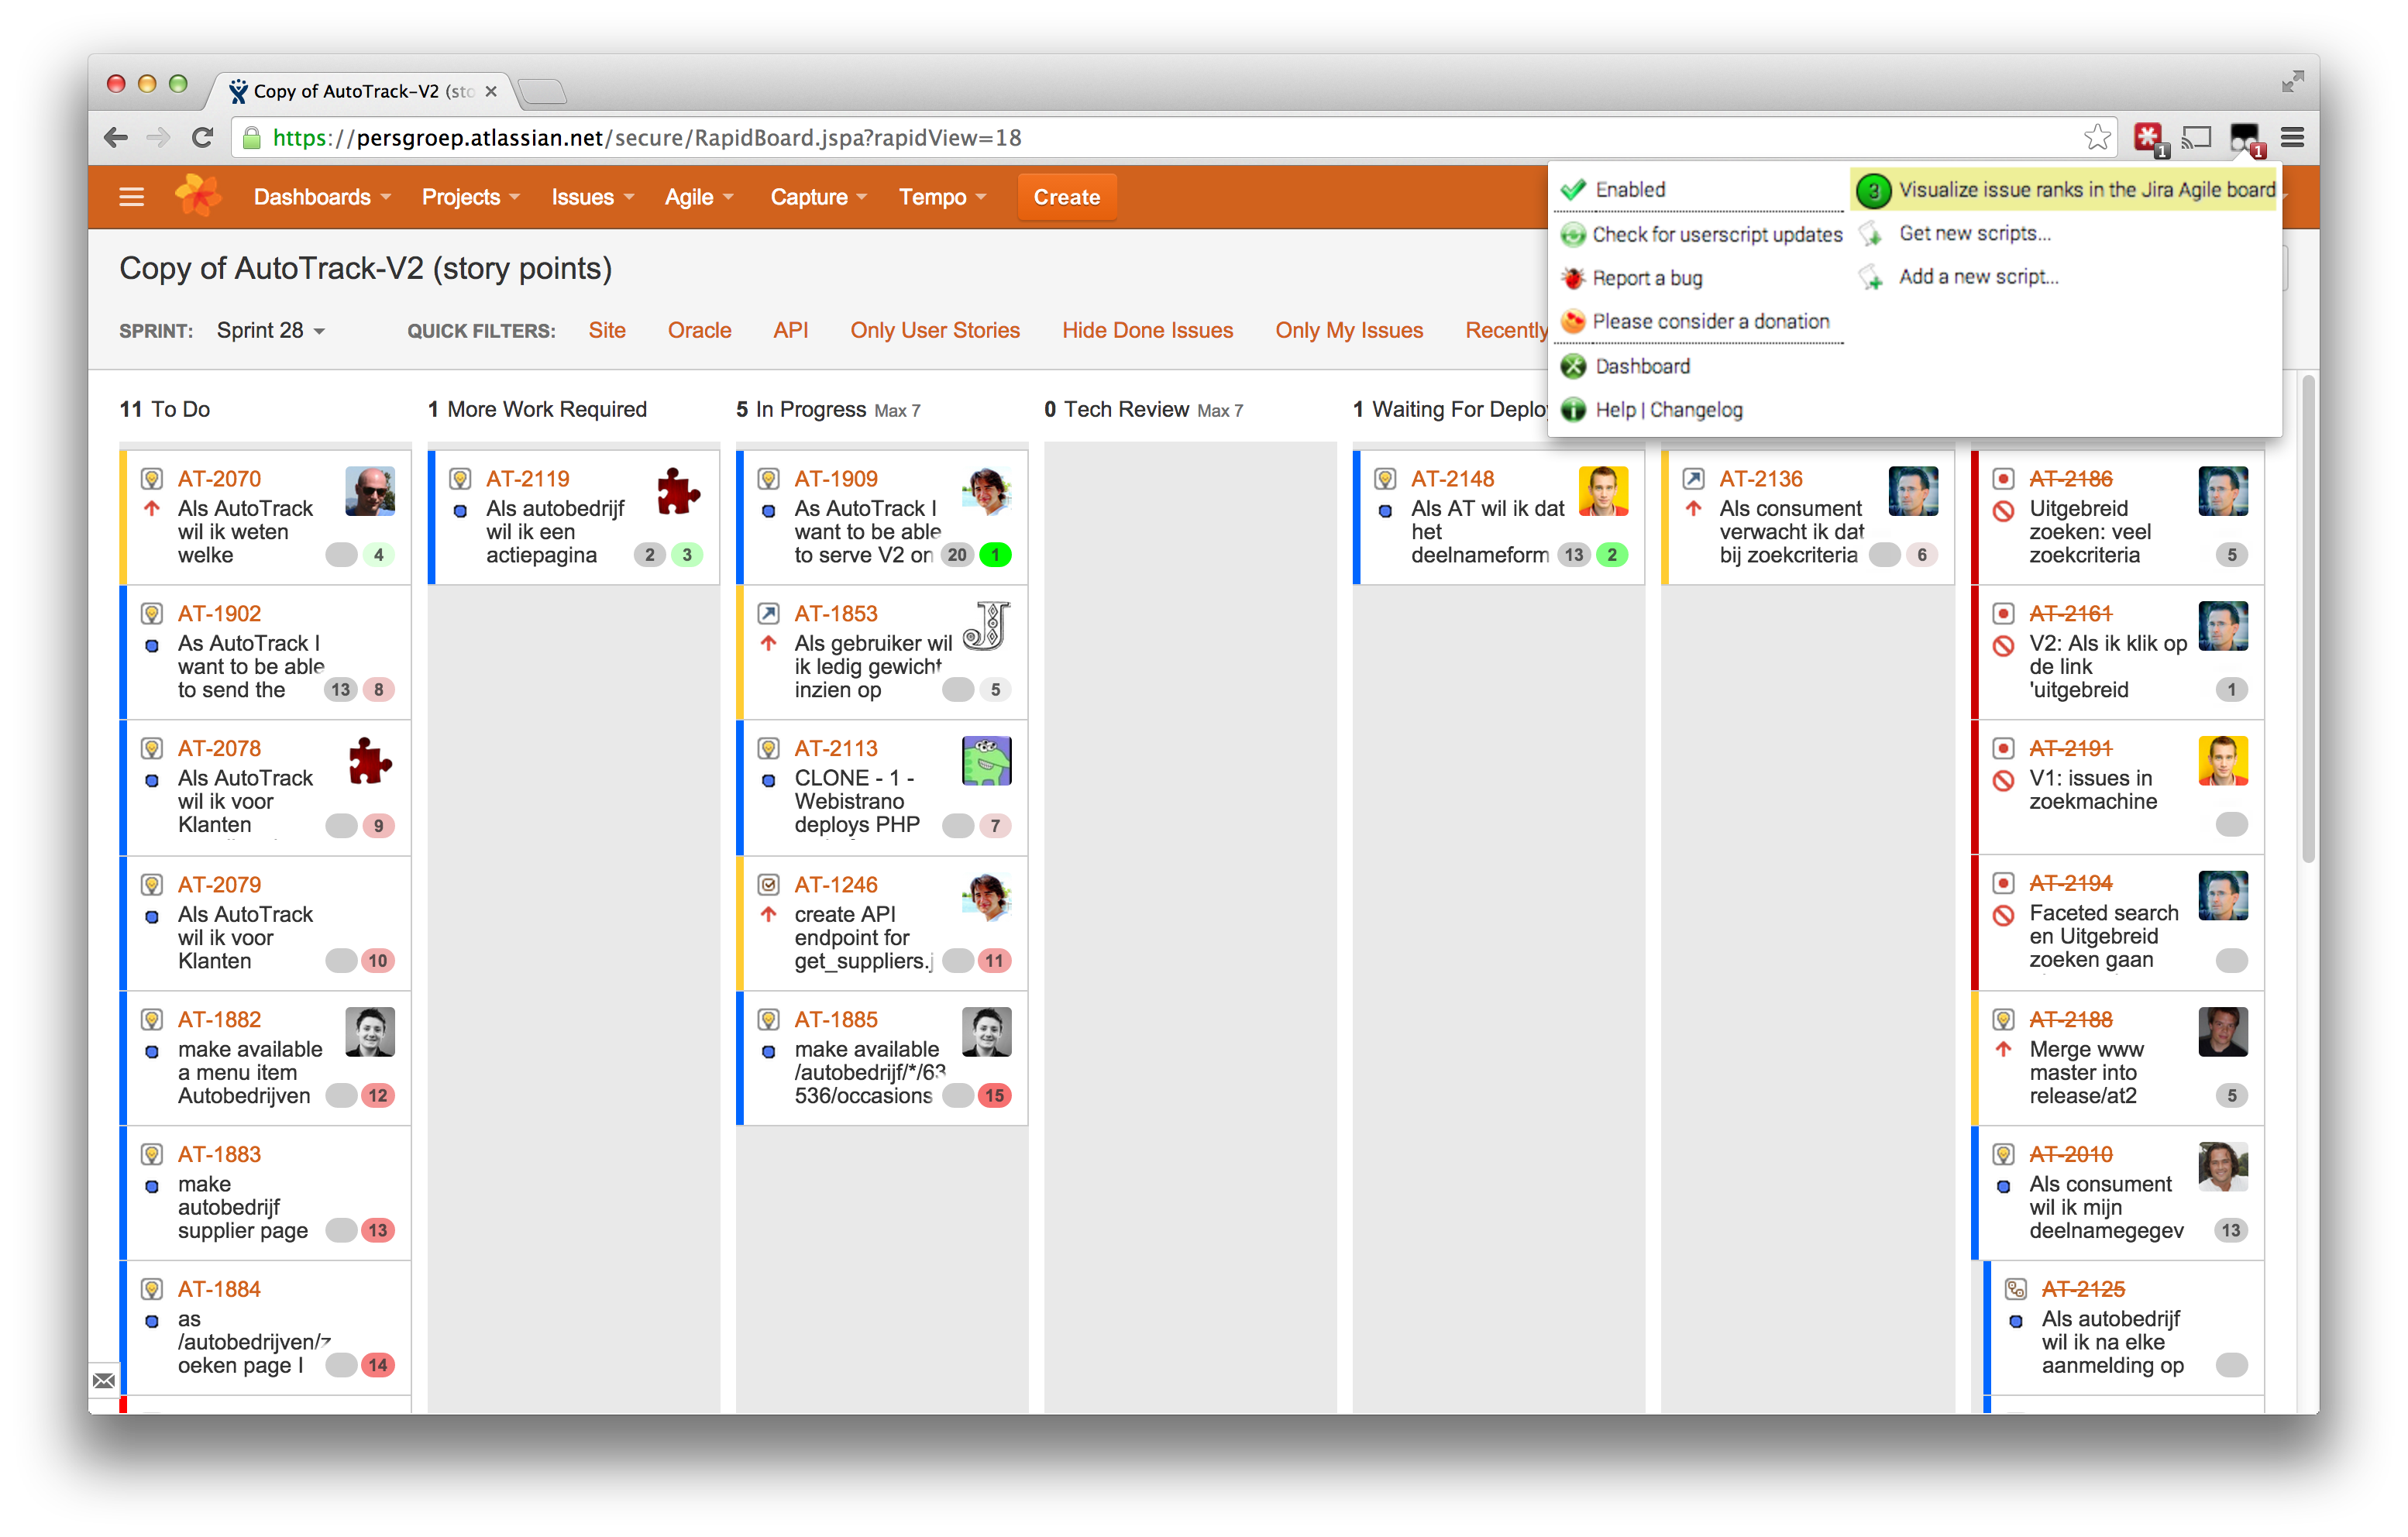
King - Servant pattern
At work we use the King-Servant pattern (see screenshot I made of slide 47 from this pdf) to avoid too much concurrent work. This pattern tries to solve the problem that you could end up with four unfinished tickets rather than two or even one complete ticket(s).

We work with remote programmers and therefore don't use a physical Scrum board.
During the day and standups we view this board often and found it annoying that
in order to determine the "King" ticket, you would need to switch back and
forth the "Plan mode" a lot to see the Ranks. The different swimlanes often
obfuscate the ranking information.
With this script the king ticket is simply the one with rank "1". ")
The tampermonkey / greasemonkey script to give you this precious feature
Editing configuration may be required to adjust it to your board.
- You can view/copy/download it from my gist at github and click the
Rawbutton and copy & paste.
- Chrome: You can use the Tampermonkey extension, "add new script", copy & paste the script and save.
- FireFox: You can use the Greasemonkey add-on, add user script, and you need to explicitly add
http*://*.atlassian.net/secure/RapidBoard.jspa?*as an include url, then copy & paste the script code from clipboard and save. Sorry Greasemonkey is not very user friendly.
[Edit 2-Nov-2014, I've changed my mind with the coloring, and some other things. The original version 1 is still available here]
[Edit 2-Jun-2015, I actually use the following script URL: //cppse.nl/public/tampermonkey_agile_board_prios.js and keep it up-to-date with my gist]
Sometimes as a webdeveloper I have to work with websites where performance is not optimal and sacrifised in exchange for some other quality attribute.
Perhaps that's why I "over optimize" some sites--like this blog--which probably is not even worth the effort considering the traffic it gets.
However, it's something I spend my time on and it could be useful to others. And this being a blog, I blog about it.
Statically compile
In this blog I statically "compile" this websit with a minimalist tool I created. It was a project with a similar approach as octopress (based on Jekyll). I've never used octopress, I'm not sure if it even existed back when starting this blog.
A webserver likes plain file serving more than CPU intensive PHP scripts (that generate pages per request). You may not need to statically compile everything like I do, there are alternatives like using Varnish cache to optimize your performance perhaps. Tweakers.net (and many more high performance websites) use Varnish.
YSlow & Page Speed diagnostiscs
These are browser plugins, but you can do the checks online via services like: GTmetrix or WebPageTest. In the following screenshot are as an example some quick wins I made using GTmetrix in two ours of optimizing my blog.
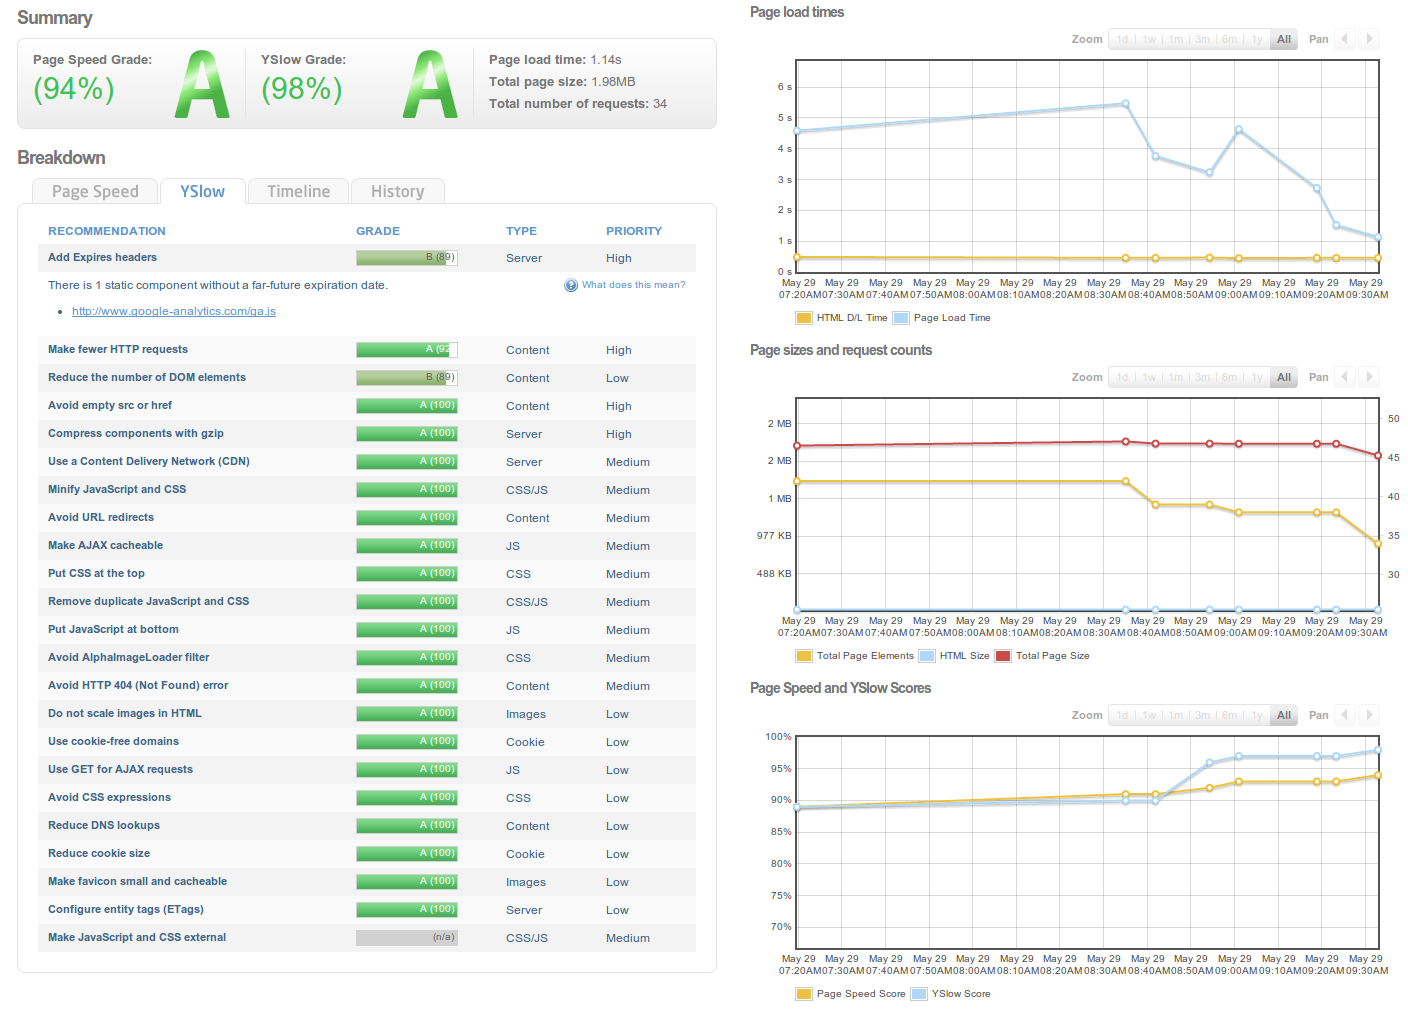
In this blog I won't go over all the Tips given on those websites, but there is a lot of useful advice in there I won't repeat. Except for maybe one more: Caching headers for clients (and (caching) proxies), you might want to make sure you get those right. ![]()
Cloudfront as a Content Delivery Network (CDN)
In google analytics I noticed that in some countries my blog was a lot slower. Especially the loading of media.
I verified this with WebPageTest, apparently my AWS server that was located in Ireland was too far away for some countries. Maybe not especially slow for the HTML, but especially for media, like images, a.k.a. "Content". Hence, CDN ![]()
First how to setup a CDN with Cloudfront...
You start with creating an "S3" bucket, which is basically a "dumb" but fast hosting for files. For every file you put there you have to set permissions, headers (if you want those headers to be returned to the client (i.e. Content-Type, etc.)). Normally a webserver like apache would do most of that stuff for you, here you have to do it yourself. All your static content should be uploaded to such a bucket.
Your bucket is something named like <BUCKETNAME>.s3-website-eu-west-1.amazonaws.com.
As you can guess from the domain name, the bucket is hosted in one location. With "one location" I mean the unique URL, but also "EU West 1", which is one region (or location).
Files in the bucket are accessible via HTTP: //cdn-cppse-nl.s3-website-eu-west-1.amazonaws.com/some/path/to/a/file.txt.
If you put Cloudfront in front of your bucket, you can make if fetch from your bucket, and "cache" it in X locations all over the world. Your cloudfront endpoint is something like <UNIQUEID>.cloudfront.net.
When you want to use another domain in your HTML, you can define a CNAME (canonical name, a hostname that resolves to another hostname basically), which is a dns record that points to the cloudfront.net domain. In my case cdn.cppse.nl points to d15zg7znhuffnz.cloudfront.net (which reads from cdn-cppse-nl.s3-website-eu-west-1.amazonaws.com).
Creating a CNAME has the advantage that you can at DNS level switch to another CDN. If I were to use akamai, I can make the CNAME point to something from akamai. I could also prepare a totally new bucket and/or cloudfront endpoint, and then switch to the new endpoint by changing the CNAME to another <UNIQUEID2>.cloudfront.net.
Second how Cloudfront / CDNs work...
Cloudfront hostname resolves to multiple IP addresses. At DNS level the actual "edge" (a.k.a. server, in terms of it's ip address) is chosen where the actual files are to be fetched from. You can interpret all the cloudfront edges as "mirrors" for your S3 bucket. On my home PC (which is currently near Amsterdam) when I resolve cdn.cppse.nl (d15zg7znhuffnz.cloudfront.net) it is resolved to a list of IP's:
> cdn.cppse.nl
Server:     127.0.1.1
Address:    127.0.1.1#53

Non-authoritative answer:
cdn.cppse.nl    canonical name = d15zg7znhuffnz.cloudfront.net.
Name:   d15zg7znhuffnz.cloudfront.net
Address: 54.230.13.72
Name:   d15zg7znhuffnz.cloudfront.net
Address: 54.230.12.206
Name:   d15zg7znhuffnz.cloudfront.net
Address: 54.230.12.246
Name:   d15zg7znhuffnz.cloudfront.net
Address: 54.230.13.12
Name:   d15zg7znhuffnz.cloudfront.net
Address: 54.230.13.65
Name:   d15zg7znhuffnz.cloudfront.net
Address: 54.230.12.249
Name:   d15zg7znhuffnz.cloudfront.net
Address: 54.230.13.2
Name:   d15zg7znhuffnz.cloudfront.net
Address: 54.230.15.34
The fastest "edge" for my location is returned first and has the address: 54.230.13.72.
If you reverse DNS lookup that IP you can see "ams1" in the hostname the ip resolved too.
> 54.230.13.72
Server:     127.0.1.1
Address:    127.0.1.1#53

Non-authoritative answer:
72.13.230.54.in-addr.arpa   name = server-54-230-13-72.ams1.r.cloudfront.net.

Authoritative answers can be found from:
This is specific to how Amazon structures their hostnames. ams1 in server-54-230-13-72.ams1.r.cloudfront.net stands for Amsterdam Airport Schiphol. Their coding is based on the closest International Airport IATA code.
You can check how the domain resolves and what latency/packetloss is from a lot of different "checkpoints" (locations) at once, with tools like APM Cloud Monitor. In China/Hong Kong the address it resolves to is: 54.230.157.116. The reverse dns resolution for that ip is server-54-230-157-116.sin3.r.cloudfront.net, where SIN is the code for Republic of Singapore. So they won't have to download my javascript/css/media there all the way from Amsterdam.
If your website is entirely static, you could host everything this way. And hopefully people from all over the world can benefit from fast downloads from their nearest edges.
A few challenges I had with Cloudfront
After switching to Cloudfront I first noticed that loadtimes increased! ![]() I forgot that my apache used
I forgot that my apache used mod_gzip (and mod_deflate) to send text-based content compressed to the http client/webbrowser. But I uploaded my stuff to S3 "as is", which is plain/text and not gzipped.
A webbrowser normally sends in it's request whether it supports gzip or deflate encoding. If it does, apache will compress the content in a way to the client's preference, otherwise it will serve the content "as is". S3 is simply a key-value store in a way, so this conditional behaviour based on a client's headers like Accept-Encoding:gzip,deflate,sdch isn't possible. In the documentation you see that you have to create separate files.
Unfortunately Javascript doesn't have access to the browsers Accept-Encoding header (that one my chromium sends). So you cannot document.write the correct includes based on this client-side. That was my first idea.
How I now resolved it: For the CSS and Javascript files served from Cloudfront, I upload the plain version file.css and a compressed version file.gz.css. With correct headers etc., like this:
# Create expiry date
expir="$(export LC_TIME="en_US.UTF-8"; date -u +"%a, %d %b %Y %H:%M:%S GMT" --date "next Year")"

# Copy global.js to global.gz.js and gzip compress the copy
cp -prv global.js global.gz.js
gzip -9 global.gz.js

# Upload the files to bucket
s3cmd --mime-type=text/css \
      --add-header="Expires:$expir" \
      --add-header=Cache-Control:max-age=31536000 \
      -P put global.js s3://cdn-cppse-nl/global.js

s3cmd --mime-type=text/css \
      --add-header=Content-Encoding:gzip \
      --add-header="Expires:$expir" \
      --add-header=Cache-Control:max-age=31536000 \
      -P put global.gz.js s3://cdn-cppse-nl/global.gz.js
s3cmd is awesome for uploading stuff to s3 buckets. It also has a very useful sync command.
Perfect routing
Because I now have separate files for compressed and uncompressed javascript/css files, I cannot serve my static HTML files "blindly" from my CDN anymore.
I now have to make sure I send the HTML either with references to file.gz.css or file.css based on the client's browser request headers.
So I introduced "Perfect routing", okay, I'm kind of trolling with the "Perfect" here, but I use "perfect hash generation" with gperf. ![]() At compiletime I output an input file for gperf and have gperf generate a hash function that can convert an
At compiletime I output an input file for gperf and have gperf generate a hash function that can convert an article name string (the Request URI) to an Index (or to nothing in case the request is invalid).
That Index points directly to the position in a map that it also generates containing the filename that corresponds to the article name. In that way it can fetch the file in a single lookup, and the filesystem is never hit for invalid requests.
My routing.cgi program does the following:
- Read the
Accept-Encodingheader from the client. - If the generated hash function returns the filename: read the HTML into memory.
- If client requested gzip encoding: replace in the HTML javascript and CSS includes with a regex to their
.gz.jsversions. Compress the HTML itself too in the same encoding. - If client requested deflate encoding: do the same with deflate encoding on the HTML, but I currently didn't implement
.defl.jsversions for the Javascript and CSS. - Also after fixing the javascript and CSS includes, compress the HTML now in the same way (gzip or deflate).
- For fun it will add a
X-Compressionheader with compression ratio info. - If the compressed length exceeds the plain version, it will use the plain version.
routing.cgi apache 2.4 config
For now routing.cgi is a simple cgi program, it could be further optimized by making it an apache module, or perhaps using fastcgi.
AddHandler cgi-script .cgi
ScriptAlias /cgi-bin/ "/srv/www/vhosts/blog.cppse.nl/"

<Directory "/srv/www/vhosts/blog.cppse.nl/">
AllowOverride None
Options +ExecCGI -Includes
Order allow,deny
Allow from all
Require all granted

DirectoryIndex /cgi-bin/routing.cgi
FallbackResource /cgi-bin/routing.cgi
</Directory>
routing.cpp a few code snippets
1) Determine encoding:
char *acceptEncoding = getenv("HTTP_ACCEPT_ENCODING");
enum encodings {none, gzip, deflate};
encodings encoding = none;

if (acceptEncoding) {
    if (strstr(acceptEncoding, "gzip"))
        encoding = gzip;
    else if (strstr(acceptEncoding, "deflate"))
        encoding = deflate;
}
2) The hash lookup:
static struct knownArticles *article = Perfect_Hash::in_word_set(requestUri, strlen(requestUri));
if (article) {
    printf("X-ArticleId: %d\n", article->articleid);
    printf("X-ArticleName: %s\n", article->filename);
    printf("Content-Type: text/html; charset=utf-8\n");
    ....
    ss << in.rdbuf();
} else {
    printf("Status: 404 Not Found\n");
    printf("Content-Type: text/html; charset=utf-8\n");
    ss << "404 File not found";
}
3) The regexes:
if (encoding == gzip) {
    //std::regex regx(".css");
    //str = std::regex_replace(str, regx, string(".gz.css"));
    const boost::regex scriptregex("(<script[^>]*cdn.cppse.nl[^ ]*)(.js)");
    const boost::regex cssregex("(<link[^>]*cdn.cppse.nl[^ ]*)(.css)");
    const std::string fmt("\\1.gz\\2");
    str = boost::regex_replace(str, scriptregex, fmt, boost::match_default | boost::format_sed);
    str = boost::regex_replace(str, cssregex, fmt, boost::match_default | boost::format_sed);

    cstr.assign(compress_string2(str));
}
4) Compressing to gzip or deflate:
I simply took of Timo Bingmann his {de}compress_string functions, whom use deflate, and created gzip versions of these.
They took me a while to get right, to find the correct parameters etc., so you may find them useful.
You can find them here: Deflate and Gzip Compress- and Decompress functions.
More "performance wins": deferred javascript loading
As a base for the html I use adaptiv.js which provides a grid layout for a responsive design, with the following config:
// Find global javascript include file
var scripts = document.getElementsByTagName('script'),
    i = -1;
while (scripts[++i].src.indexOf('global') == -1);

// See if we're using gzip compression, and define config for adaptiv.js
var gzip = scripts[i].src.indexOf('.gz.js') != -1,
    rangeArray = gzip
        ? [
             '0px    to 760px  = mobile.gz.css',
             '760px  to 980px  = 720.gz.css',
             '980px  to 1280px = 960.gz.css',
             '1280px           = 1200.gz.css',
          ]
        : [
             '0px    to 760px  = mobile.css',
             '760px  to 980px  = 720.css',
             '980px  to 1280px = 960.css',
             '1280px           = 1200.css'
         ];
Only after loading the javascript will it correctly "fix" the right css include, introducing an annoying "flicker" effect. This makes it necessary to require the adaptiv.js javascript asap (a.k.a. in the header of the page).
To fix this I simply added the same css includes with media queries:
<link href='//cdn.cppse.nl/global.css' rel='stylesheet'>
<link href='//cdn.cppse.nl/assets/css/960.css' media='only screen and (min-width: 980px) and (max-width: 1280px)' rel='stylesheet'>
<link href='//cdn.cppse.nl/assets/css/720.css' media='only screen and (min-width: 760px) and (max-width: 980px)' rel='stylesheet'>
<link href='//cdn.cppse.nl/assets/css/1200.css' media='only screen and (min-width: 1280px)' rel='stylesheet'>
<link href='//cdn.cppse.nl/assets/css/mobile.css' media='only screen and (min-width: 0px) and (max-width: 760px)' rel='stylesheet'>
Now the javascript in adaptiv.js is only a fallback for browsers that don't support these queries.
All javascript can now be included after DOM elements are loaded/rendered. Nowadays there may be different libraries that don't have this problem. But I'm not up-to-date on that ![]() .
.
As long as you make sure the javascript is loaded after all elements are drawn.
Personally I don't put do that in the <body>'s onload="" attribute, as that is executed after everything on your page is loaded. I prefer to put it right before the body tag closes (</body>), as only the static DOM should have been outputted for the browser.
(You may want your javascript photo-viewer loaded before the very last thumbnail is done loading for example.)
// Now start loading the javascript...
var j = document.createElement('script');
j.type = 'text/javascript';
j.src = '//cdn.cppse.nl/global.' + (gzip ? 'gz.' : '') + 'js?' + version;
document.body.appendChild(j);
You can also do this for certain stylesheets, like the print.css perhaps.
Image compression
Another huge gain is of course compressing images. I have PNG, JPG and GIF images. Before I choose a format I already try to choose the most appropriate encoding. Typically PNG or GIF for screenshots, JPG for everything else. In my static site generation, I also optimize all images.
TruePNG + PNGZopfli are the best for lossless compression, see this awesome comparison.
They are windows tools, but they run perfectly with wine, albeit a little slower that's how I use them.
For gifs I use gifsicle (apt-get install gifsicle), and for JPG jpegoptim (apt-get install jpegoptim).
minimize_png:
    wine /usr/local/bin/TruePNG.exe /o4 "file.png"
    wine /usr/local/bin/PNGZopfli.exe "file.png" 15 "file.png.out"
    mv "file.png.out" "file.png"

minimize_jpg:
    jpegoptim --strip-all -m90 "file.jpg"

minimize_gif:
    gifsicle -b -O3 "file.gif"
Excerpt from minimize.log:
compression of file 86-large-thumb-edges.png                                               from 96K        to 78K
compression of file 86-edges.png                                                           from 45K        to 35K
compression of file 86-thumb-edges.png                                                     from 38K        to 31K
compression of file 600width-result.png                                                    from 1,3M       to 121K
compression of file 72-large-thumb-userjourney.jpg                                         from 100K       to 29K
compression of file 57-large-thumb-diff_sqrt_carmack_d3rsqrt.jpg                           from 557K       to 95K
compression of file 63-result.jpg                                                          from 270K       to 137K
compression of file 55-large-thumb-vim.jpg                                                 from 89K        to 27K
Replace google "Custom search" with something "faster"
Google's custom search is pretty useful and easy to setup. I did have to do a few nasty CSS hacks to integrate it in my site the way I wanted.
- The advantage is that is does the crawling automatically.
- The disadvantage is that it does the crawling automatically.
- Another disadvantage is that it adds a lot of javascript to your site.
In my case when I search for a keyword "foobar", google search would yield multiple hits:
/index- main page/blog- category/1- paging/foobar- individual article
Wanting more control I switched to Tokyo Dystopia ![]() . You can see it in action when searching via the searchbox on top of the page.
For this to work I now also generate a "searchdata" outputfile alongside the HTML, which is simply the "elaborated" Markdown text. With elaborated I mean code snippets and user comments included.
. You can see it in action when searching via the searchbox on top of the page.
For this to work I now also generate a "searchdata" outputfile alongside the HTML, which is simply the "elaborated" Markdown text. With elaborated I mean code snippets and user comments included.
CSS and Javascript minification
Not going into detail on this one. As a tool I use mince, which by default provides css and js minification with with csstidy and jsmin. For javascript I made a small adjustment to make it use crisp (who is an old collegue of mine)'s JSMin+. Because it's a more advanced minifier that yields even smaller javascript files.
Deferred loading of embedded objects like YouTube videos
I found YouTube/Vimeo & Other flash embeds in my blog posts annoyingly slow. So what I do is put the actual embed code in a container as an HTML comment. For example: I have a custom video player for an mp4 stream like this:
<p><center>
<a class="object_holder" href="#" onclick="videoInLink(this)" style="background:url(//cdn.cppse.nl/83-videothumb.png); width: 750px; height:487px; display:block;">
<!--
<object id="player" classid="clsid:D27CDB6E-AE6D-11cf-96B8-444553540000" name="player" width="750" height="487">
    <param name="movie" value="//cdn.cppse.nl/player.swf" />
    <param name="allowfullscreen" value="true" />
    <param name="allowscriptaccess" value="always" />
    <param name="flashvars" value="file=//blog.cppse.nl/videos/wxhttpproxy.mp4&repeat=never&shuffle=true&autostart=true&streamer=lighttpd&backcolor=000000&frontcolor=ffffff" />
    <embed
        type="application/x-shockwave-flash"
        id="player2"
        name="player2"
        src="//cdn.cppse.nl/player.swf"
        width="750"
        height="487"
        allowscriptaccess="always"
        allowfullscreen="true"
        flashvars="file=//blog.cppse.nl/videos/wxhttpproxy.mp4&repeat=never&shuffle=true&autostart=true&streamer=lighttpd&backcolor=000000&frontcolor=ffffff"
    />
</object>
-->
</a>
</center></p>
The object_holder displays a screenshot of the player, giving the illusion it's already loaded. Only when the user clicks the screenshot the commented <object> is inserted using the videoInLink javascript function.
function videoInLink(anchor)
{
    anchor.innerHTML = anchor.innerHTML.replace('<!--','').replace('-->','');
    anchor.removeAttribute('href');
    anchor.onclick = null;
    return false;
}
The end
Concluding my ramblings, I hope you may have find something of use in this post.
Implemented this feature I saw in XChat
Yes, having switched to Linux and using XChat, I now first realize how slow mIRC is (connecting to my bouncer, joining all kinds of channels, replaying scrollback, etc.-- mirc takes a few seconds, where XChat is "instant"), but I don't care. It's still my client of choice for Windows.
On Tweakers IRC network, it is custom for a lot of people to indicate their away status with /nick <nickname>|afk and such. That makes sense, but XChat does something "smart", it periodically /who's all channels to know whom are away so it can color those in light grey in the nicklist. Cool feature I thought! So I "extended" my nicklisting coloring mirc script, by adding aways.ini. It's no longer necessary to keep changing your nickname with an away status (on freenode it isn't even allowed in some channels ).
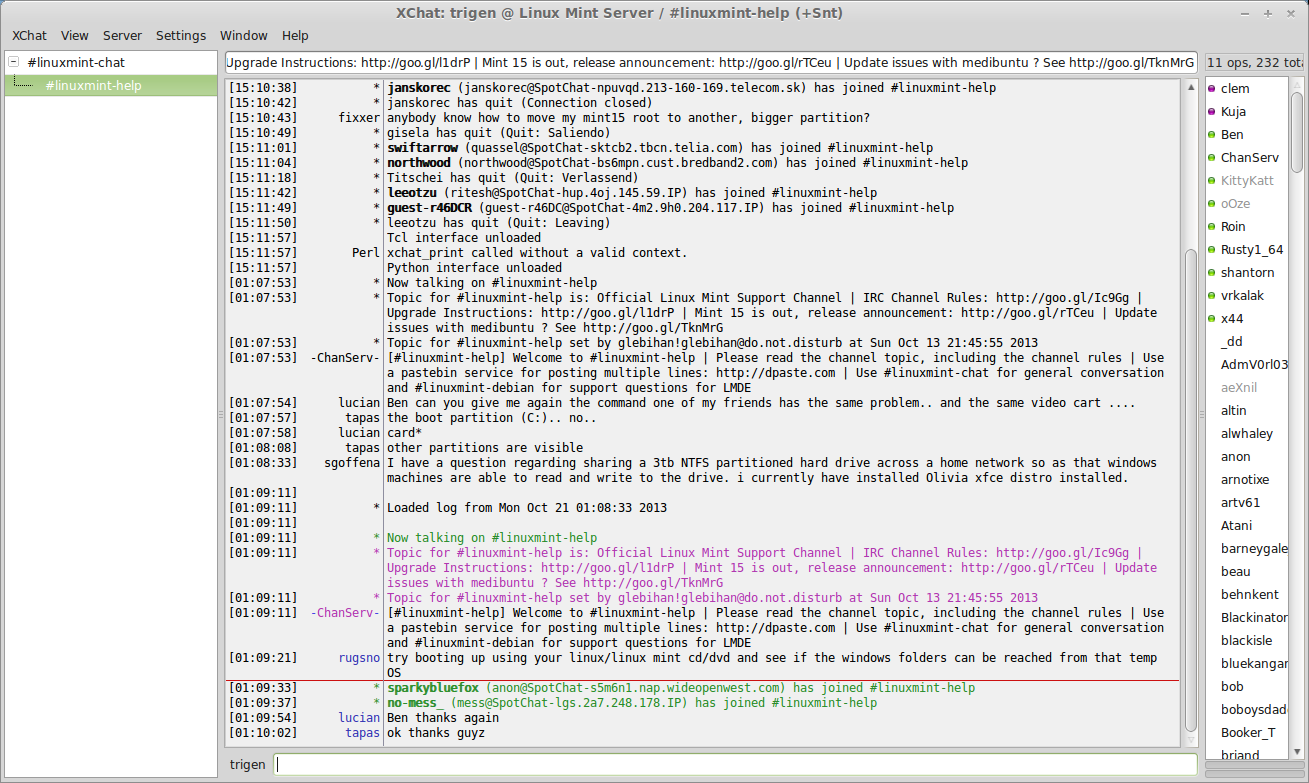
Away nicks in light-grey in XChat
The same feature in mIRC
It's a pity that such an inefficient implementation is required ("pull"ing /who aways.ini depends on nicklist.ini, also downloadable there. (nicklist.ini still works without aways.ini, it will then use light grey at random instead.)
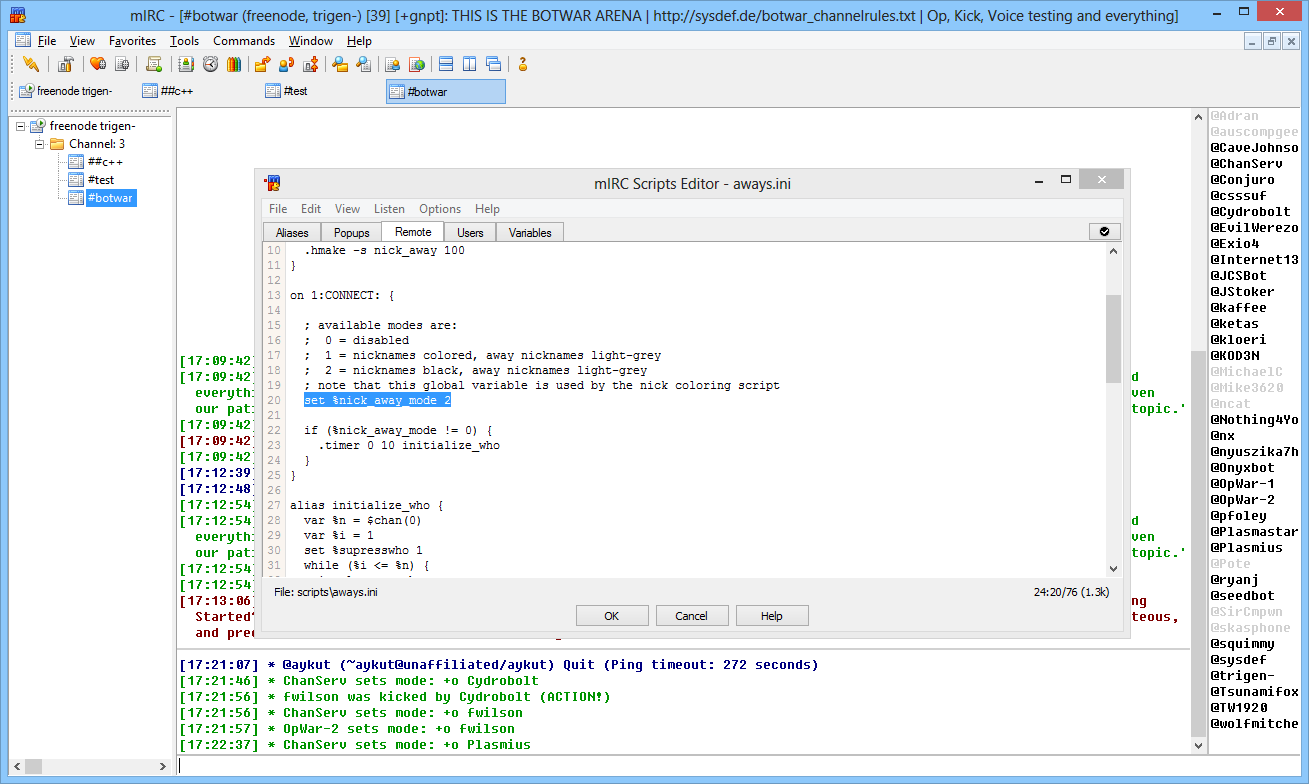
Away nicks in light-grey
Away nicks in light-grey, other nicks colored.
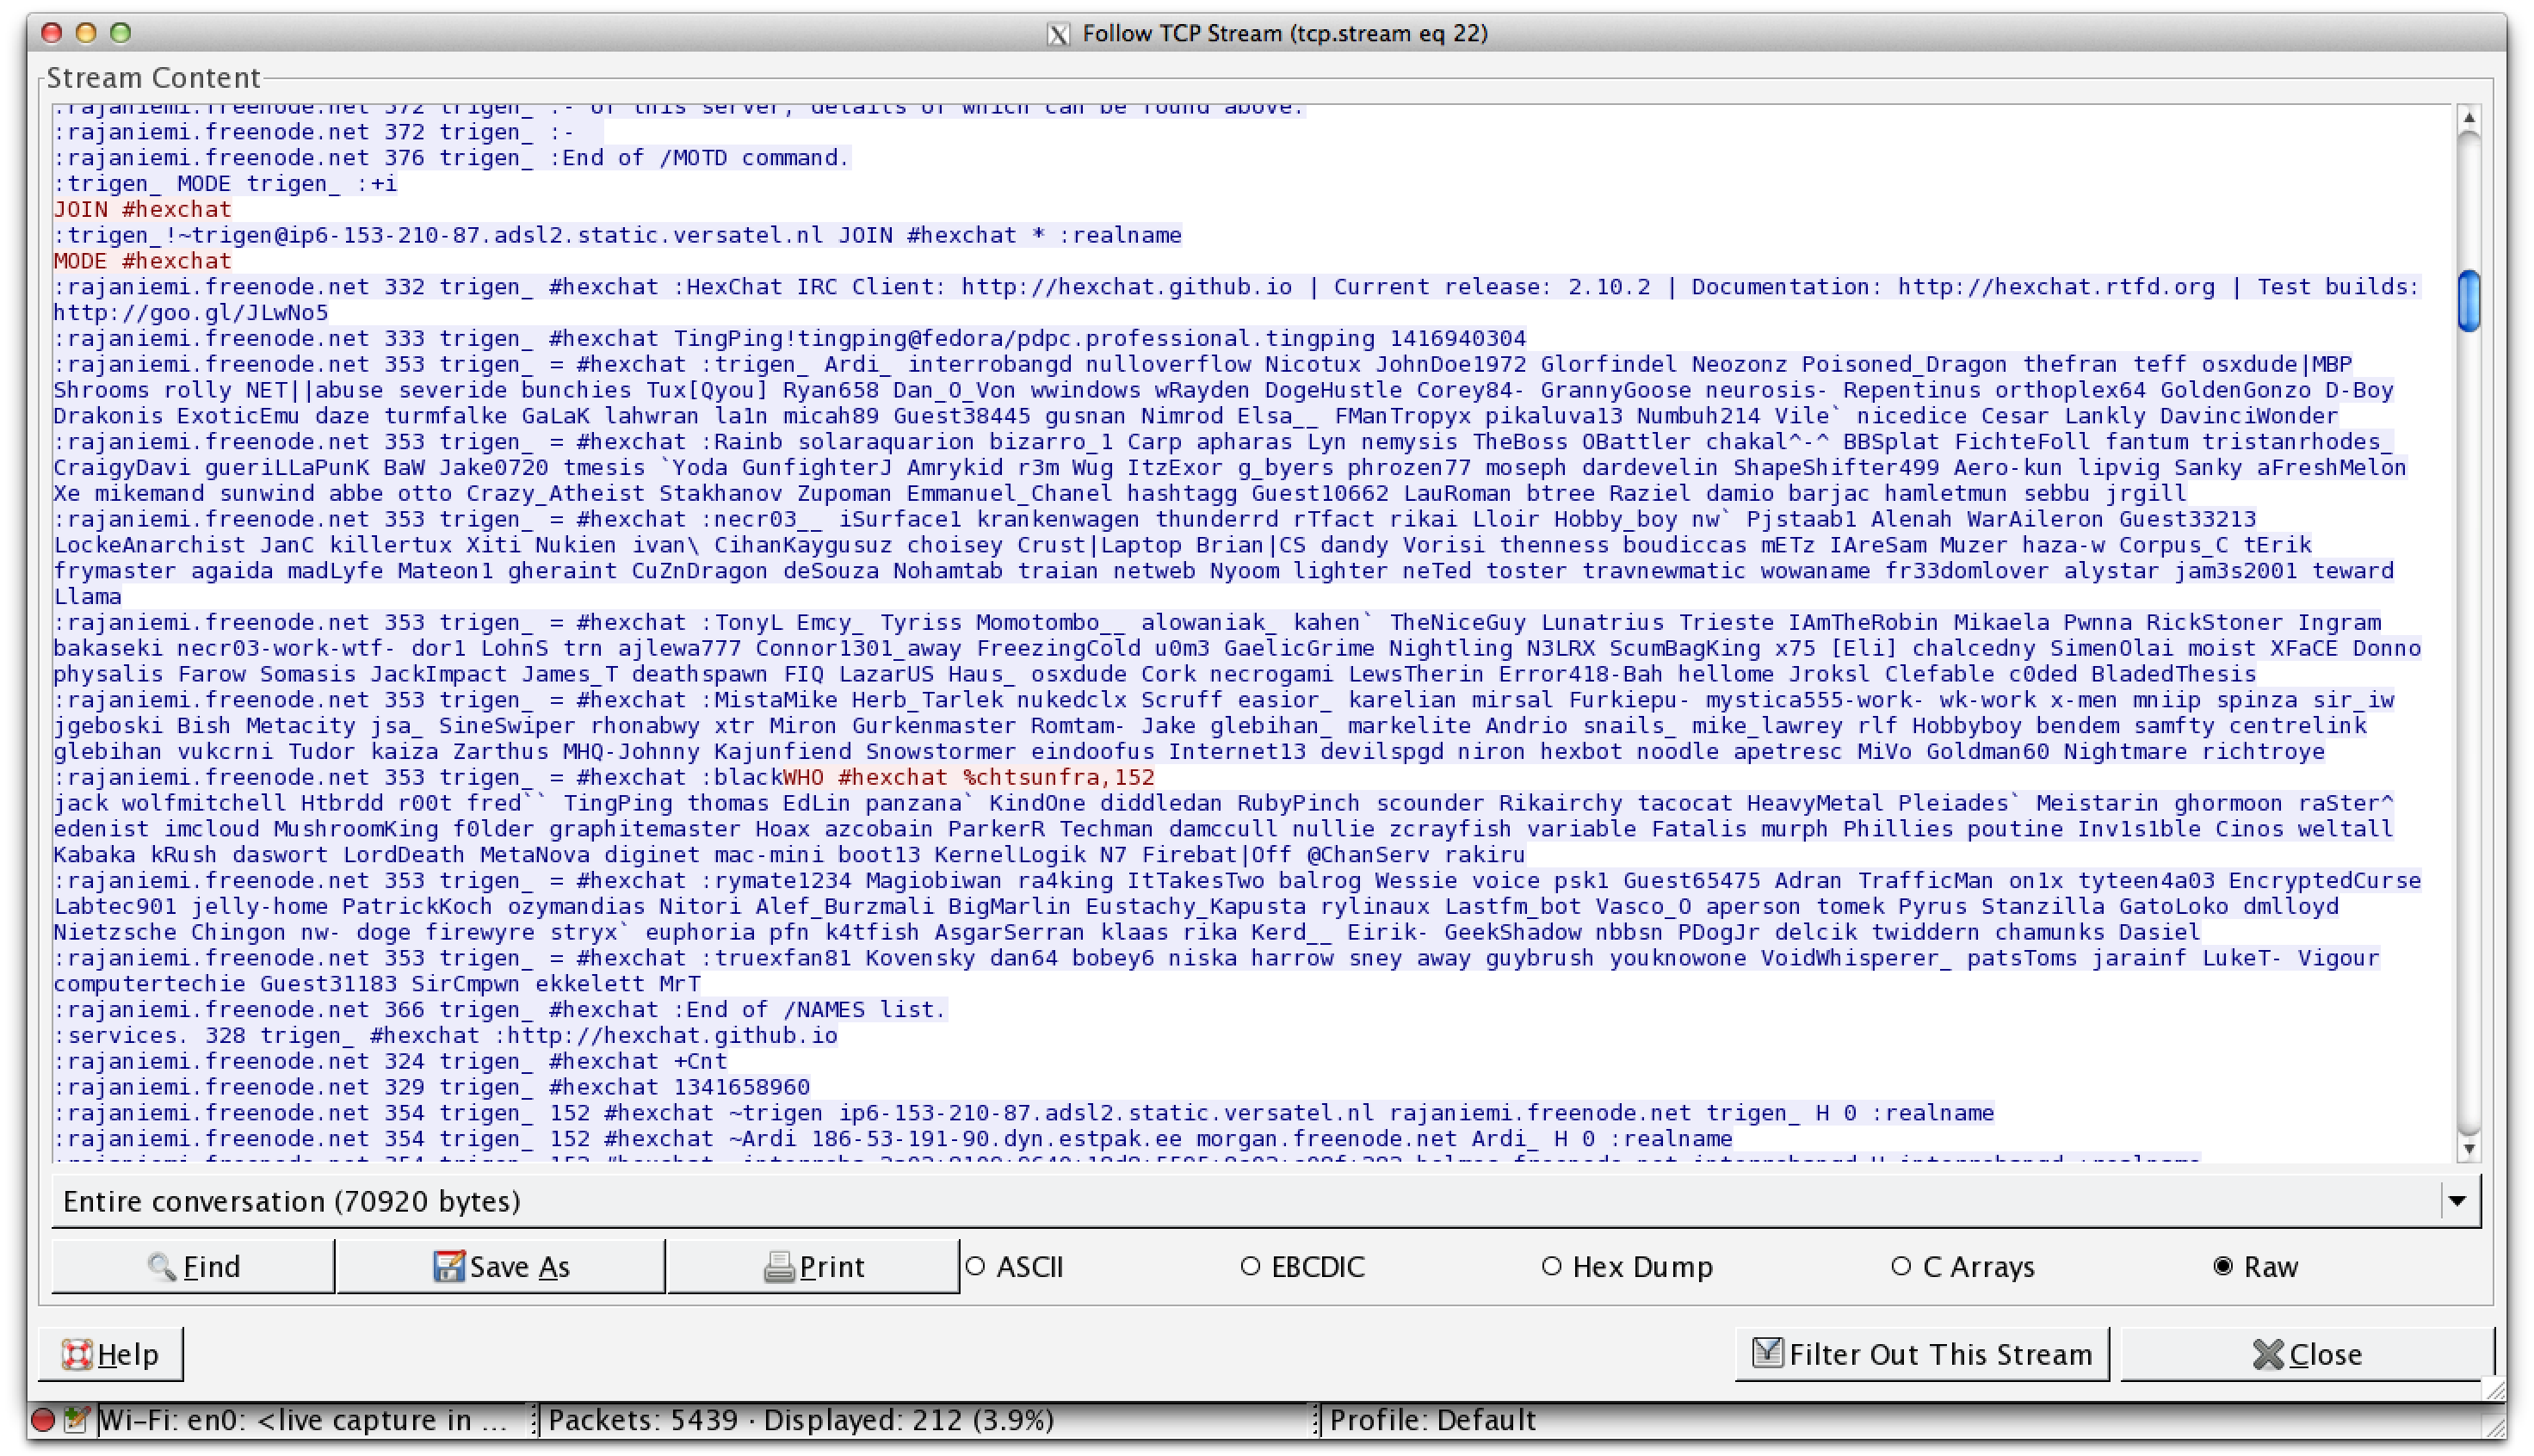
Click the play button to start stream. (Will only work if I have the script running on my raspberry pi though. ![]() )
)
raspivid + ffmpeg
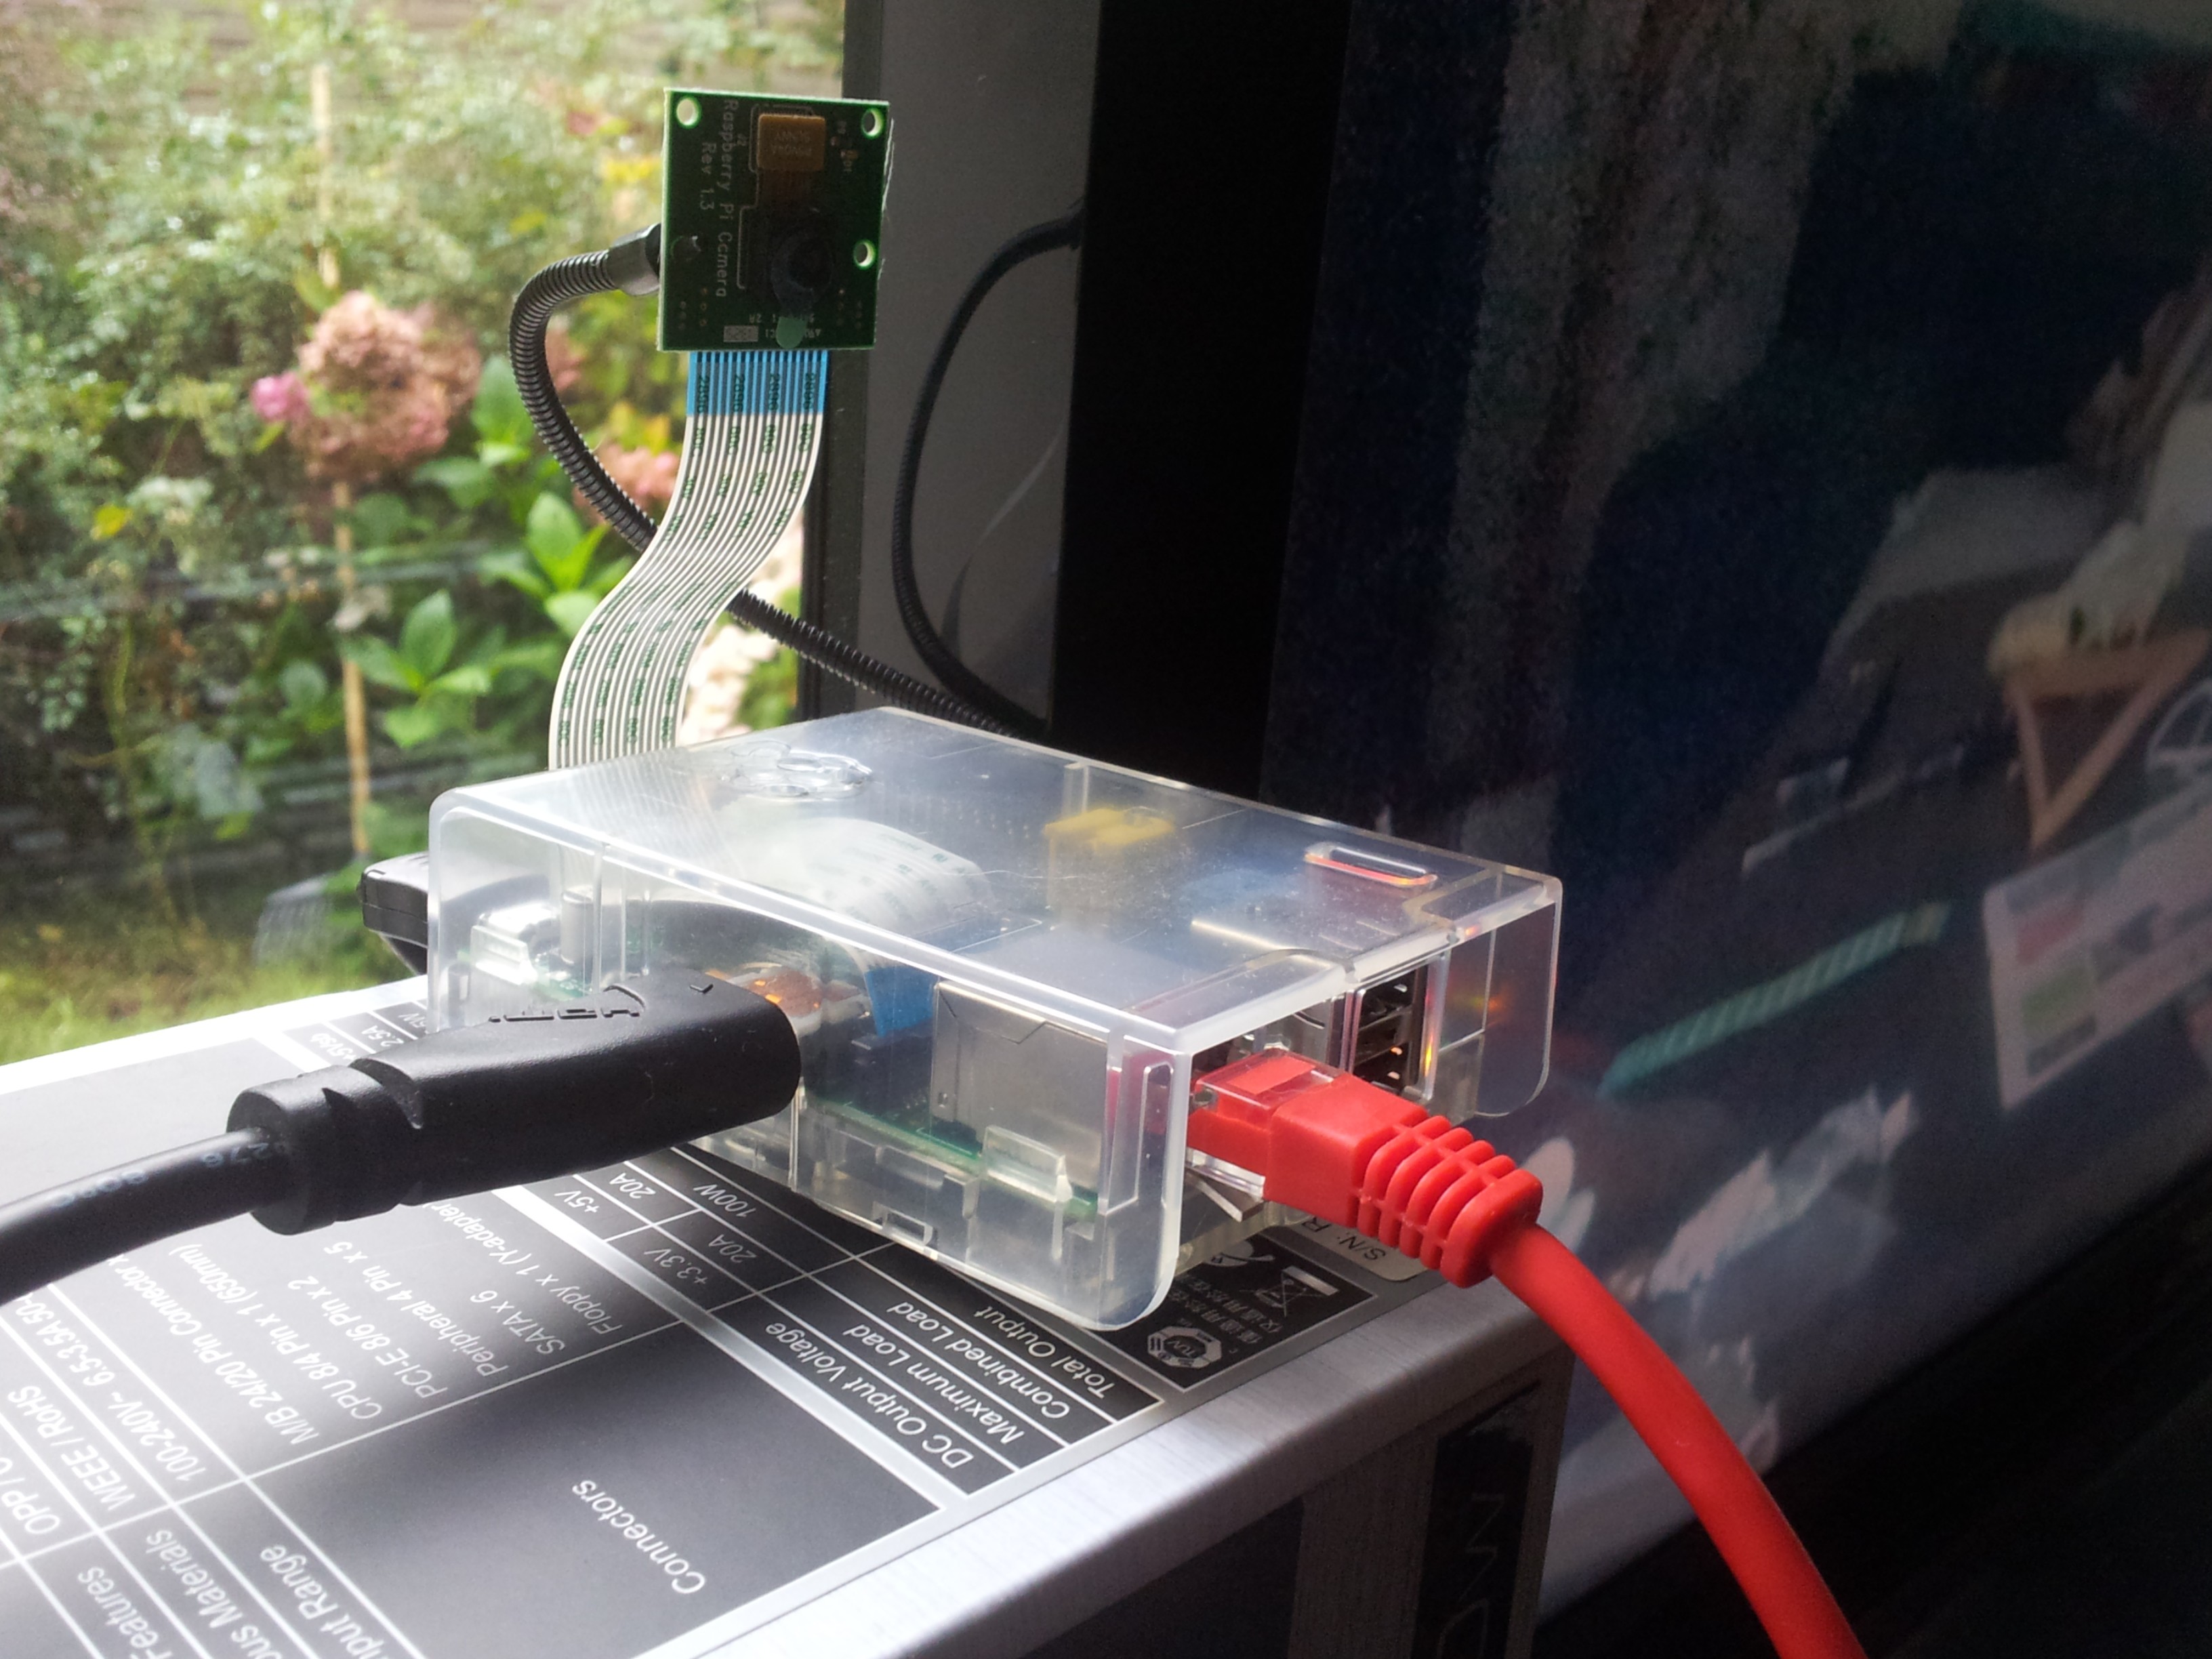
# test chaining raspivid and ffmpeg
raspivid -t 5000 -w 960 -h 540 -fps 25 -b 500000 -vf -o - | ffmpeg -i - -vcodec copy -an -r 25 -f flv test.flv

# stream to tcp endpoint
raspivid -n -t 0 -w 1920 -h 1080 -fps 25 -b 2000000 -o - | ffmpeg -i - -vcodec copy -an -f flv -metadata streamName=video2 tcp://cppse.nl:6666
Port 6666 is the same with the sample that is delivered with crtmpserver (the flvplayback.lua sample).
Turn off pi camera led
#!/usr/bin/env python
import time
import RPi.GPIO as GPIO

# Use GPIO numbering
GPIO.setmode(GPIO.BCM)

# Set GPIO for camera LED
CAMLED = 5

# Set GPIO to output
GPIO.setup(CAMLED, GPIO.OUT, initial=False)

# Five iterations with half a second
# between on and off
#for i in range(5):
#  GPIO.output(CAMLED,True)  # On
#  time.sleep(0.5)
#  GPIO.output(CAMLED,False) # Off
#  time.sleep(0.5)

GPIO.output(CAMLED,False) # Off
Think I got this script from here.
 Dutch PHP Conference 2013
Het thema van de Dutch PHP Conference 2013 was Respecteer het eco-systeem.
Dag één begon voor mij (en mijn collega's) 7 juni en Ade Oshineye opende met het pleiten voor User Journeys, de flows over meerdere devices die gebruikers volgen zoals openen van een nieuwsbrief op een telefoon en naar doorklikken naar product om deze uiteindelijk te kopen op een werkstation.
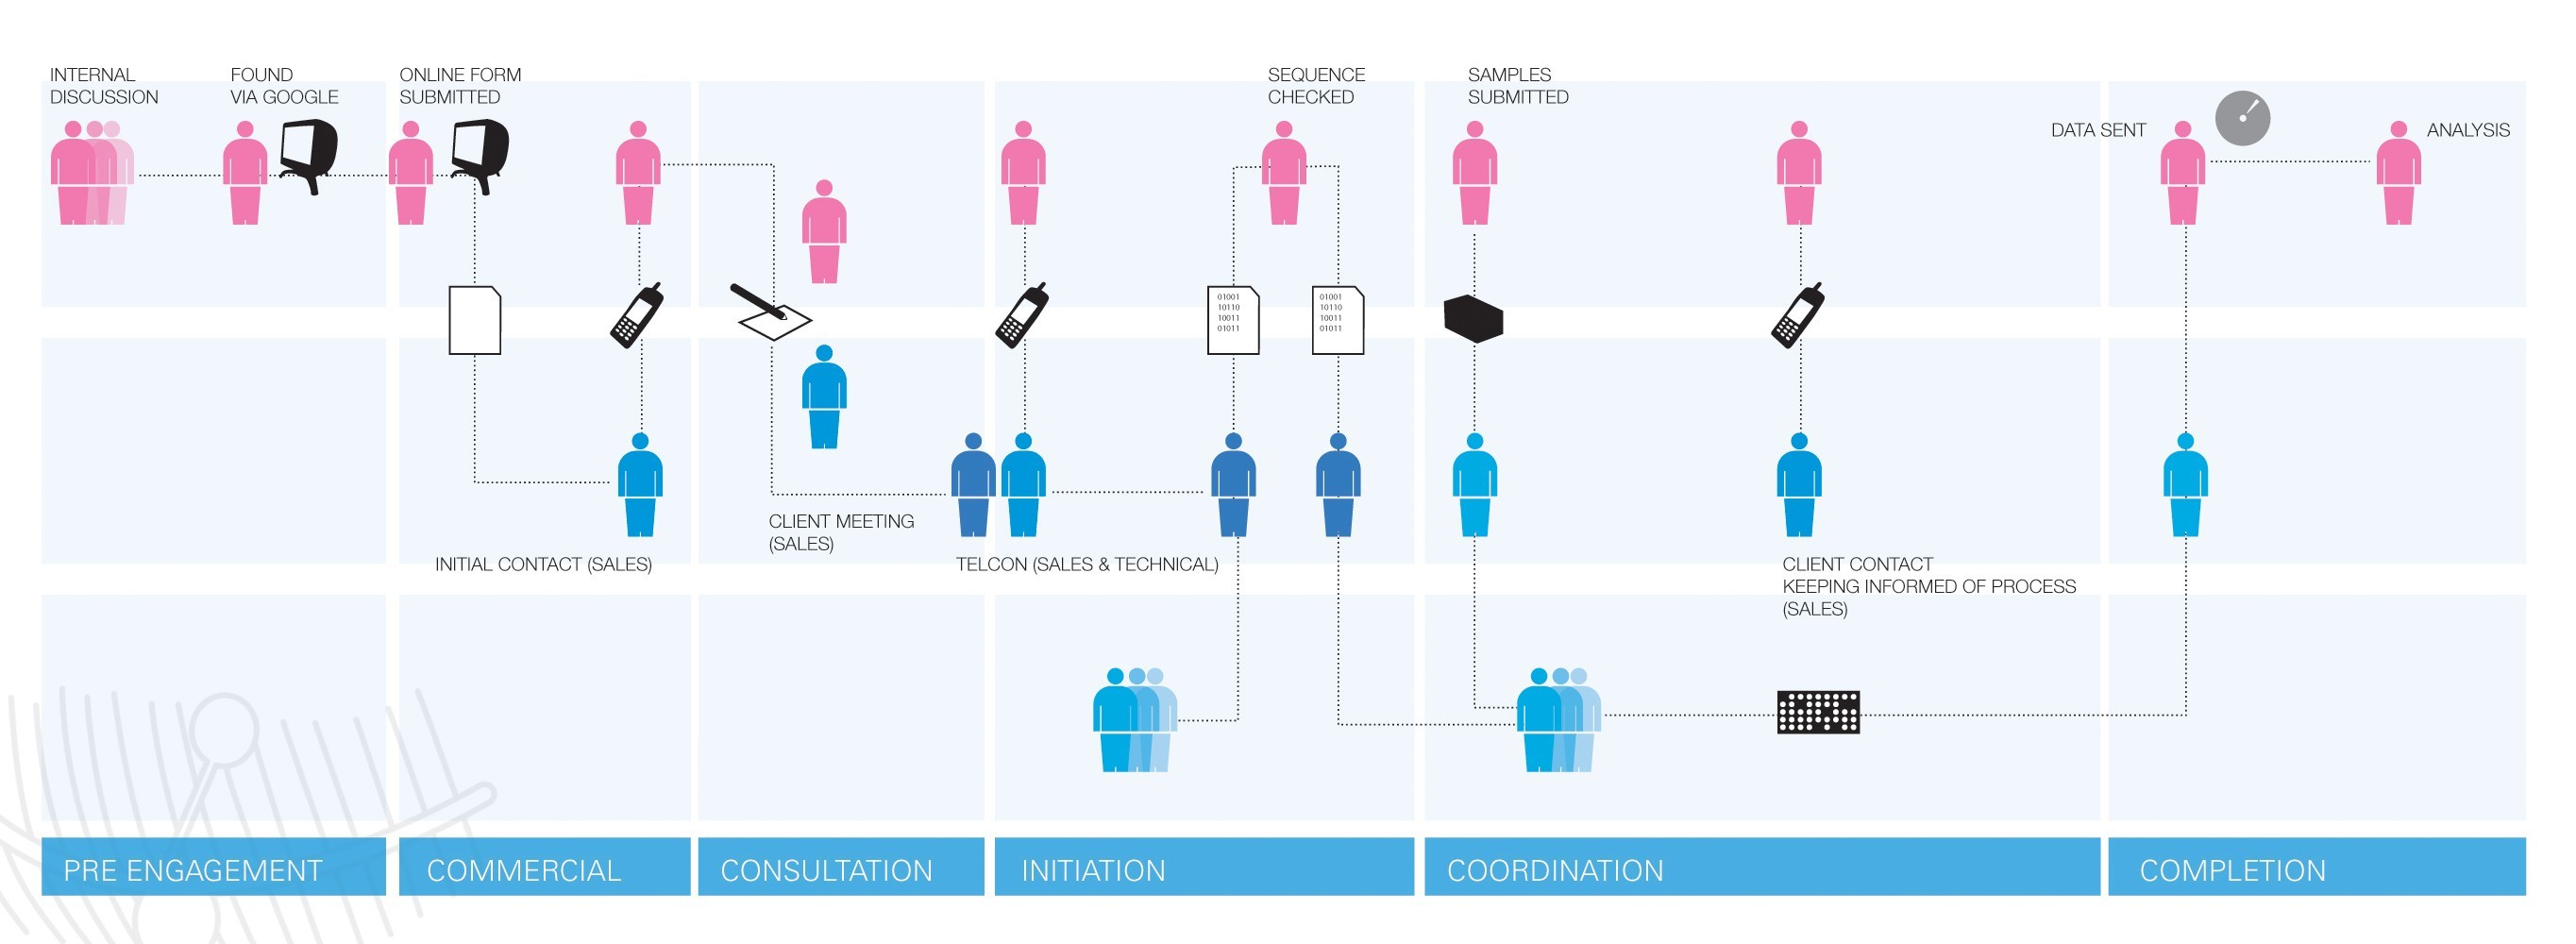
Denk ook na over dat een website geopend in een LinkedIn app nog kleiner getoond wordt (aangezien het in een webview geladen wordt, soort een frame). Hoe ziet je site er dan nog uit?
Hoe vaak komt het niet voor dat je vanuit een nieuwsbrief door wilt klikken naar een product om vervolgens geconfronteerd te worden met een inlogscherm? Kan dat niet gebruiksvriendelijker?
Unbreakable Domain Models van Mathias Verraes bevatte tips die mij doen denken aan OO in C++: goed gebruik maken van types. I.p.v. een string voor een e-mail echt een Email class maken die eventueel ook validatie regelt. Wat ik interessant vind om te zien is dat de spreker in zijn sheets gebruik maakt van exceptions in de constructor. Waar ik persoonlijk ook groot fan van ben maar veel mensen in mijn omgeving niet .
Naar mijn mening moet je een type niet half kunnen aanmaken (constructen) want dan is het geen volledig type, maak dan een liever een ander type die die state representeert.
Zijn slides over "Encapsulate operations" tonen gebruik van een CustomerSpecification interface en het maken van classes zo dicht mogelijk bij het domein.
Surviving a Prime Time TV Commercial - David Zuelke. Zeer interessante manier van vertellen met veel tips en info, triggert mij te kijken naar e.e.a., zoals genoemde supervisord, transactional e-mail of elastic search. Voor hun use-case was het zinvol om zo'n beetje alles in Elastic Search op te slaan.
PHP, Under The Hood - Anthony Ferrara. Ook goede spreker en presentatie was humorvol. Hij heeft een PHP compiler gemaakt in PHP en wist leuke dingen te vertellen over opcodes en liet bijbehorende code hier en daar zien. Helaas talk maar voor de helft gezien. Dat vm_execute.h gegenereerd wordt tijdens compileproces door PHP vind ik niet zo schokkend, dat je heel g++ compiled met g++ vind ik pas schokkend!

Mikado!
Uncon: The Mikado method - Pascal de Vink (slides here). Hele korte talk, maar wel interessant. Een methode omtrent een leuk idee, met als onderliggende toon misschien wel het tegenovergestelde van "Respecteer het eco-systeem":
- Formuleer een doel, schrijf deze op papier.
- Naief implementeren van je doel in de code, 'fuck' de details of de dingen die je stuk maakt. Gewoon coden hoe het moet worden.
- Als je dit foutloos hebt gedaan en alles werkt nog: klaar. Maaarrr waarschijnlijk heb je wel een aantal dingen stuk gemaakt, heb je een lijstje compile errors of heb je in je hoofd een aantal TODO's of FIXME's
")
- Je schrijft deze als dependencies onder je doel (alles met pen en papier). Dit zijn dan de prerequisites voor je doel in een boomstructuur.
- Je fixed ze als het simpel is of shelved je changes en gaat één voor één die prerequisites fixen en comitten.
- Je streept alles van je blaadje af en werkt zo gericht naar je doel toe.
Idee achter deze methode is dat je wellicht code weg moet gooien of shelven, maar daar tegenover staat dat je snel je prerequisites inzichtelijk hebt. Deze kun je ook aan een andere developer geven als een duidelijkere roadmap voor implementatie van dit doel.
Dependency Injection Smells - Matthias Noback. Volgens mij vond ik dit een saaie talk, weet het niet meer zeker. Maar wel veel herkenbare issues qua design en soort van eigenaardigheden in PHP. Zo is in PHP public function foo(Bar $baz) alleen maar afdwingen dat $baz de interface Bar implementeert. Maar is $baz gewoon de implementatie, en als je niet uitkijkt programmeer je tegen de implementatie aan i.p.v. de interface. (Gelukkig is phpstorm slim genoeg om dit snel herkenbaar te maken)
Getting your toolbox together - Daan van Renterghem. Was een leuke talk, ging over Vagrant. Persoonlijk nooit een hobby van me geweest het configureren van dit soort dingen, maar hij liet Vagrant zien en vertelde over Chef en dat was zeker wel interessant.
De volgende dag...
 Growth Hacking for Humans - Eamon Leonard. (video) Zeer interessante keynote. Een man die behoorlijk ondernemend is en een aantal fasen heeft doorlopen die hij wilde delen met de rest. Benadrukte de belangrijke rol van communities.
Scenario Driven API Design - Ivo Jansch. Sta je op het punt een (REST) API te ontwikkelen, neem dan deze talk even door. Leuke anecdote, spreker: "Wie heeft er wel eens wat gehoord over Scenario driven design, buiten deze talk om dan natuurlijk?". Eén of twee mensen steken hun vinger op. "Oh, dat is grappig want ik heb die term dus zelf verzonnen.".
Introduction to Django - Travis Swicegood. Was eerlijk gezegd best nieuwsgierig naar dit framework. Omdat ik binnenkort ook eens wat met Python wil gaan doen. Wel veel goede dingen over Django gehoord maar de spreker heeft niet echt goed de kracht van het framework over weten te brengen naar mij. Bleef overigens ook allemaal erg basic en na elke slide kwam een slide met daarop: "Are there any questions?".
Emergent Design with phpspec - Marcello Duarte. Deze meneer was er erg handig mee, hij is dan ook de man achter het project. Het is denk ik PHPUnit done right, maar dan niet zoals het ellendige SVN "CSV done right" zou moeten zijn. Het is iets breder, je werkt meer vanuit de specificaties (die geformuleerd zijn als tests). phpspec is gefocust om zo zinvol mogelijke foutmeldingen/feedback te geven en slimmer te zijn. Dat laatste wil zeggen dat het gespecte methoden of classes voor je kan aanmaken die nog niet bestaan. Het ondersteund je beter in Test of Behaviour driven development.
Measuring and Logging Everything in Real Time - Bastian Hofmann. Veel zinvolle tips m.b.t. logging. Veel voorkomende problemen is dat je meerdere servers en dus logs hebt, welke log entries overal horen nou bij elkaar. PHP heeft leuke apache_note. Andere trefwoorden: graylog2, elastic search, AMQP, logstash, graphite, statsd, boomerang.js, X-trace-id, monolog, error_log, set_error_handler, set_exception_handler. Zat een heel verhaal omheen, wat ik hier niet zal reproduceren.
Conclusie
Worse Is Better, for Better or for Worse - Kevlin Henney. Zeer boeiende spreker, kan ik echt lang naar luisteren zulke talks. Alan Kay meerdere keren geciteerd gedurende deze conference, zo ook in deze talk, zie ook phpspec slides, slide 40. Het messaging aspect tussen de objecten is onderbelicht geweest, zie slides 13, 14, 15 (erg leuk). Ik vind het "jammer" dat ik geen ervaring heb met COM, dus zal eens een keer uit nieuwsgierheid naar kijken. Hij ging in deze talk in op een uitspraak "Worse is better":
Over two decades ago, Richard P Gabriel proposed the thesis of "Worse Is Better" to explain why some things that are designed to be pure and perfect are eclipsed by solutions that are seemingly limited and incomplete. This is not simply the observation that things that should be better are not, but that some solutions that were not designed to be the best were nonetheless effective and were the better option. We find many examples of this in software development, some more provocative and surprising than others. In this talk we revisit the original premise and question in the context of software architecture.
Wat is het antwoord op deze vraag? Als Smalltalk zoveel "mooier" is, waarom programmeren we nu inmiddels niet allemaal in Smalltalk? Waarom werd C++ zo populair? Het antwoord is dat C++ het ecosysteem respecteerde. In de tijd van Smalltalk waren thuis computers nog zo snel niet en smalltalk was een stuk zwaarder, daarbij draaide het afgezonderd in een virtual machine in zijn soort van eigen ideale universum. Hierbuiten smalltalk is echter een heel eco-systeem wat in dit geval een "trage" computer is met een printer, muis, toetsenbord, etc. De spreker vertelde over hoe practisch hij Turbo C++ compiler vanaf een floppy op zijn computer zette en daarmee gelijk kon programmeren en echt dingen voor elkaar kon krijgen en dat de geschreven programma's snel waren. Dit is zijn waarheid, maar ik denk dat de kern van het ecosysteem respecteren wel een goed punt is, en voor mij zeer herkenbaar.
Om terug te komen op de keynote van dag één, waarom is het web zoals we dat nu kennen, met HTTP + HTML zo succesvol geworden? Er waren ook daar (geavanceerdere?) protocollen of in iedergeval alternatieven, zoals gopher. De rede is natuurlijk dezelfde, HTML "embraces the ecosysteem", het groeit mee met de ontwikkelingen, integreert en past zich aan. Denk aan Java applets, Flash, talloze file formats, VRML, WebGl maar ook juist integreert met andere protocollen zoals FTP--en ook al weet ik niet--vast ook gopher!
Wat ik handig vind is om snel een plaatje te kunnen delen, op IRC bijvoorbeeld. Naar tweakers.net gaan, {inloggen, }naar fotoalbum, file upload knop, naar juiste map bladeren, plaatje selecteren en dan uploaden... is voor mij dan niet snel genoeg. Vooral als ik het plaatje voor me heb staan, negen van de tien keer in Windows Explorer®™.
Ik wil gewoon de files selecteren, een sneltoets indrukken en aangeven in welke map ze moeten. Daarna wil ik de link hebben naar het plaatje en klaar. Geen frustratie. :)
Voorbeeld van upload naar tweakers.net fotoalbum
Leuke bijkomstigheid is dat je gelijk een heleboel files in één keer kunt uploaden op deze manier.
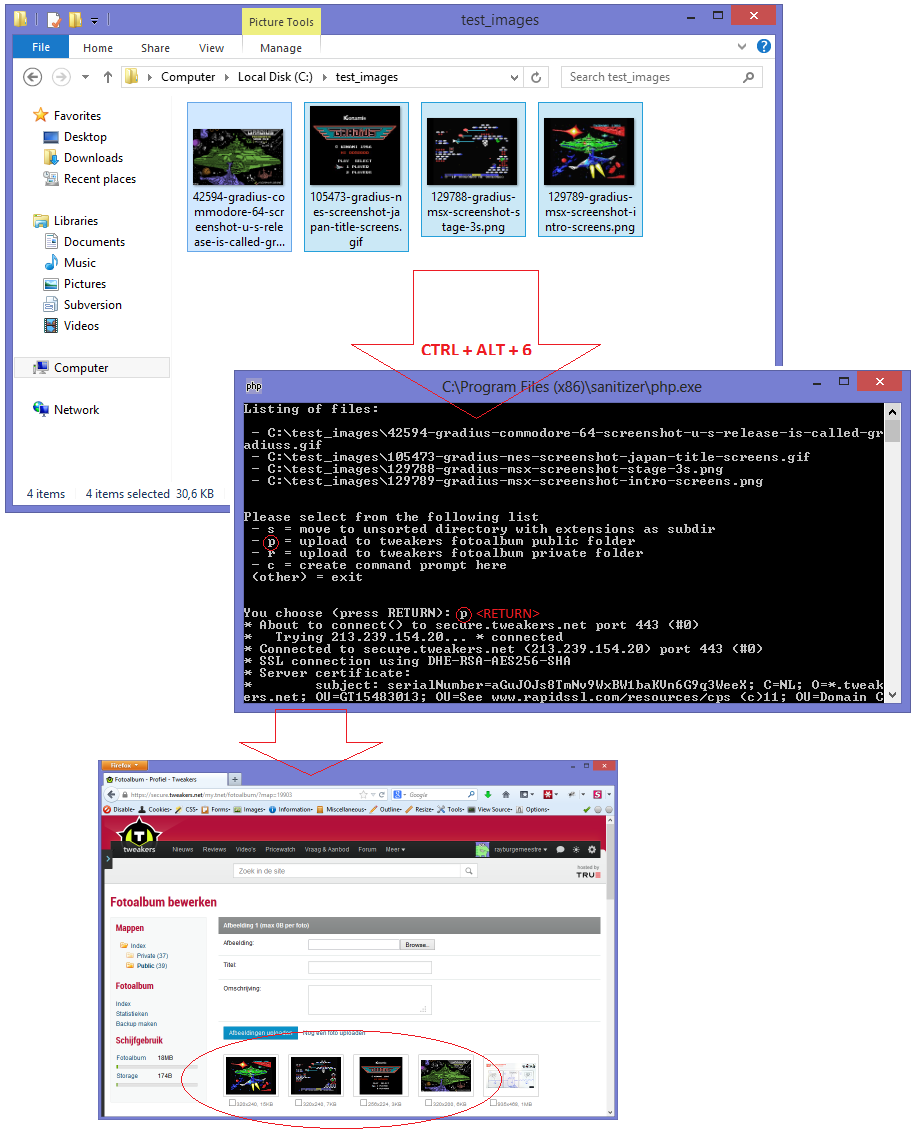
Toelichting
sanitizer.exe moet gestart zijn en luistert (standaard) o.a. op CTRL + ALT + 6. Zodra die hotkey ingedrukt wordt zal sanitizer (1) de geselecteerde files uit het actieve explorer venster lezen en wegschrijven naar het bestand selected_files.txt en (2) het php script explorer_call.php aanroepen die met dit bestand kan doen wat je wilt, in dit geval de files uploaden met curl.
Uploaden naar tweakers was het doel, maar omdat ik het überhaupt handig vind om ook andere dingen te kunnen doen met geselecteerde files in explorer heb ik het flexibel gehouden met een script.
Ook vind ik het handig om allerlei dingen onder ctrl+alt+{nummer} te kunnen stoppen: zoals text in het clipboard of system calls uitvoeren. Dus ook dat heb ik wat ruimer opgezet en daar is sanitizer uitgekomen.
Sanitizer configgen voor Tweakers.net image uploads
Je moet dus wel 1337 genoeg zijn om het fotoalbum unlocked te hebben binnen tweakers, anders zul je de optie onder je profiel niet hebben. :7
Als je mij genoeg vertrouwd kun je de installer van sanitizer downloaden en uitvoeren.
De installer maakt ook een example_tweakers/ directory aan met daarin een explorer_call.php, die kun je bewerken en over explorer_call.php heenplakken die een directory hoger staat.
Out of de box werkt deze dus nog niet.
Ten eerste zitten in explorer_call.php ook nog wat andere probeersels van mij die je kunt negeren (opties 'c' en 's').
Voorbeeld output:
Listing of files:

 - C:\Program Files (x86)\sanitizer\example_scripts\explorer_call.php.tweakers


Please select from the following list
 - s = move to unsorted directory with extensions as subdir
 - p = upload to tweakers fotoalbum public folder
 - r = upload to tweakers fotoalbum private folder
 - c = create command prompt here
 (other) = exit


You choose (press RETURN):
Ten tweede ga ik even uit van de standaard situatie dat je een private en een public folder hebt in je fotoalbum. In mijn geval is 'r' -> upload naar m'n album 'private' en 'p' naar 'public'.
Je kunt het script makkelijk uitbreiden met een extra curl request om de albums eerst dynamisch op te halen. Vergeet het dan niet in de reacties te delen ;)
Als je dit huidige script werkend wilt maken voor jezelf moet je momenteel:
1. Een TnetID (sessie id) in de sourcecode op regel 29 zetten van een actieve sessie naar tweakers.net (je zou een extra sessie kunnen maken speciaal voor dit script).
Dat kun je doen door in te loggen en met Firebug je cookie uit te lezen:
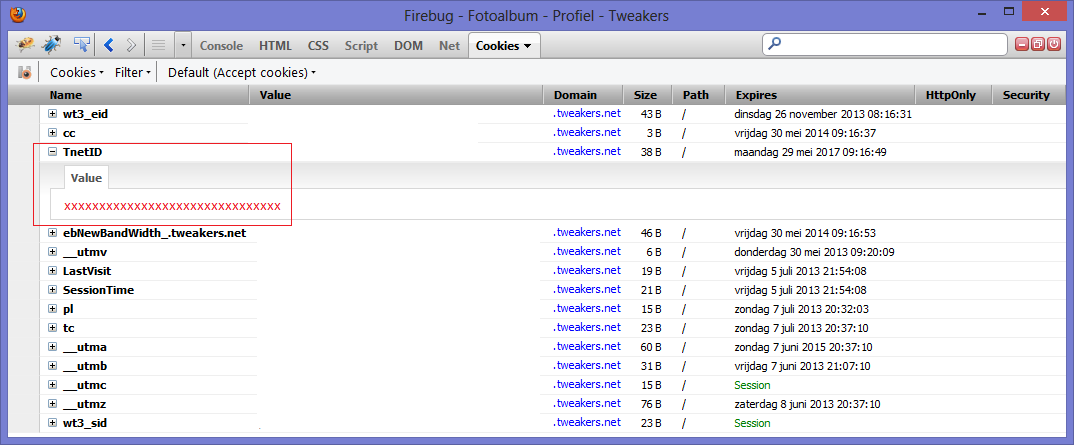
2. Je fotoalbum id's in de source zetten op regels 32 en 35.
Deze staan in de URL's van de albums, in het voorbeeld 1001:
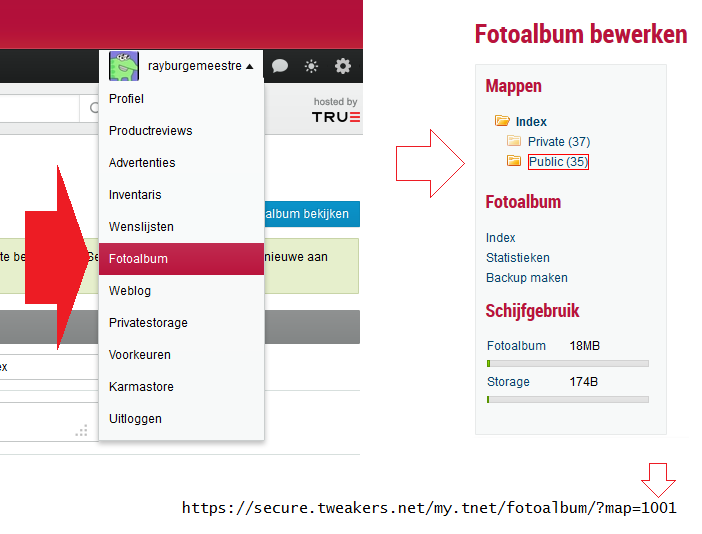
3. sanitizer.exe moet wel gestart zijn natuurlijk
Troubleshoot
- Image upload werkt niet op geselecteerde files op je desktop. Open dan eerst explorer en ga via dat ding naar de desktop..
- Lees ook de troubleshoot van sanitizer. Huidige PHP script is namelijk niet geheel fout ongevoelig opgezet. :X
Faster than random reads that is.
I knew this to be true for harddisks and SSD drives because of this presentation. (For average devices: Random I/O 2.7 MB/s vs. Sequential I/O of 213 MB/s for HDD's,
60-300 MB/s vs. 293-366 MB/s for SSD's).
But I never realized it was similarly true for RAM access, or that the impact would be this big.
Now that I do however, I realize where I must have destroyed performance in the past.. and why something else surprised me at the time in being unexpectedly fast!
SFML fast pixel read/write access!
Anyway, my goal was finding the fastest possible read and write access for pixels inside an image. In this case I used SFML and desired for
no overhead by getters or setters (providing f.i. bounds checking). Just raw access.
Found out you can get a (read only) pointer to the underlying pixel data for an sf::Image object (that I force non-const):
sf::Image image;

image.create(1280, 720, sf::Color(0, 0, 0, 255));

auto *pixels      = const_cast<sf::Uint8 *>(image.getPixelsPtr());
Wrote a simple loop to initialize an image with fancy colors (you can probably guess where this is going.. ):
for (int x = 0; x < width; x++) {
    for (int y = 0; y < height; y++) {
        int index = (x + y * width) * 4;
        // My trademark color setup
        int index = x + y;
        pixels[index + 0] = index         % 255; // R
        pixels[index + 1] = (index + 100) % 255; // G
        pixels[index + 2] = (x     + 200) % 255; // B
        pixels[index + 3] = 80;                  // A
    }
}
In the mainloop I have similar code: for each pixel, increment the RGB color values a bit. You can view the code in the screenshot a few paragraphs from now. The result was 42.65 FPS (frames per second).
Measuring FPS every 0,5 seconds 30 times, results in this average of 42.65 fps with a Standard Error of 0.08. See [1] in the following table.
| [1] | [2] | [3] | |||
|---|---|---|---|---|---|
| N | 30 | N | 30 | N | 30 |
| Mean | 42.6518 | Mean | 122.4701 | Mean | 125.8626 |
| S.E. Mean | 0.0801 | S.E. Mean | 0.2189 | S.E. Mean | 0.3322 |
| Std. Dev | 0.4387 | Std. Dev | 1.1991 | Std. Dev | 1.8193 |
| Variance | 5.5810 | Variance | 41.6968 | Variance | 95.9866 |
| Minimum | 42.1456 | Minimum | 119.8428 | Minimum | 120.3156 |
| Maximum | 44.7471 | Maximum | 124.7525 | Maximum | 128.2051 |
| Median | 42.6357 | Median | 120.7921 | Median | 125.0000 |
The fix: Changing the order of pixel access
I don't have the fastest PC so initially I thought it wouldn't get that much faster, but then I ran the profiler and discovered the first write to the color values was extremely slow. Once the pointer was in position for the pixel however, successive writes to green (G) and blue (B) (of RGBA) are fast. This made me realize it was seeking for each pixel.
So I swapped the two for loops (to first Y then X), thus aligning the loop with the memory representation of the pixels to get the much better 122.47 FPS! (see [2]).
Another minor improvement was by making the intermediate "index" variable obsolete (see [3]).
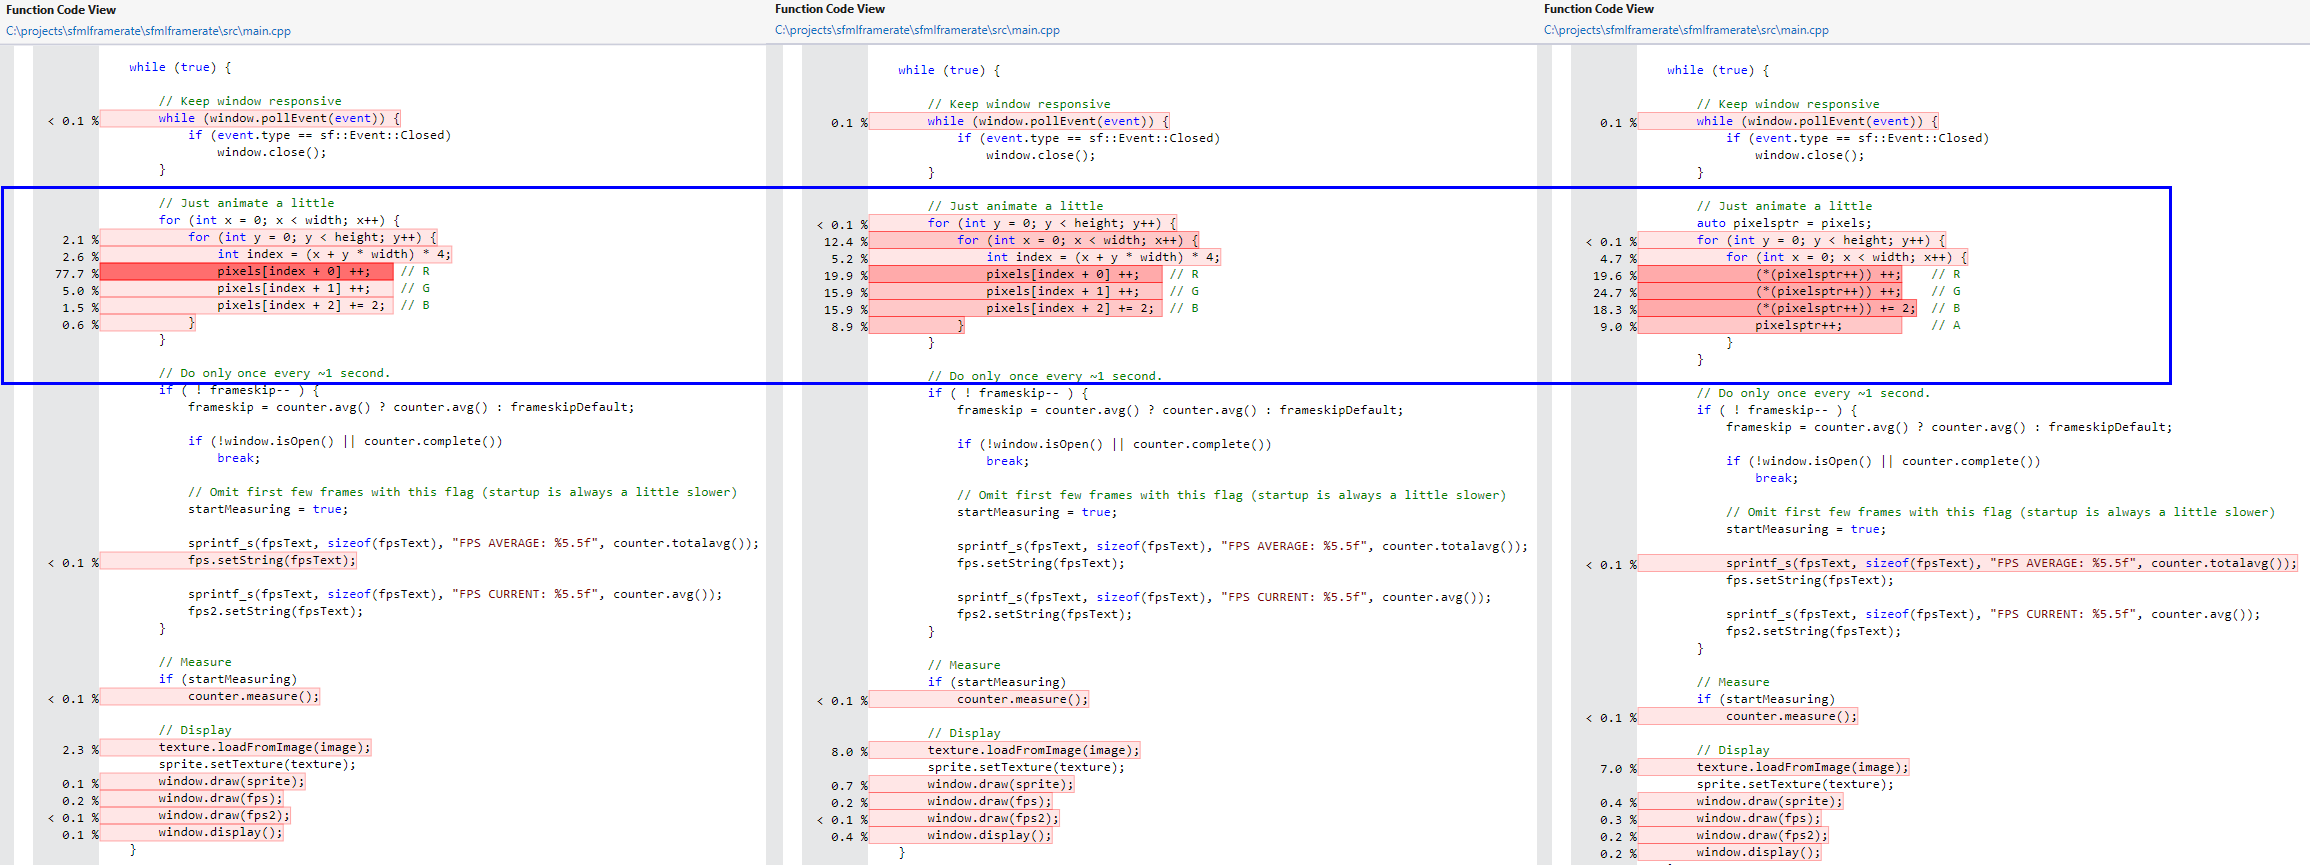
Figure: Visual studio 2012's awesome profiler output.
Note that you don't really need two for loops if you don't do stuff with the colors related to x or y.
This fix may seem obvious now, but for me this mistake of swapping the for loops was one easily made. I found it subtle and it resulted in unnecessarily poor performance. That's why I hope others to find this reminder useful!

Figure: If you didn't want poor performance, you shouldn't have swapped the for loops! (image source: here)
Also, SFML stores the RGBA values this way, other libraries may do so differently.
Recently discovered weechat, and I'm quite impressed with it!
Out of the box nicklist, nick colouring.., it just looks awesome: http://www.weechat.org/screenshots/
I am used to my IRC client to flash it's window when my name is highlighted. You can achieve this with the script bleep.pl As qbi comments over here:
You can download beep.pl: cd ~/.weechat/perl && wget http://www.weechat.org/files/scripts/beep.pl. Now you can use in weechat: /perl load beep.pl
If you use multiple windows in screen, and your weechat client is not the active one, you get a "Bell in window %n" message instead of an actual bell in the terminal. You can change that message with CTRL+A, :bell_msg "^G". Just as %n will be replaced with the window number, ^G is replaced with an actual bell. (source: http://www.delorie.com/gnu/docs/screen/screen_64.html)
In PuTTY: Change settings->Terminal -> Bell -> Taskbar/caption indication on bell: (x) Flashing. Also don't forget to use FauxFaux build of putty as it has lots of cool additional features like clickable links, ctrl+scrollwheel for changing font size, minimize to tray, ... .
I created the next best thing in the log monitoring world! It's like unix 'tail' but with additional features!!
The tool pipes all data from the logfile through a customizable java-script before presentation.
So you can change the behaviour on the fly.
The ability to script the behaviour allows you to use the following features in your logfiles (or custom logfiles). You could for example pretty-print in the "main log" output using colors, extra indenting, or enrich it with related information. But the main idea for the tool is that you can add references or bookmarks to important parts inside the log in a separate listing, the 'meta log', and thus create a more general overview of the log's output for yourself.

It displays (and parses) the logfile realtime as it behaves like tail in that sense, and it's fast because it is written in C++ but also because it uses Google's V8 engine for Javascript, which is known to be a very fast implementation. It's also quite handy that you can script and reload at runtime, so you can tweak your logfile easily with real data. The program takes around 4MB of memory, initially and grows as it logs the file of couse, it doesn't remove stuff from its outputs. There are shortcuts in case you wish to flush current output (ALT+C = clear log).
Example: Webdevelopment with MySQL (and other stuff)
While developing it can be useful to see all queries that are being executed in a specific request. Especially if you are working with software you don't know very well yet. If you have a proper database layer in your system you can probably log the queries to a file from one specific place in the code. But if you don't have that, and legacy PHP code for instance uses mysql_** functions, you cannot make a centralized change. In that case you can use mysql-proxy to sit between your software and the actual server.
You have to start it with a script like this:
local log_file = 'mysql.log'
local fh = io.open(log_file, "a+")
function read_query( packet )
    if string.byte(packet) == proxy.COM_QUERY then
        local query = string.sub(packet, 2)
        fh:write(string.format("@@begin@@\n%s\n%6d\n%s\n@@end@@\n",
            os.date('%Y-%m-%d\n%H:%M:%S'),
            proxy.connection.server["thread_id"],
            query))
        fh:flush()
    end
end
To have it output log entries in the following format:
@@begin@@
2012-11-25     << date
19:48:58       << time
786455         << thread id (probably useless)
SELECT         << query
  *            <<  ,,
FROM           <<  ,,
  some_tabl;   <<  ,,
@@end@@
So If you use my tool to tail an output file like that, with the script 'sqlonly.js' loaded. If you were to make a request that would send data to the database, It would display something like this:
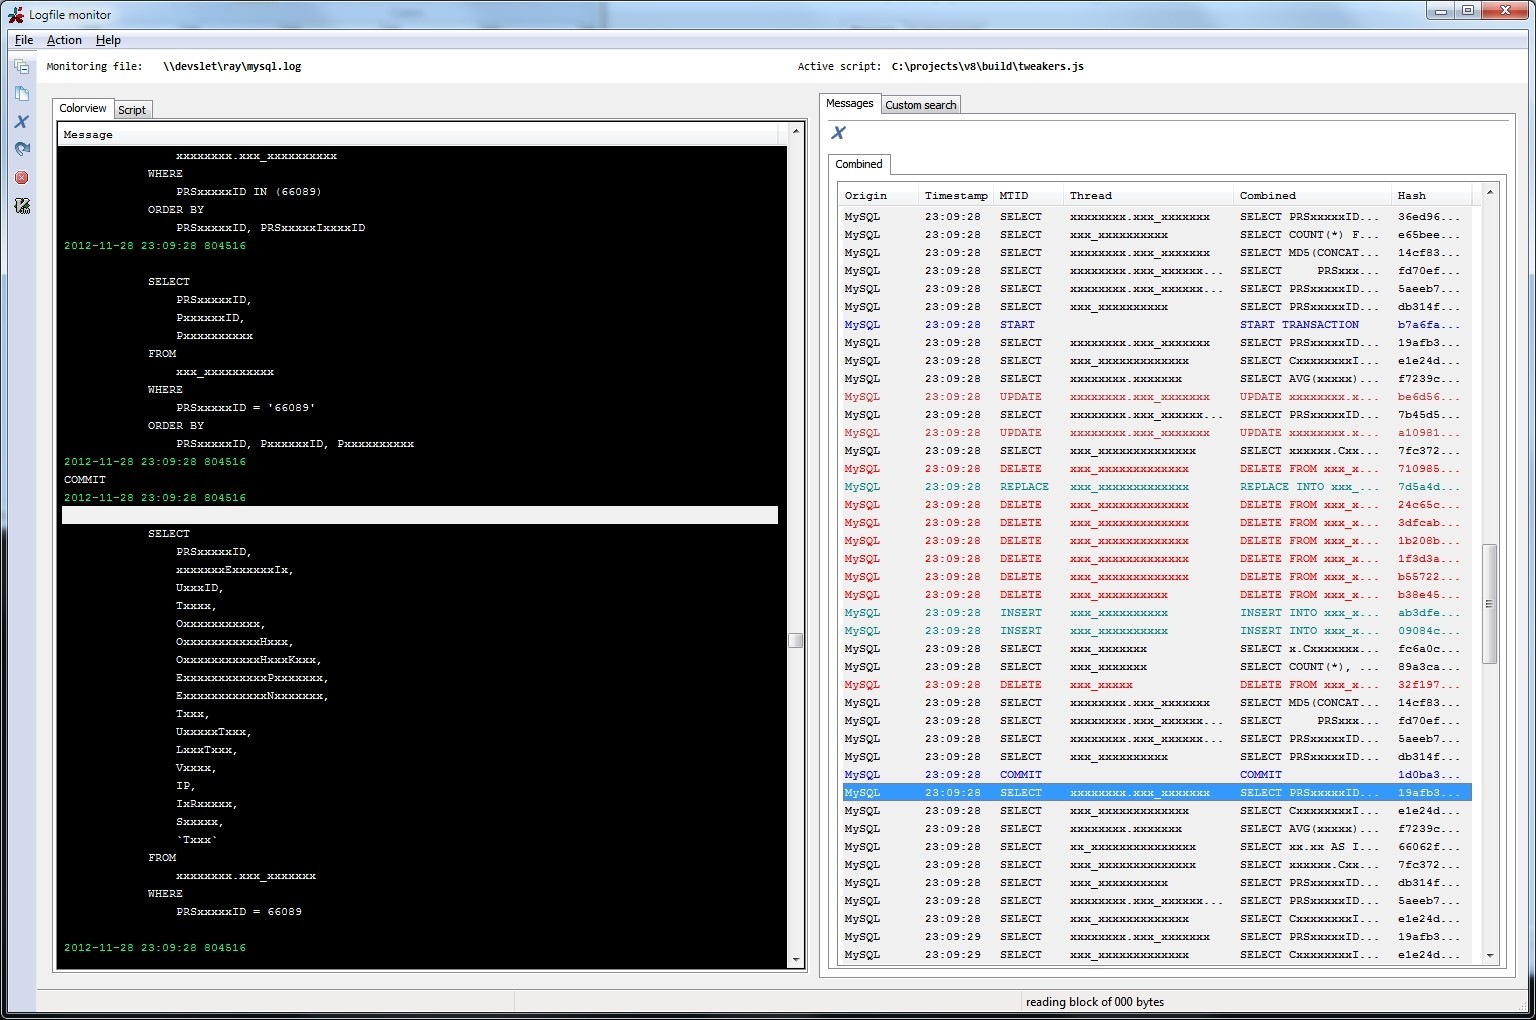
I have obfuscated the actual queries though ( line.replace(/[a-z]/g, 'x') IIRC).
In the screenshot, in the meta log specific query types have been given different colours, by focusing on the blue text for example you can see what was executed inside a transaction. Also I hadded a column "Origin": at work I use a different script because I abuse the mysql-proxy and send it other types of data as well. Like MongoDB queries, engine calls, memcached calls and JML queries. Like this for example: $db->select('/**@mongodb <some stuff>*/'); It will be proxied to MySQL, which is the dirty part, but it is considered a comment so nothing happens. But I parse this comment and so something cool with everything between the comments. You can dump a lot of stuff between the C-style comments, for example a print_r if you like, and simply add a single meta log line with "MongoDB" as the "Origin".

Another thing I setup is a .htaccess files in my development environment that sets the php error_log to the same file. I write this down just to give you some ideas. I even use it for debugging now: $something->select('/* contents: ' . print_r($obj,1) . '*/'); It was not why I made this tool initially.
"metalogmon" Usage
Personally I prefer a quickstart link (those you can start with WINKEY+{1,2,3,...}). On Windows 7 it is really nice that if you already started to log monitor it makes the existing window active. Which allows for even easier navigation to it then alt+tab.
Usage: metalogmon.exe [/h] [/s] /t /h, --help displays help on the command line parameters /s, --script= javascript file that handles the parsing /t, --tail= the file to tail The value for the option 't (or tail)' must be specified. Example: "metalogmon.exe /t \\networkshare\something\mysql.log /s C:\path\to\sqlonly.js"
Keyboard:
- CTRL+C (copy selected lines from main log to clipboard)
- ALT+C (clear output in main- and meta log)
- ALT+F4 (exit program :P)
Toolbar:
 | Currently does not do anything. |
 | Copy selected lines to clipboard (or CTRL+C) |
| Clear all output (or ALT+C) | |
 | Process entire logfile (default metalogmon will seek to end of log and tail there) |
 | Stop tailing, halts tail command. |
 | Open the active logfile in gvim. |
| Open the active script in gvim. |
Features
- You can enable an 'idle' bar, if the log is idle for more than two seconds it adds a marker. For webdevelopment this is (for me anyways) good enough to separate consecutive requests. (Note that you could log a request start explicitely)
- It detects log rotation/truncation. It will seek to the beginning of the file and simply continue.
- When resizing the window it splits the main- and meta log 50/50.
- Mainlog: customizable background and foreground color per line. Lines > 512 are truncated, but when you copy & paste them to clipboard they won't be truncated.
- Metalog: customizable background and foreground color per line, customizable column names and sizes. (largest column gets extra remaining space)
- Reload your script at runtime.
- Search case sensitive or insensitive in the main log.
Scripts
Some included scripts
- sample.js: simple example that you can use as a base for your own script.
- sqlonly.js: simple example that parsers sql queries from my log.lua mysql-proxy output.
- sqlphplog.js: sqlonly.js extended with parsing for php's error_log.
Contents of sample.js:
/**
 * Example script, display all lines prefixed with line number in main log, and
 *   create a meta log entry for every 100th line.   Meta log has two columns.
 *
 * $author: Ray Burgemeestre$
 *
 * $date: 2012-12-06$
 */


// Implemented API functions

function getColumns()
{
    return [['Line', 75], ['Message', 200]];
}

function handleLine(num, line)
{
    var newline = log(num + ': ' + line);

    if ((num % 100) == 0)
        metalog(newline, ['' +num, 'Shortcut to ' + num + 'th line', '']);
}
The API
Expects you to implement mandatory functions (see sample.js):
- function getColumns()
- return: (string[]) array: [[colname, size], [another, size], ...]
- function handleLine(num, line)
- param: (int) num, current line number
- param: (string) line, the current line from log
- return: (void)
Optionally (see sqlonly.js):
- function getIdleColors() - implementing enables the idle bar I mentioned
- return: (string[]) array: [forground color, background color]
- function getIdleMetaLog() - what text to display in idle bar in meta log, @message@ is replaced with "Idle for xx seconds".
- return: (string[]) array: [column value, column value, ...]
You have at your disposal:
- function log(message, foreground color, background color) -- add log in main log
- param: (string) message or array of format: [message, clipboard-message].
- if you want a different message to be printed in the log and another message to be copied to clipboard you can use the array version.
- param: (string) foreground color (i.e., 'red', or '#ff0000')
- param: (string) background color ,, ,,
- return: (int) the line number in the main log
- function metalog(num, colvalues, foreground color, background color) -- add log in meta log
- param: (int) num -- line number in main log, if you click this item in the meta log, it will scroll to this line in the main log.
- param: (string[]) array: [first column value, second column value, ...].
- param: (string) foreground color (i.e., 'red', or '#ff0000')
- param: (string) background color ,, ,,
- function md5(str) -- calculate md5 hash for given string
- param: (string) input
- return: (string) md5 hash.
Roadmap
I used to use a version of this tool to monitor a debug log for a multithreaded transaction processing system. Each thread would get their own text colour which was cool, and important parts in the log were logged in the meta part. It wasn't scriptable then, so no javascript was used, it had a few more features that may be reinstated in the future (If there is demand for it):
- Tree view for grouping log messages per thread
- Multiple meta log controls
- Toggable filters for what-not to log in meta log.
- Tail multiple files, combine output in log view.
- Tail database tables through ODBC connection.
TODO:
- Copy & paste from the meta log.
Download
Download here: metalogmon-1.0.zip.
In order to run the executable you may need to install the Visual C++ Redistributable for Visual Studio 2012 from microsoft. (My guess is that you don't need to do that if you run windows 8.)
Other platforms: both these libraries compile to windows, linux and osx. But currently I only made binaries for windows.
If somebody is interested in another OS I will create the binaries, but until then I'll be lazy
Smash Battle is a really cool game made by Bert Hekman and Jeroen Groeneweg. Of which Jeroen is now a collegue of mine at Tweakers.net. It supports up to four players, you can use gamepads and the multiplayer is best out of five. You can get powerups in the game like extra damage, health pack, armor etc. :) (I see that in the codebase also a single player is under development!)


Network version
I decided to add a network multiplayer gametype to it, and I develop that in a separate branch. It supports more than four players.
Currently the network multiplayer supports only bullets and mines (your default equipment). Powerups do not yet appear. All damage to players or tiles is determined on the server. The clients are trusted though, to send their correct player positions, shots fired etc. You could theoretically cheat (up to a certain level) by modifying and compiling your own client, but it is far easier to implement a network multiplayer if I can trust clients somewhat. This can easily be rewritten though, and if you play with low lags you will probably not notice any difference. But I think you will notice if someone is cheating.
Pre-alpha test release
My fork is https://bitbucket.org/rayburgemeestre/smashbattle
It's a pre-alpha because the gametype is not completely finished yet, if there are more than two players a normal best out of five multiplayer starts. Once the game has started, you cannot join the server anymore. You can already test it out simply install the current release of Smashbattle.
On Windows:
- It will default install to C:\Program Files\Smash Battle\
- Extract the contents of smashbattle-pre-alpha.zip into your installation dir. (Use BattleXP.exe if you're running Windows XP)
- If you changed the install location of it, modify the path in register_server.reg.
- Double click the .reg file, now smashbattle:// protocol should be available.
On Ubuntu:
Put this line in your /etc/apt/sources.list: deb http://repository.condor.tv lucid main
apt-get update
- apt-get install battle
- cd /usr/share/games/smashbattle/ <<<<< important! the game expects level data in ".".
- ./battle
Note that the update command might give you this if you are running 64 bit:
Ign http://us.archive.ubuntu.com quantal-backports/universe Translation-en_US
Fetched 1,032 kB in 30s (33.7 kB/s)
W: Failed to fetch http://repository.condor.tv/dists/lucid/main/binary-amd64/Packages  404  Not Found

E: Some index files failed to download. They have been ignored, or old ones used instead.
You can ignore this error and continue installing the 32 bit version.
The game should now run, but to use the pre-alpha, you have to replace the 'battle' binary with mine:
- rm -f battle && wget http://blog.cppse.nl/battle && chmod +x battle
- Edit: you may need to: apt-get install libsdl-net1.2
Server usage
You can start your server with these parameters:
Battle.exe -s
Example: Battle.exe -s

Battle.exe -s <listen port>
Example: Battle.exe -s 1100

Battle.exe -s <levelname> <listen port>
Example: Battle.exe -s "TRAINING DOJO" 1100
In case no level is given as a parameter, the server will start with level selector. In case no port is given, default will be used (1100).
Client usage
To connect to a client, you need to have registered the .reg file. You can click links like:
smashbattle://<domain.tld>:<port>
Example: smashbattle://cppse.nl:1100
You could type such an url in your WINDOWS+R (Run command) or in command prompt start <url>.
If you do not like to register the .reg file, you can also give it to Battle.exe as a parameter:
Battle.exe <url>
Example: Battle.exe smashbattle://cppse.nl:1100
After you have set a server on your machine, you should be able to connect using ---> smashbattle://localhost:1100
The level names are
"TRAINING DOJO"
"PLATFORM ALLEY"
"PITTFALL"
"DUCK'N'HUNT"
"COMMON GROUNDS"
"POGOSTICK"
"LA MOUSTACHE"
"THE FUNNEL"
"BLAST BOWL"
"PIT OF DEATH"
"RABBIT HOLE"
"STAY HIGH"
"PIE PIT"
"SLIP'N'SLIDE"
"BOULDERDASH"
"SNOW FIGHT"
In game controls
- F1 - toggle console (for debugging)
- F10 - toggle fullscreen
- F11 - toggle FPS
- ESCAPE - pause menu
Default your keyboard controls are
- a, s, d, w - left, duck, right, jump.
- CONTROL - shoot
- ALT - mine
- SHIFT - run
Roadmap
Link gameloop to timeCreate client and server classDesign efficient protocolCreate solution for lag- Introduce nicknames
- Introduce ingame chat
Support powerups- Introduce more gametypes?
- Red team vs Blue team
- King of the Hill
- Capture the flag
- Refactor*
- Merge with master
Refactoring:
While developing I sometimes put #include's above the function where I use stuff from it. This is when I feel like I might refactor the code, I can easily remove the #include again. Works for me, but it results in some stray #include's. Also I'm not sure about my design choice of making server and client singleton's (basically global classes). It was easy so I could weave the client/server code into the game rapidly, but I think it may need to integrate with the existing classes better, and use polymorphism a bit more here and there. Example: I have a few places in the code where I do different stuff based on Main::runmode static global, for server do this, for client do this..
Select behaviour in address bar in Linux
I use control + arrow keys and control + shift + arrow keys for selecting a lot.
And as a webdeveloper especially in the address bar. I think it is somehow the default under linux distributions, under OpenSuse anyways, that always all text is selected. I find that very VERY annoying. Because you cannot quickly select (a) piece(es) from the URL. But luckily I found the config setting where you can change this!
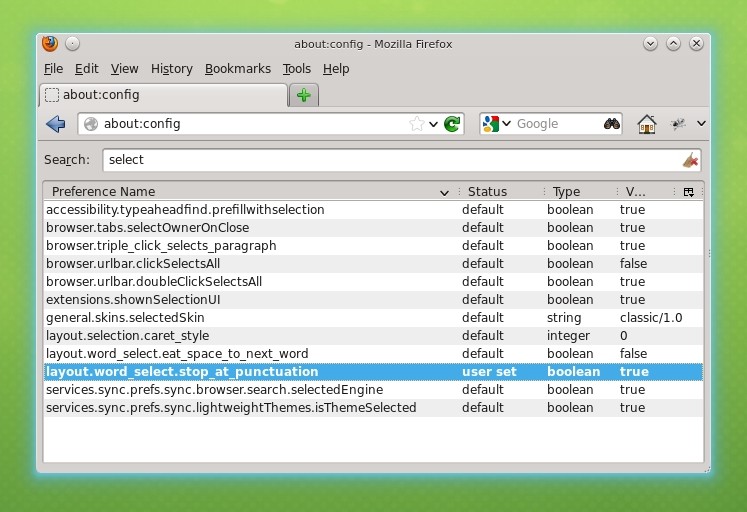
Enable H264 support in Windows
In about:config, enable the value media.windows-media-foundation.enabled. Especially useful if you disable Flash. A lot of video players use a HTML5 player as fallback support only the H264 codec.
Just one thing that was annoying me for a long while, and how I fixed it. I tend to switch back and forth between insert and command mode in vim. And somehow PhpStorm with IdeaVim plugin enabled felt non-responsive. I press escape, start hitting :wq, and I have :wq in my code.
I got accustomed hitting Escape twice, and later even three times, by default so that I was more certain I was out of insert mode. I also tried Control+C, and Control+[, but they have the same problem.
I know the 'problem' always occured when i.e. PhpStorm started rendering an Intellisense popup: press '.' somewhere, in a large file it may take a few moments before that popup appears (maybe due to parsing etc.), so you don't see it. Assuming you are now in command mode, the escape press was actually consumed by the popup. Then of course you do escape to command, and try to undo, but it undo's a lot more than the chars you now accidentally sprayed in the code (also not exactly the same behaviour as Vim, but alas :D)
Fix
Right mouse click -> Remove Escape:
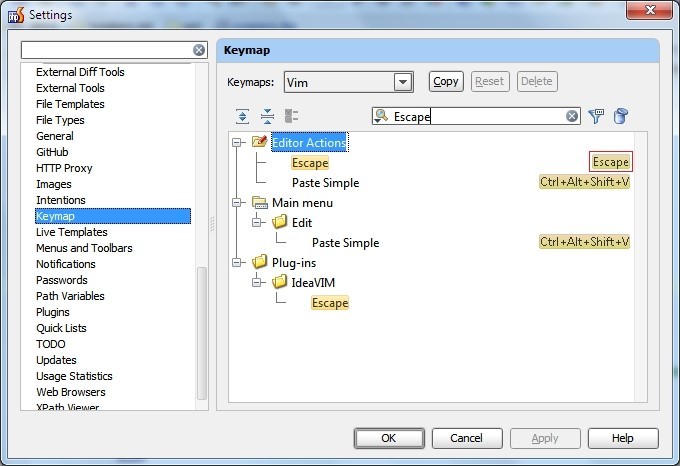
Go to Plug-ins -> IdeaVIM ->
Find the row with all the keybindings on it.. right click on it -> Add Keyboard Shortcut
Hit escape, save that. -> Apply -> Ok.
Annnnnd you're done!
I find it pleasant to have nicknames coloured in busy channels, that's why I made this. It simply generates colours by hashing the nicknames. This ensures that a given nickname will always be the same colour.
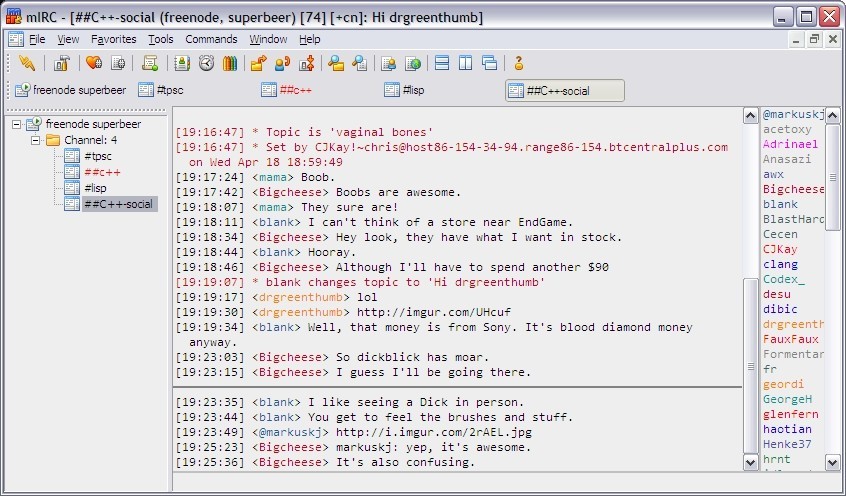
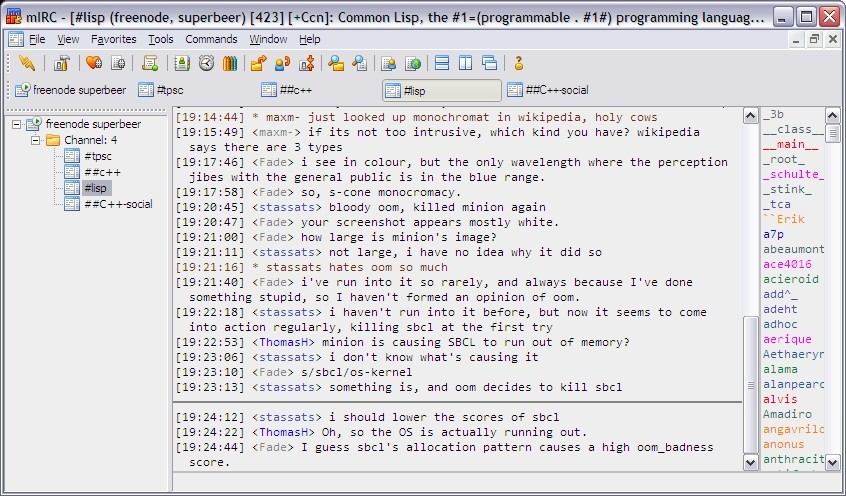
The script
;;;
;;; Lazy nickname coloring script
;;;
;;; Color all nicknames automatically by calculating a numeric hash over the nickname.
;;; The calculated number is used to pick a (space delimited) color from the %colors variable
;;;  (set in "on START" event).
;;; Colors are made configurable because yellow on white is annoying, and you may want to use
;;;  black or white depending on your background color.
;;;

;; Initialize

on 1:START: {
  .initialize_coloring
}

alias initialize_coloring {
  ; use the following colors only
  .set %colors 1 2 3 4 5 6 7 9 10 11 12 13 14 15

  ; reset all entries in the clist
  while ($cnick(1)) {
    .uncolor_nick $cnick(1)
  }
}

;; Events

; Parse the /names <channel> response(s)
raw 353:*: {
  var %names = $4-
  var %i = 1
  var %n = $gettok(%names,0,32)
  while (%i <= %n) {
    var %current_nick = $gettok(%names,%i,32)
    var %firstchar = $mid(%current_nick, 1, 1)
    while (%firstchar isin @+%) {

      %current_nick = $mid(%current_nick, 2)
      %firstchar = $mid(%current_nick, 1, 1)
    }
    .color_nick %current_nick

    inc %i
  }
}

; Handle nick changes/joins/quits
on 1:NICK: {
  .uncolor_nick $nick
  .color_nick $newnick
}

on 1:JOIN:*: {
  .color_nick $nick
}

on 1:QUIT: {
  .uncolor_nick $nick
}

;; Helper functions

; usage: color_nick <nickname>
alias color_nick {
  if (!%colors) {
    .initialize_coloring
  }
  var %colors_idx = $calc($hash($1, 16) % $numtok(%colors, 32)) + 1
  var %nick_color = $gettok(%colors, %colors_idx, 32)
  .cnick $1 %nick_color
}

; usage: uncolor_nick <nickname>
alias uncolor_nick {
  .cnick -r $1
}
Copy & paste it in your remote (open with alt + r).
You may need to enable nicklist colouring in general. Use alt + b, Nick colors, choose "Enable".
Update!!!
Note that I have a new version of this available, see this blogpost.. It also provides a script that makes nicks marked as away light-grey!
If you are behind a firewall, chances are you can tunnel through it with Proxytunnel. This post does not describe anything new, but I think is still useful because it includes configuration of apache and ssh client examples.
The goal is being able to tunnel through a (corporate) firewall/proxy. And even more important, have your communication encrypted. This also has the advantage that even if you are not restricted, a corporate firewall/proxy can still not cache the websites you visit.
We do this by establishing an ssh session to some machine, and useing ssh portforwarding from there. This target machine may be your home computer or some server on the internet.
If you are able to run your SSH server on port 80 or 443, you might want to do that because then you can simply define the firewall as a proxy in PuTTY. The firewall should probably allow the communication, especially on 443 as this is normally for HTTPS and encrypted (as is SSH). I haven't tested this, but I believe you should be able to skip the proxytunnel stuff.
I assume you already have Apache running on port 80 and 443, so switching SSH to one of those ports won't be possible. We simply configure Apache so that it becomes itself another proxy that can make the connect to port 22, or 42 in the example I'm going to use. If you do not want to use apache, you can put your webserver of choice on a different port and use Apache's mod_proxy to redirect a virtual host to it.
In short how it works:
Your ssh client will NOT communicate directly to your ssh server. Instead it will communicate with proxytunnel, and proxytunnel establishes the actual connection. Proxytunnel will first connect to the "corporate" firewall/proxy and request a connection to your server on the HTTPS port, The firewall will then consider all communication HTTPS encrypted traffic and therefor allow it. But actually a mod_proxy is configured to respond to connection requests to specific destinations (using CONNECT dest:port HTTP/1.1). So we issue another CONNECT connection to the destination + SSH port. From that moment on proxytunnel simply redirects all read/write to the ssh client.
Once connected to your SSH server you can simply use the Port forwarding stuff that the SSH protocol supports.
Example config
I will be using this hosts throughout the post, you will have to replace these.
| Ip | Host | Description |
|---|---|---|
| 46.51.179.218 | ext.cppse.nl | My server machine, runs the apache @ port 80 and destination ssh @ 42 |
| NA | whatismyipaddress.com | Some website @ port 80 that displays remote host (optional for testing) |
| 172.18.12.11 | NA | The firewall @ port 8080, accepts only connections to ports 80,443. |
Configure proxy on some Apache server
You need mod_proxy, mod_proxy_http, mod_proxy_connect modules enabled in Apache. (Not 100% sure about mod_proxy_http.)
Create a VirtualHost like this:
<VirtualHost *:80>
    ServerAdmin no-reply@ext.cppse.nl
    ServerName ext.cppse.nl
    ErrorLog /var/log/apache2/error_log
    TransferLog /var/log/apache2/access_log

    # Allow proxy connect (forward-proxy) to servers only on port 80 (http) and 42 (at my box SSH)
    ProxyRequests On
    AllowConnect 80 42
    # Deny all proxying by default...
    <Proxy *>
        Order deny,allow
        Deny from all
    </Proxy>
    # This directive defines which servers can be connected to.
    # Access is controlled here via standard Apache user authentication.
    <ProxyMatch (46\.51\.179\.218|ext.cppse.nl|whatismyipaddress.com|www.whatismyipaddress.com)>
        Order deny,allow
        Allow from all

        #You should replace the above two rules with something like this:
        # Deny from all
        # Allow from <some_host>
        # Allow from <some_host>
    </ProxyMatch>
</VirtualHost>
This example will allow from any source to CONNECT to four locations: 46.51.179.218, ext.cppse.nl, whatismyipaddress.com and www.whatismyipaddress.com. Only destination ports 80 and 42 are allowed. We'll be using 46.51.179.218 on port 42 (SSH server), and {www.}whatismyipaddress.com on port 80 (plain HTTP) for testing.
- Add this VirtualHost as the first virtual host. Loading it /after/ other vhosts made the proxy deny all CONNECT's on my machine.
- Port 443 would be nicer, again, on my machine I couldn't do this because I have other HTTPS sites configured, and couldn't get it to use the proxy "as HTTP on port 443". My apache seems to expect SSL communication although I didn't enable SSL on the vhost.
- The vhost name "ext.cppse.nl" seems unimportant, the Proxy settings appear not to be specifically bound to this vhost. This might explain why using port 443 didn't work.
- I can imagine there would be some more complicated trick to make it possible to configure "unencrypted" traffic over port 443 for a specific vhost, butthis works well enough for me.
Test if this proxy works
You might want to test this from some location where you are not behind the firewall. Configure it as a proxy in your browser:
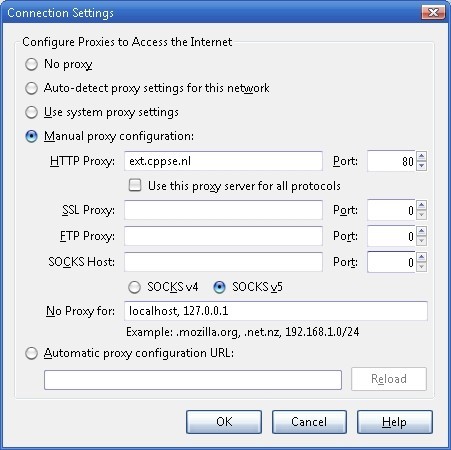
This is why I added [www.whatismyipaddress.com][] and port 80 in the Virtual Host, open it:
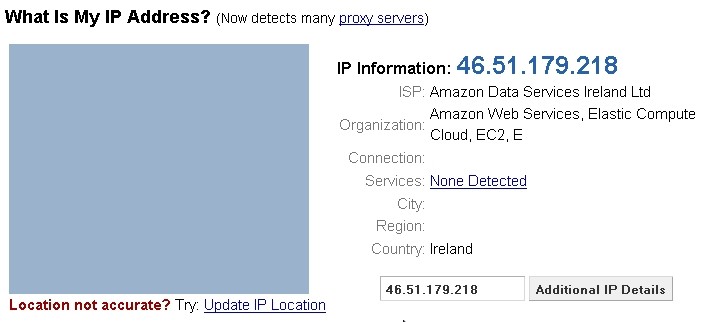
- You can also test the SSH connection if your client supports usage of an HTTP proxy.
- You also might want to replace the default allow by the default deny config in the vhost.
- You might want to remove port 80 from the AllowConnect parameter in the vhost, and the whatismyipaddress domain(s).
Configure proxytunnel for PuTTY
In our example we have the proxy "172.18.12.11:8080", with no-authentication required. If you have a proxy that requires a username and password use the -P "username:password" parameter on proxytunnel. Also see the help for more available options.)
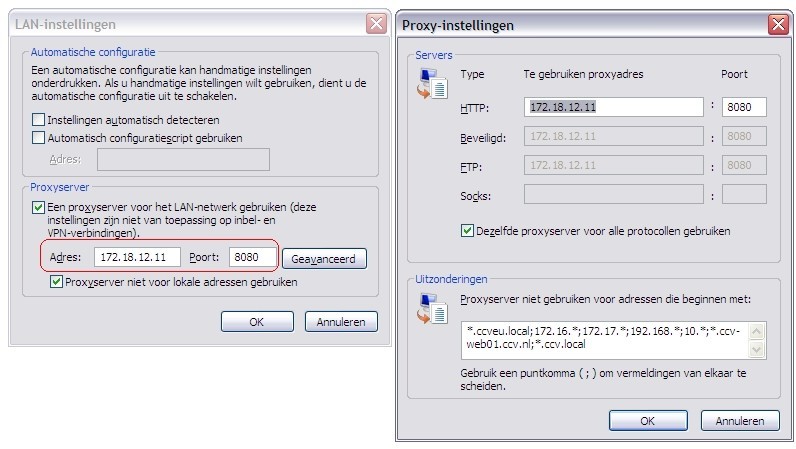
Install proxytunnel on windows
I made a zip file with Putty "Development snapshot 2012-01-16:r9376" because it
supports "local proxy" feature we need to use for Proxytunnel, also included
version 1.9.0.
You can download PuTTY Tray a version of PuTTY that supports local proxy and some more very nice additional features!!
When PuTTY is configured to use Proxytunnel it delegates the connection to proxytunnel, which will first connect to our newly configured proxy "46.51.179.218:80" (the one we configured in apache) using the firewall/proxy 172.18.12.11:8080. Once connected to our proxy we connect to our intended destination "46.51.179.218:42". In PuTTY you use %host:%port (these values get replaced).
This is a command you can use for testing at commandline:
C:\proxytunnel>proxytunnel -v -p 172.18.12.11:8080 -r 46.51.179.218:80 ^
         -d 46.51.179.218:42 -H "User-Agent: Mozilla/4.0 (compatible; MSIE 6.0; Win32)\n"
Connected to 172.18.12.11:8080 (local proxy)

Tunneling to 46.51.179.218:80 (remote proxy)
Communication with local proxy:
 -> CONNECT 46.51.179.218:80 HTTP/1.0
 -> Proxy-Connection: Keep-Alive
 -> User-Agent: Mozilla/4.0 (compatible; MSIE 6.0; Win32)\n
 <- HTTP/1.1 200 Connection established

Tunneling to 46.51.179.218:42 (destination)
Communication with remote proxy:
 -> CONNECT 46.51.179.218:42 HTTP/1.0
 -> Proxy-Connection: Keep-Alive
 -> User-Agent: Mozilla/4.0 (compatible; MSIE 6.0; Win32)\n
 <- HTTP/1.0 200 Connection Established
 <- Proxy-agent: Apache/2.2.12 (Linux/SUSE)

Tunnel established.
SSH-2.0-OpenSSH_5.1
You give exactly the same command to PuTTY although, instead of the -v flag and hardcoded destination you use the -q (quiet mode) (and %host:%port). PuTTY then communicates by reading/writing to the started proxytunnel process, instead of a socket.
This is how you configure PuTTY
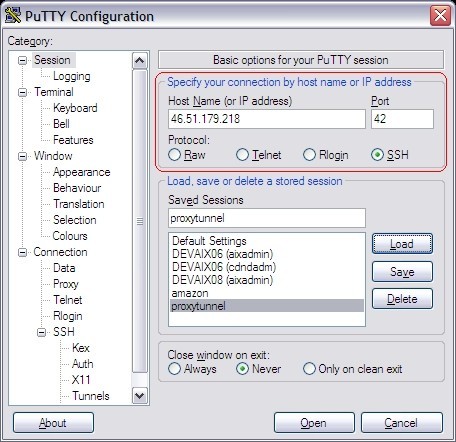
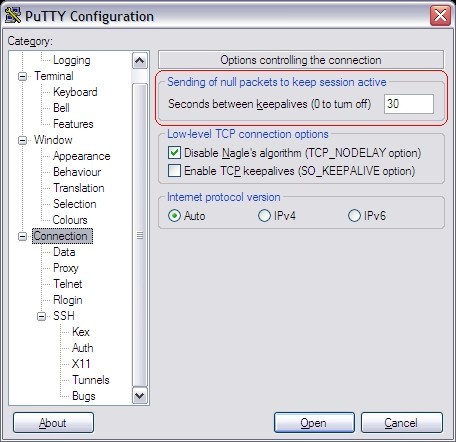
Note that the Keep-alive may be necessary if the firewall we're going to tunnel through actively closes connections if they are idle for longer than xx seconds.
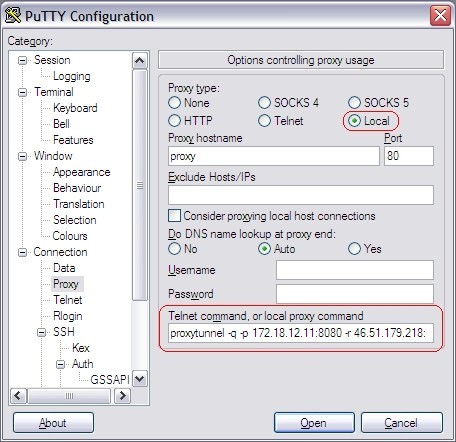
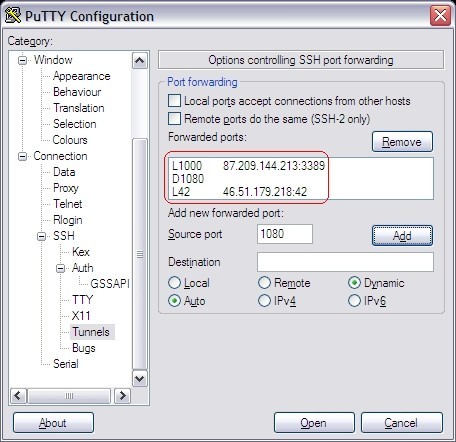
You can configure all kinds of portforwarding.
Install proxytunnel on linux
Download proxytunnel and "make" like any other tool. If you are missing development packages, I may have a precompiled 32 bit version available that might work on your box. Todo: Add download link.
linux-yvch:/usr/local/src # tar -zxvf proxytunnel-1.9.0.tgz
...
linux-yvch:/usr/local/src # cd proxytunnel-1.9.0
..
linux-yvch:/usr/local/src/proxytunnel-1.9.0 # make
..
linux-yvch:/usr/local/src/proxytunnel-1.9.0 # make install
..
linux-yvch:/usr/local/src/proxytunnel-1.9.0 # cd
Just as with PuTTY you need to configure your ssh config: In linux I prefer to keep it verbose (the -v setting, you can use -q for quiet mode). Note that openssh uses %h:%p for host / port replacement.
linux-yvch:~ # cat ~/.ssh/config
Host 46.51.179.218 ext.cppse.nl ext.cppse.nl
        DynamicForward 1080
        ProxyCommand proxytunnel -v -p 172.18.12.11:8080 -r 46.51.179.218:80 \
               -d %h:%p -H "User-Agent: Mozilla/4.0 (compatible; MSIE 6.0; Win32)\n"
        ServerAliveInterval 30
Connecting with openssh should yield something like:
linux-yvch:~ # ssh -l proxy -p 42 46.51.179.218
Connected to 172.18.12.11:8080 (local proxy)

Tunneling to 46.51.179.218:80 (remote proxy)
Communication with local proxy:
 -> CONNECT 46.51.179.218:80 HTTP/1.0
 -> Proxy-Connection: Keep-Alive
 -> User-Agent: Mozilla/4.0 (compatible; MSIE 6.0; Win32)\n
 <- HTTP/1.1 200 Connection established

Tunneling to 46.51.179.218:42 (destination)
Communication with remote proxy:
 -> CONNECT 46.51.179.218:42 HTTP/1.0
 -> Proxy-Connection: Keep-Alive
 -> User-Agent: Mozilla/4.0 (compatible; MSIE 6.0; Win32)\n
 <- HTTP/1.0 200 Connection Established
 <- Proxy-agent: Apache/2.2.12 (Linux/SUSE)

Tunnel established.
Password: *****
Last login: Thu Jan 26 15:55:40 2012 from 46.51.179.218

  __|  __|_  )  SUSE Linux Enterprise
  _|  (     /       Server 11 SP1
 ___|\___|___|       x86 (32-bit)

For more information about using SUSE Linux Enterprise Server please see
http://www.novell.com/documentation/sles11/

Have a lot of fun...
YOU ARE IN A RESTRICTED SHELL BECAUSE THIS ACCOUNT IS ONLY FOR TUNNELING
proxy@ip-10-235-45-12:/home/proxy>
After the "Tunnel established" you continue as with any other SSH connection.
Using SSH port forwarding
It would have been more elegant if the first connect would have been to port
443. Because then the communication, although when sniffing you see the CONNECT statement and the SSH banner in plain text.
From the firewall perspective it is all encrypted data. It just coincidentally
happens to be readable .
But after the initial stuff everything is encrypted as we're tunneling SSH.
I'm not sure if it is possible to communicate in SSL to the second proxy,
because then it won't be detectable at all.. the SSL communication would be
encrypted twice!
I already included in the PuTTY screenshots and OpenSSH example a Dynamic Forward (socks) proxy on 1080. This means that SSH will start a listener socket on port 1080 accepting connections and tunneling it through the established connection. The SSH protocol supports this, and this feature is (I think) enabled by default, it is configurable on the server in your sshd config.
You can then configure your browser to use the socks proxy, localhost:1080 and all communications will go through the established tunnel. Remote desktop, at the time of writing, doesn't support the use of a proxy, but you can create a "normal" port-forward as for this to a specific destination & port.
If your firewall does not support CONNECT you might want to try cURLproxy, a proxy program I wrote that works simply by downloading and POSTing HTML. Available here: curlprox[cURLproxy].
DISCLAIMER: Okay, probably still almost any firewall. There are a few posts on the internet about how SSH tunnels bypass "almost any firewall", I believe this proxy will probably bypass a whole lot more firewalls.
So I had to do come up with something better than "almost any" .
When is this useful?
ProxyTunnel is awesome as it allows you to tunnel to SSH through--for example--port 443. And due to SSH supporting port forwards you can go from there to wherever you want. If I am correct, it requires that the proxy in question supports the CONNECT syntax.
Sometimes however, proxies are more restricted than that: CONNECT may not be supported; connections are not allowed to stream (i.e., file downloads are first downloaded by the proxy server, scanned for viruses, executables and other filetypes may be blocked); base64 may actually be decoded to see if it contains anything that isn't allowed, it may go as far as to inspect content of zip files and may have restrictions on the maximum file size for downloads (XX MB limit). In that case ProxyTunnel won't suffice.
If you're unfortunate enough to be behind such a firewall, no worries because now there is a way to tunnel through it!
The only requirement for it to work is that you can receive plain text from a webpage, and post data to it. One that you own or have access to. Well If you can't do that, I suggest you look for another Job, because this is REALLY important!!!!1 (Not really but then this proxy solution won't work).
Do not expect it to be very performant with broadband type of stuff by the way.
How it works in short
It works with three PHP scripts. And just like with Proxytunnel you need to run one of them on your local computer: localclient.php. This script binds to a local port, you connect with your program to this local port. Each local client is configured to establish a connection with some destination host + port. But the cool part is, it does so by simply reading plain old HTML from an url, and posting some formdata back to it. Well actually it appears to be plain old HTML, because it's the data prefixed with an HTML tag, followed by the connection identifier and the DES encrypted data (converted into base64).
The curl proxy (as I call it, because I use the cURL extension in PHP) retrieves HTML pages like this:
Example of packet with data "PONG :leguin.freenode.net", is sent as the following HTML:

<PACKET>a5bc97ba2f6574612MNIoHM6FyG0VuU6BTF/Pv/UcVkSXM5AbiUrF4BDBB4Q=
|______||_______________||__________________________________________|
       |                |                                           `=BASE64 OF ENCRYPTED DATA
       |                `=Session id / socket id
       `=Fake HTML tag

POSTing back sends a string with the same syntax back, basically only prefixed with "POST_DATA=".
In order for this to work, a second script has to be callable on the web, you must be able to access it, and the same machine has to be able to make the connections you want. For example: http://your-server/proxy.php (you could rename it to something less suspicious; there are some smart things you can do here, but I'll leave that to your imagination ). All proxy.php does is write and read files from a directory, nothing more.
Then a shellscript has to be started to run in background, with access to the same directory. This script scans that directory for instructions, specifically starting server.php processes for new connections. The actual connection is made in the server.php script. And all this script does is read from the same directory for packets received, which it will send to it's socket, any data read from the proxy is written back to the directory, which proxy.php will eventually sent back to the client.
Graphical explanation
You should follow the arrows in the same order as presented in the Legend. Click to enlarge the image.
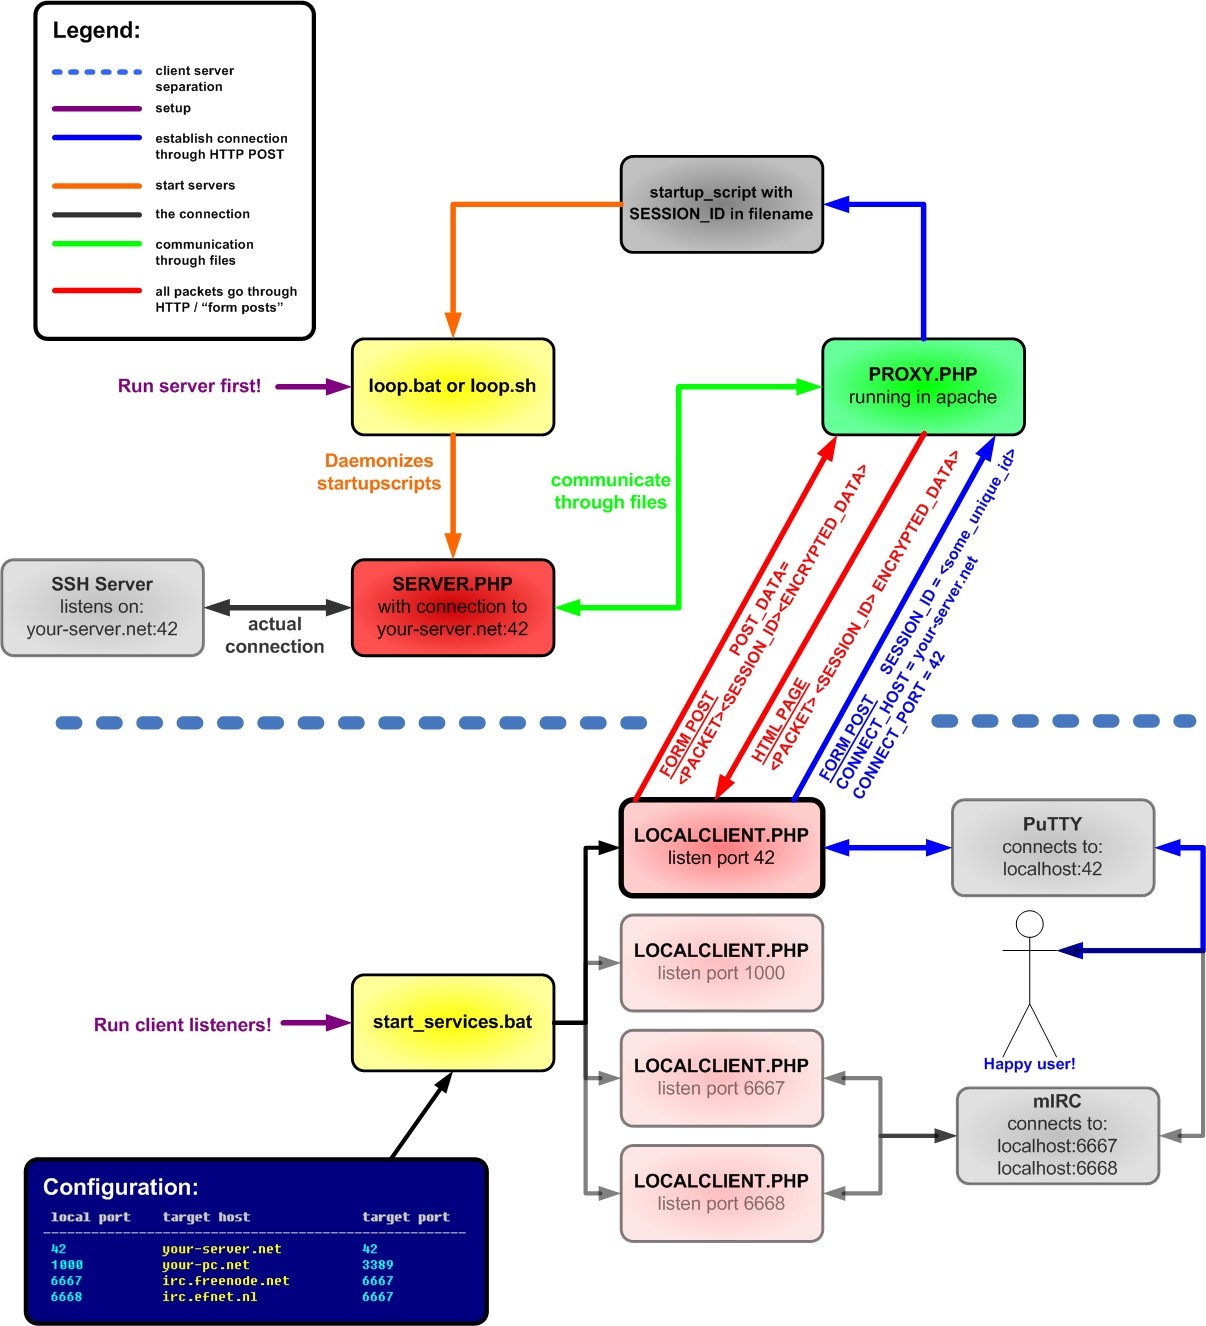
Design decisions
When I had the idea to make it, I didn't feel like spending alot of time on it, so I hacked it together in a few hours. Then I tested it, it worked and it got me exited enough to refactor it and make a blog post out of it.
- After the encryption of the packets I use base64 encoding, which increases the size of the messages, but it looks more HTML-like. If I wanted to send the encrypted data raw I'd have to do some more exotic stuff, maybe disguise it as a file upload, because AFAIK a plain old POST does not support binary data.
- I use BASE64 and not urlencode on the encrypted data, because when I tested it urlencode produced even more overhead. Of course the BASE64 string is still "urlencoded" before POST, but only a few chars are affected.
- I don't use a socket for communicating between proxy.php and server.php, but files and some lock-files because I preferred them somehow. A database would be nicer, but implies more configuration hassle.
Encryption used
define('CRYPT_KEY', pack('H*', substr(md5($crypt_key),0,16)));

function encrypt_fn($str)
{
    $block = mcrypt_get_block_size('des', 'ecb');
    $pad = $block - (strlen($str) % $block);
    $str .= str_repeat(chr($pad), $pad);

    return base64_encode(mcrypt_encrypt(MCRYPT_DES, CRYPT_KEY, $str, MCRYPT_MODE_ECB));
}

function decrypt_fn($str)
{
    $str = mcrypt_decrypt(MCRYPT_DES, CRYPT_KEY, base64_decode($str), MCRYPT_MODE_ECB);

    $block = mcrypt_get_block_size('des', 'ecb');
    $pad = ord($str[($len = strlen($str)) - 1]);

    return substr($str, 0, strlen($str) - $pad);
}
If you prefer something else, simply re-implement the functions, you'll have to copy them to all three scripts (sorry, I wanted all three scripts to be fully self-contained).
I found my "ASCII key → md5 → 16 hexadecimal display chars → actual binary" a pretty cool find by the way. Did you notice it?
Demonstration
Note that first I demo it where the server is running on an Amazon AMI image. Appended to the video is a short demo where I run the server on my local windows pc (just to show how it it'd work on windows). This second part starts when I open my browser with the google page.
Remote desktop actually works pretty good through the curl proxy by the way. Establishing the connection is a little slow like with WinSCP, but once connected it performs pretty good. I could't demo it because I don't have a machine to connect to from home.
Sourcecode & downloads
Put it here on bitbucket: https://bitbucket.org/rayburgemeestre/curlproxy Placed it under MPL 2.0 license, which seamed appropriate. Basically this means that when you distribute it with your own software in some way, you'll have to release your code changes/improvements/bugfixes (applicable to curlproxy) to the initial developer. This way the original repository will also benefit and you're pretty much unrestricted.
Werkzaamheden tijden reverse engineering
Indien je urenregistratie moet invullen met begin- en eindtijden is het soms lastig als je dat achteraf doet. Soms weet je nog wel uit het hoofd wat je gedaan hebt, soms zoek je dat op in (verstuurde) e-mails, of aantekeningen, agendapunten, enz.
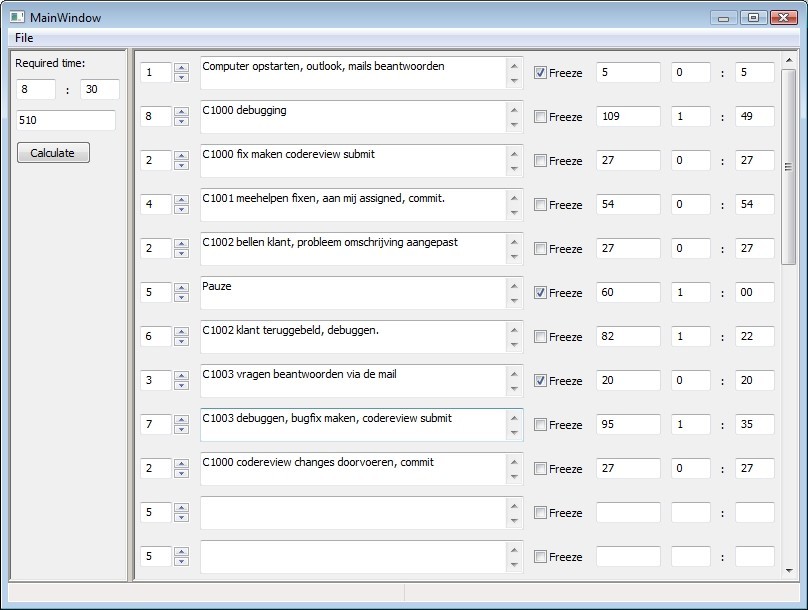
Als je dan toch de tijden moet reverse-engineeren, kun je het jezelf natuurlijk ook wat makkelijker maken door in een simpele lijst je werkzaamheden te tikken. Op te geven hoeveel tijd het bij elkaar moet zijn, van een aantal zelf de tijd invullen en vastzetten ('freeze'), een beetje aan knopjes draaien om aan te geven wat meer en wat minder werk is, af en toe op F5 drukken om te zien hoe de taart verdeeld is.
Indien tevreden, kun je het hieruit overkopieeren. Mij heeft het al meerdere malen geholpen
Download
Executable hier te downloaden.
I like both equally but am a little more familiar with git.
Although now I prefer bitbucket over github due to private repositories being free .
Actually I think currently mercurial tool support on windows seems better too (I didn't expect TortoiseHG to be so neat, as I had only used Tortoise CVS in the past, and I didn't like it, but thats probably due to the nature of CVS).
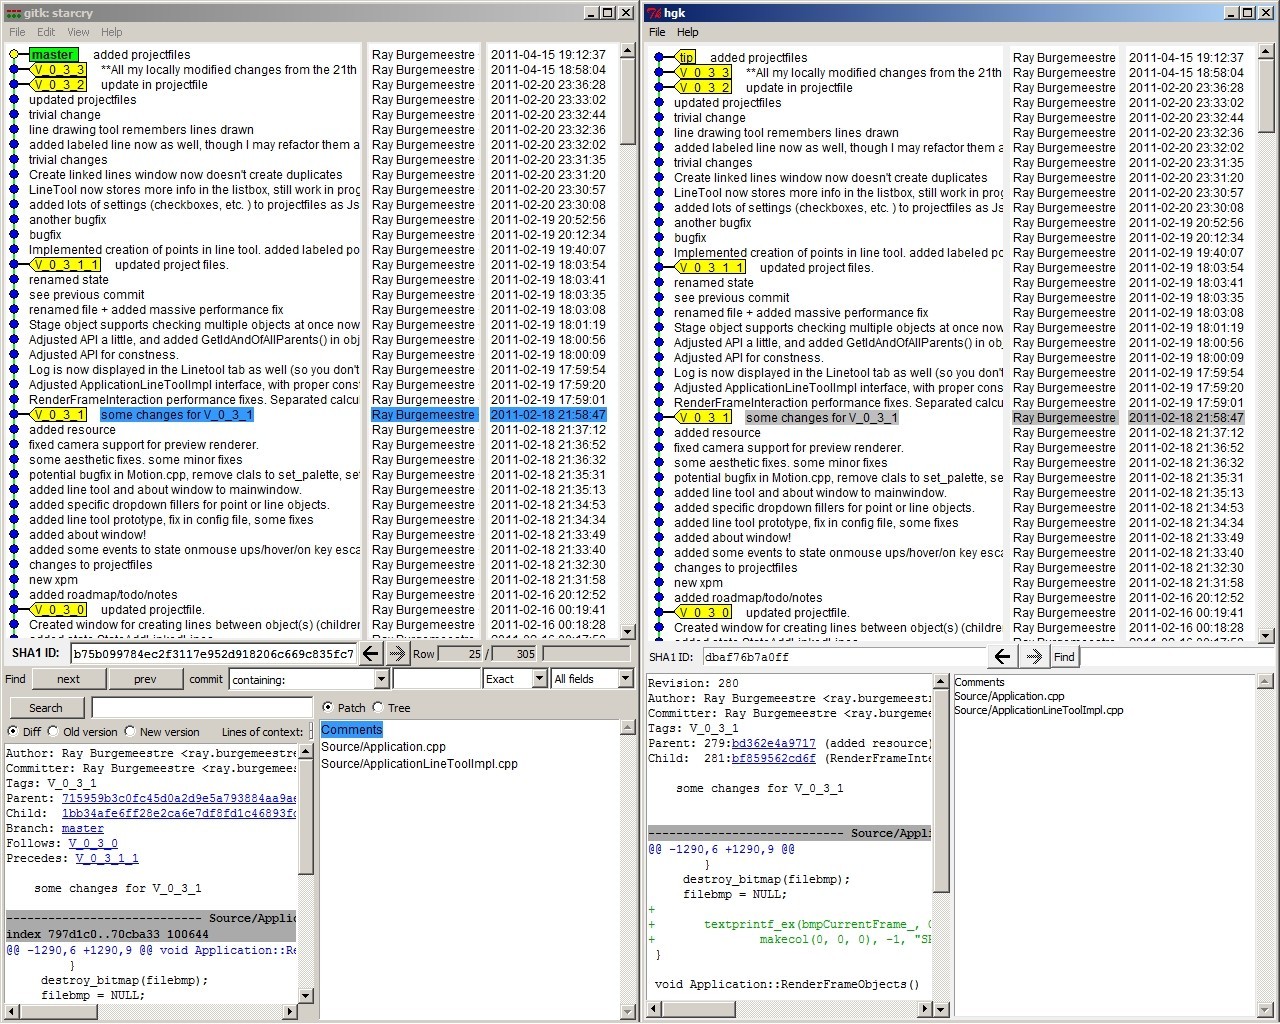
Some notes, small annoyances I encountered on my system and how I fixed them.
- Git usage on Windows Vista notes
- Git removing contents permanently from repository
- Converting from Git to Mercurial
- Mercurial through proxy


Today I moved from my "127 machine" (localhost) to an Amazon EC2 server.
First I tried the Amazon Linux AMI (32-bit) micro, but it was to difficult to get GTK working. Package manager was yum, which is nice, but a few packages I needed weren't available, decided to check another AMI out.
Found SUSE AMI (32-bit) on micro, package manager is zypper, and works like a charm. GTK was already installed on this one. Everything is up and running.
I've used Debian for a lot of years for personal use and at work, and henceforth became accustomed to Debian. I'm actually finding out SUSE isn't that bad either!
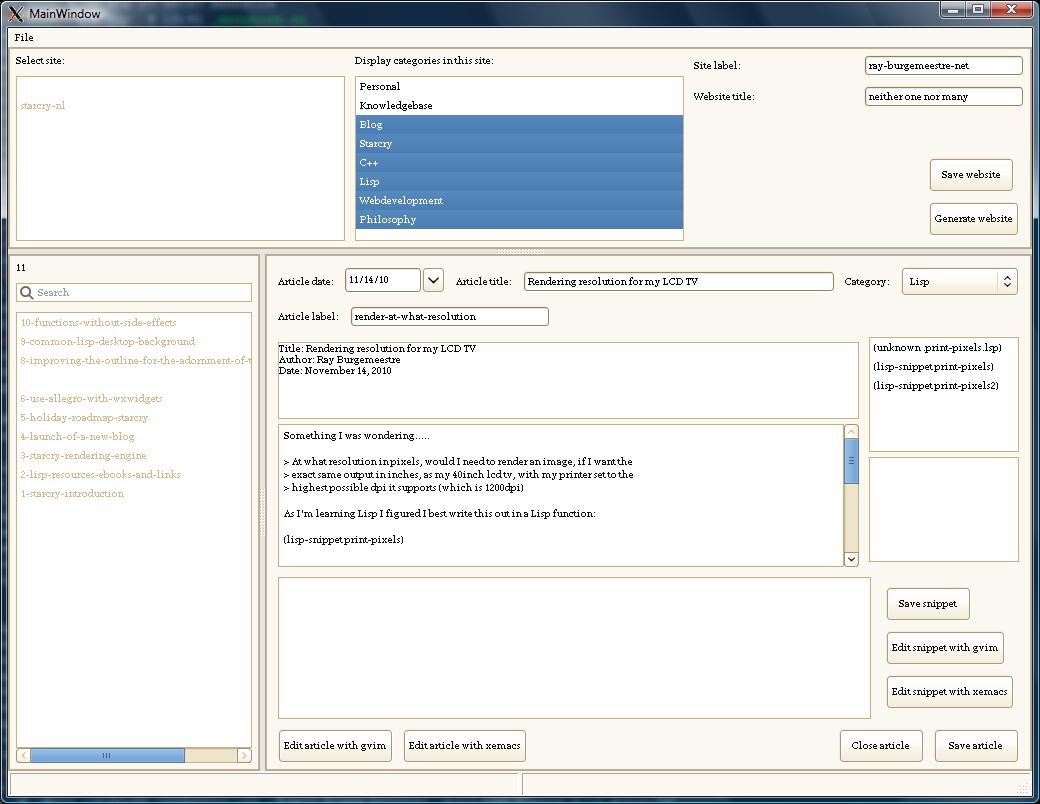
On my local machine GTK was ugly by default, so I immediately changed the theme to something less hideous. On this SUSE AMI the default GTK is pretty fancy, although the fonts were missing ;)
What annoys me is that forwarding X11 over the internet is slower than I expected. Editting text inside the forwarded "ArticleManager" isn't particularly fast. Still love my weird blogging system though!
What's new about this blog??
Hopefully some ideas on this blog will be new, or just fun. It's also for myself to keep a track of certain stuff. About the blog itself, it doesn't use typical blog or CMS software. It uses C++, and has interfaces to other tools. I created this system in a few hours this weekend, it's quite minimal.
How does it work? I have to run Xming on my windows box, and request from the administration panel of the blog a management console. This opens a C++ program developed using DialogBlocks (my best software-buy ever!!) / wxWidgets. In this application I can add sites, and choose what categories should be dispatched to it. This is the weirdest part I guess, no regular login + management through a webinterface.
Why do I do it like this? First of all I don't like to write HTML. That's why I can define a (simple) site template with a HAML and SASS, and add some markers in it for replacement.
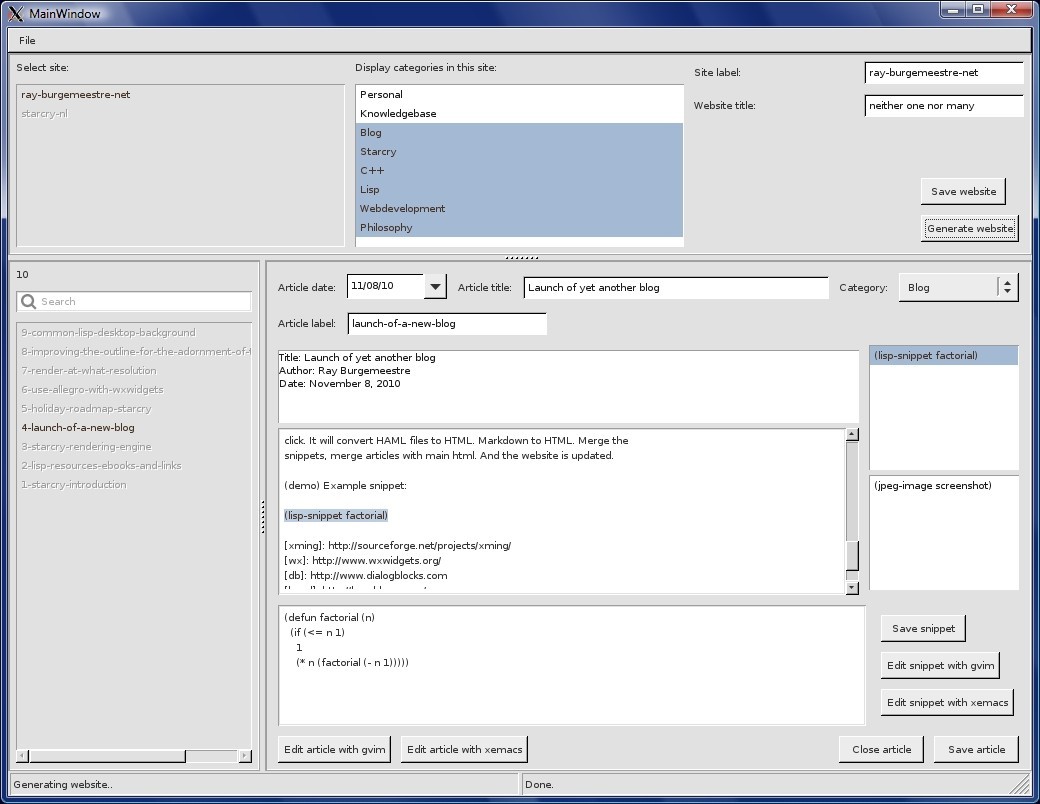
Demo snippet from the screenshot:
(defun factorial (n)
  (if (<= n 1)
    1
    (* n (factorial (- n 1)))))
The editor simply has a listing of articles, which are stored in multimarkdown syntax. (note: this format is actually easily converted to LaTeX pdf documents as well!(works like a charm)). I have made some facilities to make it easy to add i.e. C++ or other code-snippets (they can be editted in separate files). Using this code prettifyer by Mike Samuel. They will be represented by a string like (lisp-code filename), and if I use that in the markdown document it will place syntax highlighted code with the snippet there. I made something similar for images and some meta-data with regards to the articles is stored using TinyXML.
In the editor I can request gvim or xemacs to edit the markdown (or a snippet), or use the one build-in.
Lastly, I can (re)generate (parts of- or the entire-)website. It will convert HAML files to HTML. Markdown to HTML. Merge the snippets, merge articles with main html. And the website is updated.
Update 19-7-2012
- Now it processes all JPG's through imageconvert to compress them better, something similar for PNG's
- Minifies the CSS and Javascript (also combines them where possible)
Enable wake-on-lan on Linux Debian
Source = http://www.oger-partners.be/?q=node/60 I have an asus motherboard with an integrated NIC. Integrated NICs on recent motherboards have WOL capability. I hope yours has too, otherwise you may have to obtain some kind of wire to connect the NIC to the motherboard.
- Read up on WOL on wikipedia.
- Download ethtool (f.e. apt-get install ethtool)
- The command 'ethtool eth0' should yield the output 'Supports Wake-on: g'. 'g' means the NIC can read the magic packet.
- Make a shell script to enable WOL with ethtool, put this command in it: /usr/sbin/ethtool -s eth0 wol g
- Change your /etc/network/interfaces so this script is executed each time the interface is brought up.
- The tricky part was finding out why the settings set with ethtool were thrown away with each reboot. The answer lies in the /etc/init.d/halt script. Remove the '-i' from the halt command at the end of the script so the interfaces are not affected.
Good luck. :-)
Tool used in windows
Leeched from= http://www.depicus.com/download.aspx?product=gui
View attachments for word document I made with instructions for starting up ILLYRIA

Topics:
Other interests:
EBPF Flamegraphs C++ Ubuntu 20.04
Site generated using ![]() ArticleManager © 2010-2013
ArticleManager © 2010-2013